Growing tomatoes is one of the most rewarding experiences in gardening, but it also comes with a common challenge. Tomato plants grow quickly, spread widely, and can easily collapse under the weight of their own fruit.
After struggling with messy tomato plants in my garden for several seasons, I finally decided to build a simple wooden trellis.
What surprised me most was how effective and easy the solution turned out to be. Using nothing more than natural wooden branches and rope, I created a sturdy support structure that helped my tomatoes grow vertically, stay healthier, and produce more fruit.
Table of Contents
Why Tomatoes Grow Better With a Trellis?
Before building this structure, my tomato plants often sprawled across the ground. At first, it seemed harmless. But over time I noticed several problems that many gardeners face.
Tomatoes growing on the ground tend to develop fungal diseases more easily because the leaves remain wet longer after watering or rain. Poor air circulation also increases the risk of pests and mold.
Another issue is fruit rot. When tomatoes rest directly on soil, they become vulnerable to insects and bacteria. Supporting tomato plants vertically solves many of these problems.
When tomatoes grow upward along a trellis, the plants receive better sunlight exposure. Air moves freely through the leaves, which helps prevent disease.
Harvesting also becomes much easier because the fruit hangs visibly rather than hiding under tangled branches.
Many professional gardeners recommend trellising tomatoes for these reasons, especially in smaller gardens where space is limited.
Step 1: Setting Up the Vertical Wooden Posts
The first step in building this trellis was installing the vertical support posts. I started by selecting sturdy branches with natural Y shaped tops. These branches work perfectly because the forked top helps hold the horizontal support beam in place.
After choosing four strong wooden posts, I spaced them evenly along the garden bed where my tomatoes would grow. The distance between each post was about one meter.
This spacing gave the plants enough room to grow while keeping the structure strong.
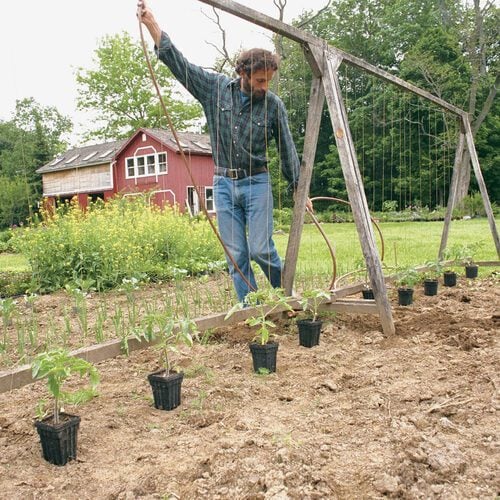
Next, I dug small holes and placed the posts firmly into the soil. Each post was buried deep enough to prevent movement when the plants became heavy with fruit.
One trick I learned is to gently pack soil tightly around the base of each post. This helps stabilize the structure and prevents leaning later in the season.
At this stage, the frame looked very simple. It was just four upright branches standing in a row. But this basic structure would become the backbone of the entire trellis.
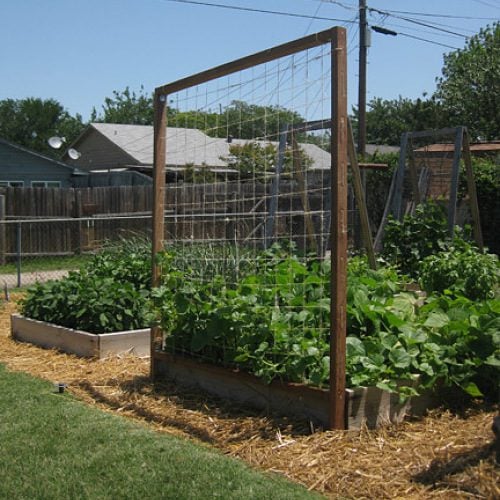
Step 2: Installing the Horizontal Support Beam
Once the vertical posts were secured, the next step was adding the horizontal beam. This beam runs across the top of the posts and connects the entire structure together. I placed a long, straight branch across the Y shaped tops of the posts.
The beam rested naturally in the forked branches, which made installation easy.
To secure it, I used strong natural rope. I wrapped the rope tightly around each connection point several times and tied firm knots to hold everything in place.
This horizontal beam plays an important role because it distributes the weight of the plants evenly across the entire trellis. Without this top support, the structure could become unstable once the tomato plants grow larger.
After tightening the rope at each post, the frame already felt much stronger.
Step 3: Creating the Woven Trellis Net
This step was the most interesting part of the project and also the most important. Instead of using metal wire or plastic mesh, I decided to create a natural woven trellis using smaller branches and rope.
Starting from the top beam, I tied ropes diagonally down to the lower support beam. Then I repeated the process in the opposite direction.
The ropes crossed each other to form a diamond shaped pattern across the frame. This lattice pattern acts as a climbing support for the tomato plants.
As the plants grow, their stems naturally weave through the gaps in the rope structure. The trellis gently guides the plants upward without restricting their growth.
This type of woven support also distributes weight across multiple points rather than concentrating it in one place. Another benefit is that the design allows sunlight to reach all parts of the plant while still providing strong support.
Step 4: Preparing the Soil and Planting Tomatoes
With the trellis complete, it was time to prepare the garden bed. I removed weeds and loosened the soil to improve drainage and root development. Healthy soil is essential for tomato plants because they require strong root systems to support heavy fruit production.
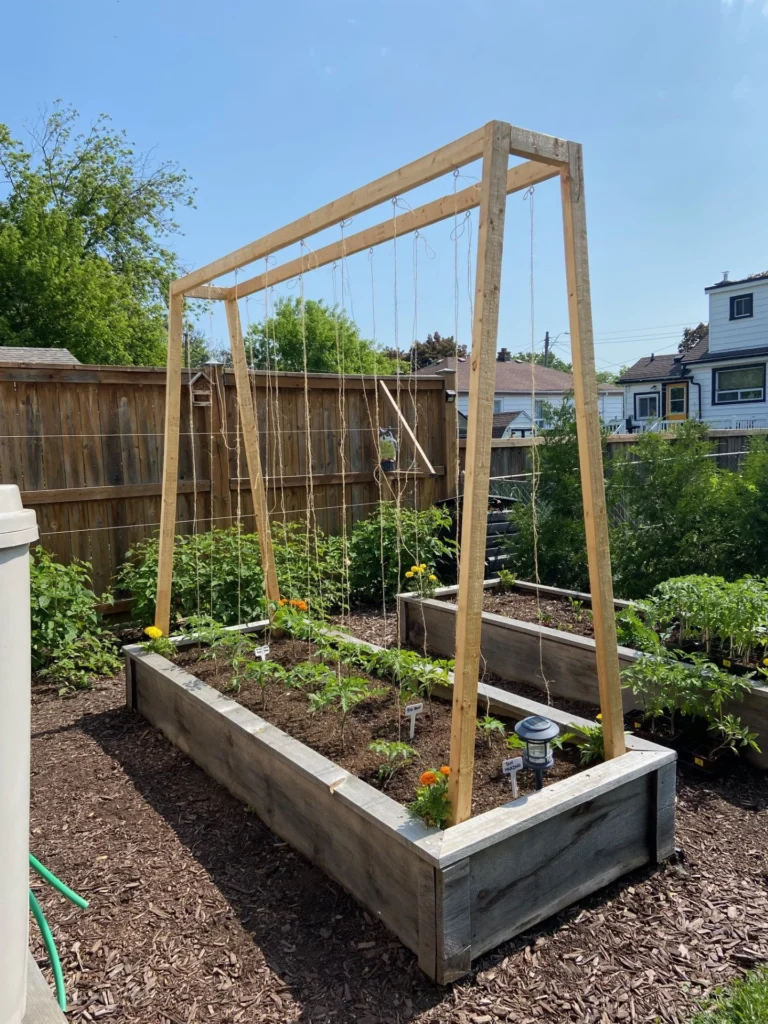
To enrich the soil, I mixed compost into the planting area. Compost adds nutrients and improves soil structure, helping the roots grow deeper and stronger. After preparing the soil, I planted tomato seedlings along the base of the trellis.
Each plant was positioned close to the structure so the stems could easily reach the woven support as they grew. I spaced the plants about 40 to 50 centimeters apart. This distance allowed each plant to receive enough sunlight and airflow.
Within a few weeks, the tomato plants began climbing naturally through the rope lattice.
Step 5: Training the Tomato Plants to Climb
One thing I learned from experience is that tomato plants sometimes need a little guidance when they begin climbing. As the plants grew taller, I gently directed the stems toward the trellis.
If a branch started growing away from the structure, I loosely tied it with soft garden twine.
The key is to avoid tying the stems too tightly. Tomato plants continue growing throughout the season, and tight ties can damage the plant. After a short time, the plants began wrapping themselves naturally around the rope lattice.
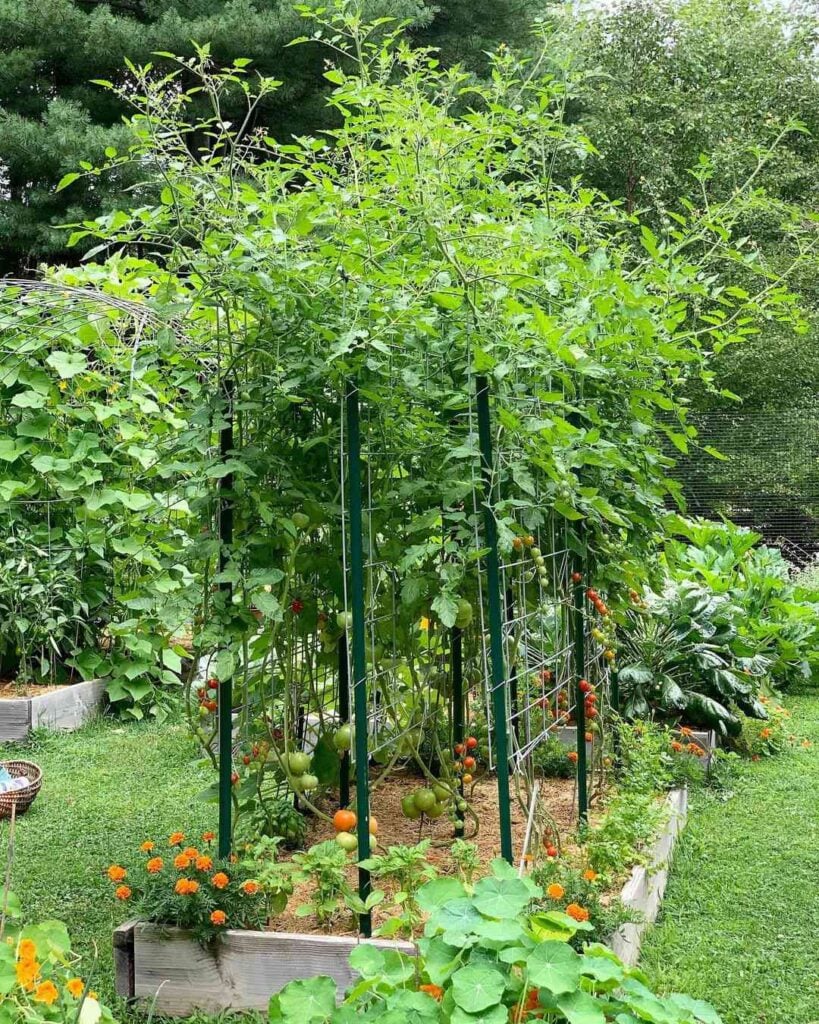
Soon the entire trellis became covered with green leaves and developing fruit clusters.
The Moment the Trellis Started Paying Off
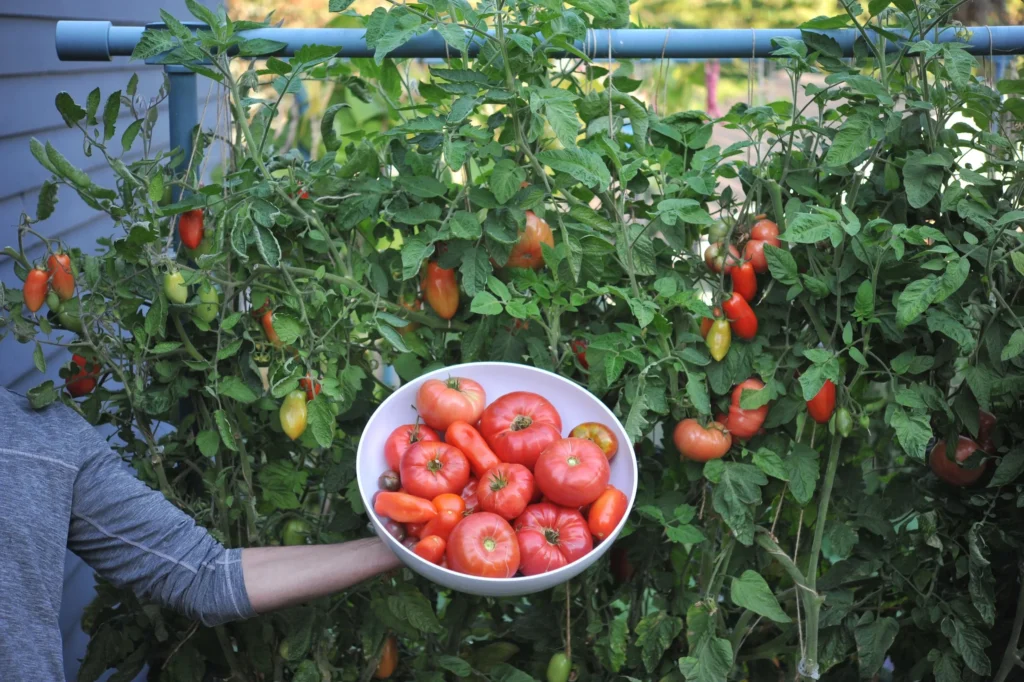
A few months after building the structure, the results became very clear. The tomato plants grew taller and stronger than they had in previous seasons. Instead of spreading across the ground, the vines climbed upward along the trellis.
The fruit hung freely in the air, which reduced rot and pest damage. Harvesting became much easier as well. Instead of searching through tangled vines, I could clearly see each tomato hanging along the trellis.
Another unexpected benefit was how beautiful the structure looked in the garden. The natural wooden frame blended perfectly with the surrounding plants, giving the garden a rustic and organized appearance.
Why Natural Wooden Trellises Work So Well?
Many gardeners use metal cages or plastic supports, but natural wooden trellises offer several advantages. First, they are environmentally friendly. Using branches from pruned trees or natural wood reduces the need for manufactured materials.
Second, the structure blends naturally into the garden landscape. Third, wooden trellises are highly customizable. You can adjust the height, width, and rope pattern depending on the needs of your plants.
They also work well for many other climbing crops such as cucumbers, beans, peas, and even small melons.
Long Term Benefits for Garden Productivity
After using this trellis system, I noticed several long term improvements in my garden. Tomato yields increased because the plants received more sunlight and airflow.
Disease problems decreased because the leaves dried faster after watering. Garden space also became more efficient. Vertical growing allowed me to plant additional crops in the same area.
In smaller gardens or urban spaces, this vertical approach can make a huge difference.
Final Thoughts
Building a wooden tomato trellis turned out to be one of the most useful improvements I have made in my garden. The structure is simple, affordable, and effective.
Using only wooden branches and rope, I created a natural support system that helps tomato plants grow vertically and stay healthier. What started as a simple experiment has now become a permanent part of my gardening routine.
If you grow tomatoes and want stronger plants, cleaner fruit, and easier harvesting, a trellis like this can make a huge difference. Sometimes the simplest solutions in the garden turn out to be the most powerful.