Building my own raised garden bed from old wooden pallets was one of the best DIY gardening projects I have ever tried. At first, I thought it would be complicated, expensive, and time consuming.
But after spending one weekend working on it, I realized how simple and rewarding the process actually was.
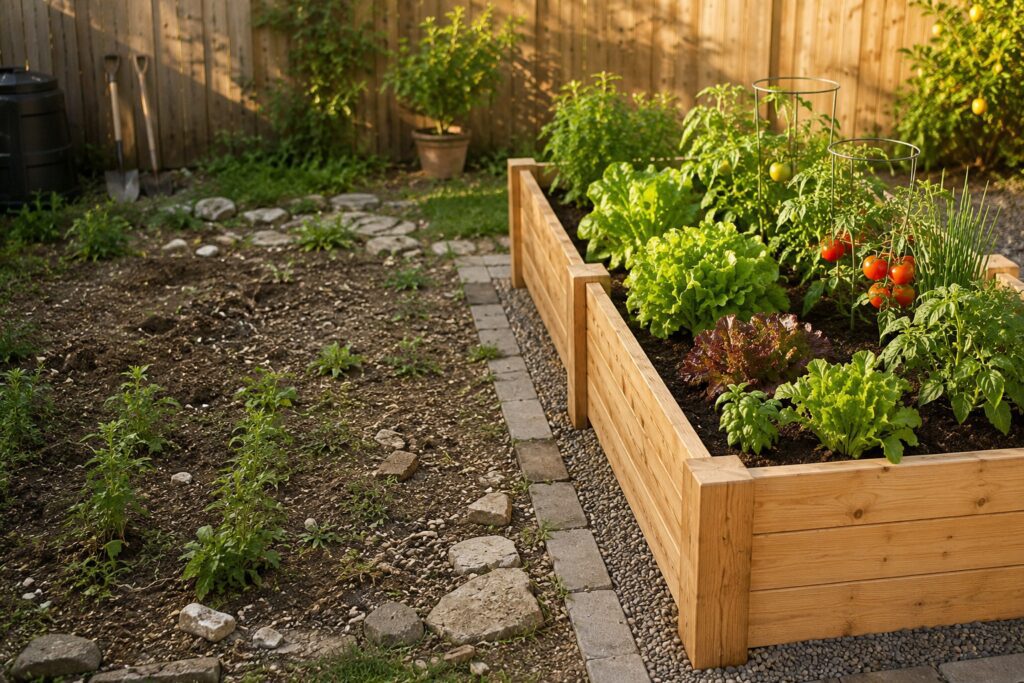
Not only did I save money, but I also created a beautiful garden space where I could grow vegetables, herbs, and flowers right at home.
What surprised me most was how versatile old pallets can be.
Many people see them as scrap wood, but with a little creativity and effort, they can become something practical and attractive.
I wanted a raised garden bed that looked natural, felt sturdy, and was high enough to make gardening easier on my back. Using pallets allowed me to achieve all of that without spending a fortune on expensive wood or premade garden beds.
Table of Contents
- Why I Decided to Build a Raised Garden Bed?
- Finding the Right Pallets Was More Important Than I Expected
- Taking Apart the Pallets Required Patience
- Planning the Size of the Raised Bed Made the Project Easier
- Building the Wooden Frame Was the Most Rewarding Part
- Adding Base Slats and Support Braces Increased Stability
- Natural Lining Helped Protect the Soil
- Filling the Raised Bed With Good Soil Changed Everything
- Planting My First Crops Felt Incredibly Satisfying
- What I Would Do Differently Next Time?
- Final Thoughts on Building a Raised Garden Bed From Pallets
Why I Decided to Build a Raised Garden Bed?
Starting a garden directly in the ground sounds simple until you actually try it. My soil was hard, uneven, and filled with weeds.
Every time it rained, the area became muddy, and my plants struggled to grow properly.
That was when I started researching raised garden beds.
I quickly learned that raised beds offer several benefits. They improve drainage, make soil management easier, reduce weed growth, and create a cleaner gardening environment overall.
I also liked the idea of having a defined gardening space that looked organized and intentional.
The problem was the price. Many ready made raised garden beds were surprisingly expensive.
Some cost hundreds of dollars, especially the larger wooden ones. I wanted something affordable, practical, and still visually appealing. That was when I discovered pallet gardening.
Using pallets instantly lowered my costs because the wood was either free or extremely cheap. Many local warehouses, hardware stores, and small businesses are happy to give away pallets they no longer need.
After seeing how many people were successfully repurposing them into furniture and garden projects, I decided to try it myself.
Finding the Right Pallets Was More Important Than I Expected
One thing I learned very early was that not all pallets are safe for gardening. Some pallets are chemically treated and should never be used for growing food.
That is why the first step in the process is finding heat treated pallets.
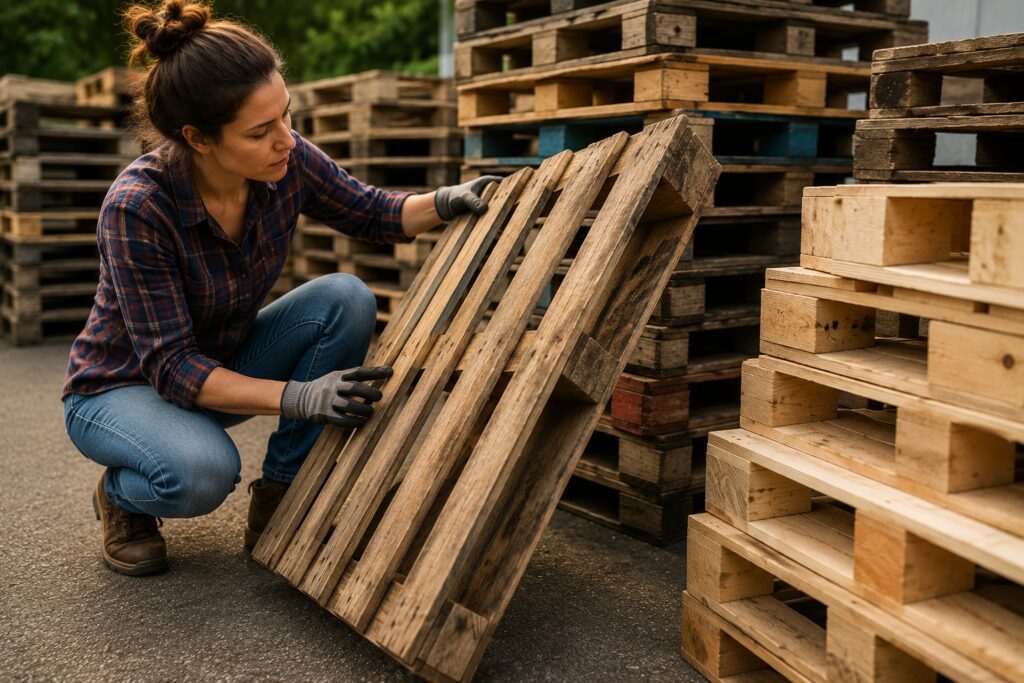
I specifically looked for pallets stamped with “HT,” which stands for heat treated. These pallets are treated using high temperatures instead of harmful chemicals.
Avoid pallets marked with “MB,” because that means they were treated with methyl bromide, a chemical pesticide that is unsafe for gardening projects.
I spent a day visiting local stores and asking politely if they had unused pallets available. Surprisingly, several businesses were happy to let me take them away for free.
I chose pallets that looked clean, dry, and relatively undamaged.
Strong wood matters because the garden bed needs to support heavy soil weight once filled.
When selecting pallets, I also checked for signs of rot, mold, or insect damage. A pallet may look fine from a distance, but weak wood becomes obvious once you start dismantling it.
Taking Apart the Pallets Required Patience
At first, I assumed dismantling pallets would be the easiest part. I was completely wrong. Pallets are built to survive heavy industrial use, which means they are nailed together extremely tightly.
I used a crowbar, hammer, gloves, and safety glasses.
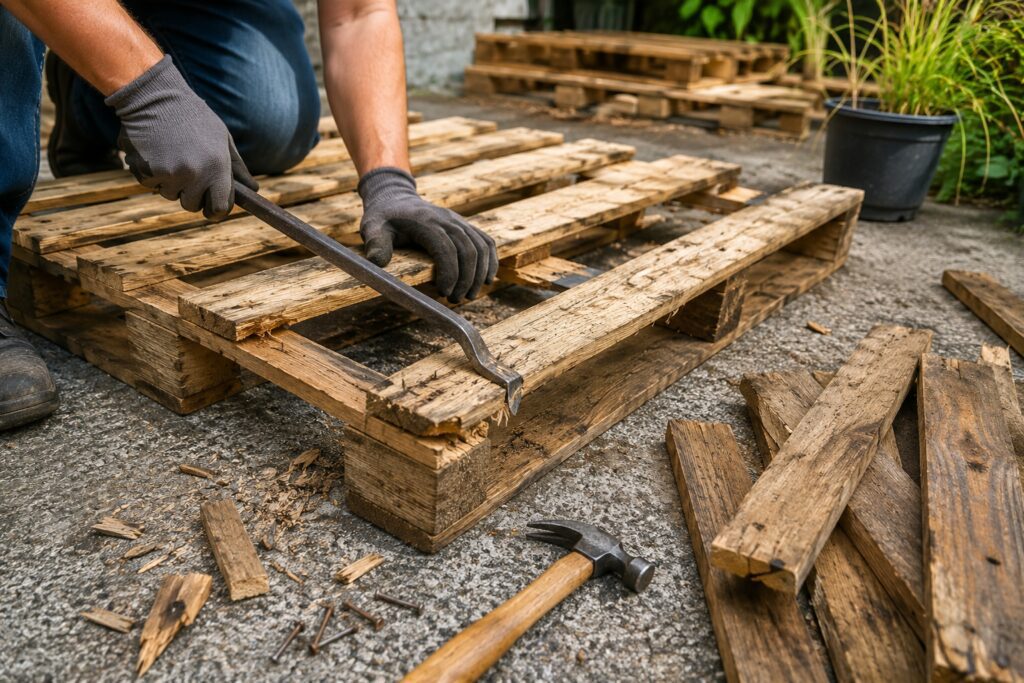
The gloves were especially important because pallets often contain rough splinters and hidden nails. Slowly prying the boards apart worked much better than trying to force them quickly.
Some boards cracked during the process, which taught me an important lesson.
Always collect more pallets than you think you need. Having extra wood gave me flexibility when some pieces became unusable.
Even though dismantling took time, I actually enjoyed the process once I got into a rhythm. It felt satisfying turning rough shipping pallets into usable lumber for a garden project.
Planning the Size of the Raised Bed Made the Project Easier
Before building anything, I spent time planning the size of the raised garden bed carefully. I wanted something large enough for vegetables but small enough to fit comfortably in my backyard.
I eventually settled on a rectangular design that was easy to reach from all sides.
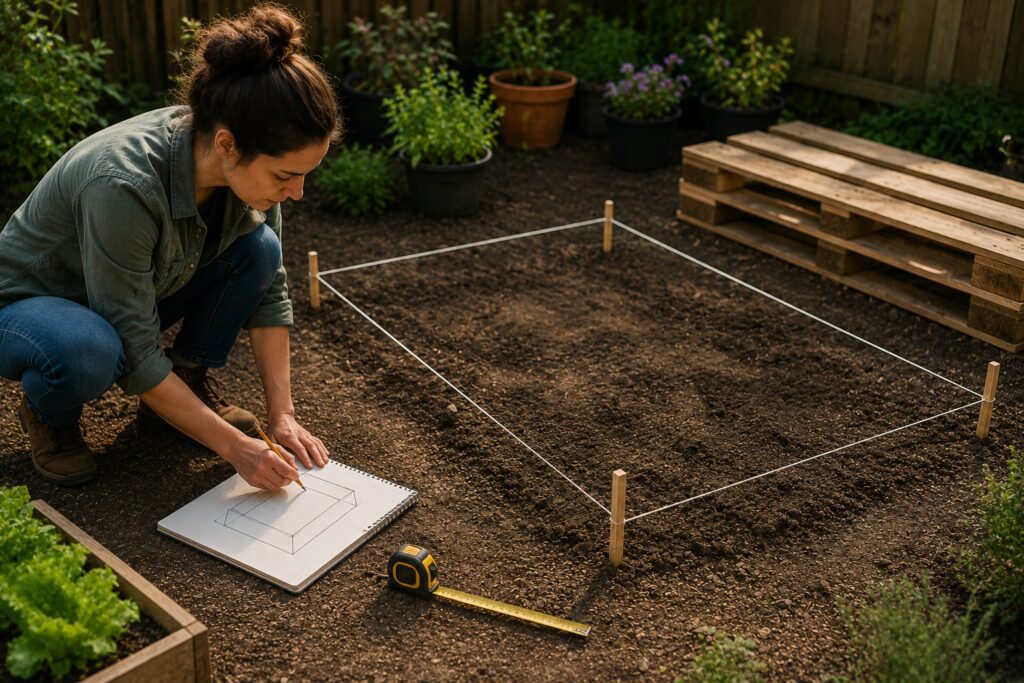
One common gardening mistake is making beds too wide. If you cannot comfortably reach the center without stepping into the soil, maintenance becomes frustrating.
I also considered the height carefully. A raised bed that sits higher off the ground reduces strain on the back and knees.
Since I planned to grow herbs and leafy greens, I wanted easy access for regular harvesting.
Sketching the dimensions beforehand helped me estimate how many boards and screws I would need. It also prevented unnecessary cutting mistakes later.
Building the Wooden Frame Was the Most Rewarding Part
Once the boards were cleaned and cut to size, the project finally started looking like a real raised garden bed. I used thick wooden posts for the corners because they provide the main structural support.
I began by attaching the side boards to the corner posts using exterior wood screws.
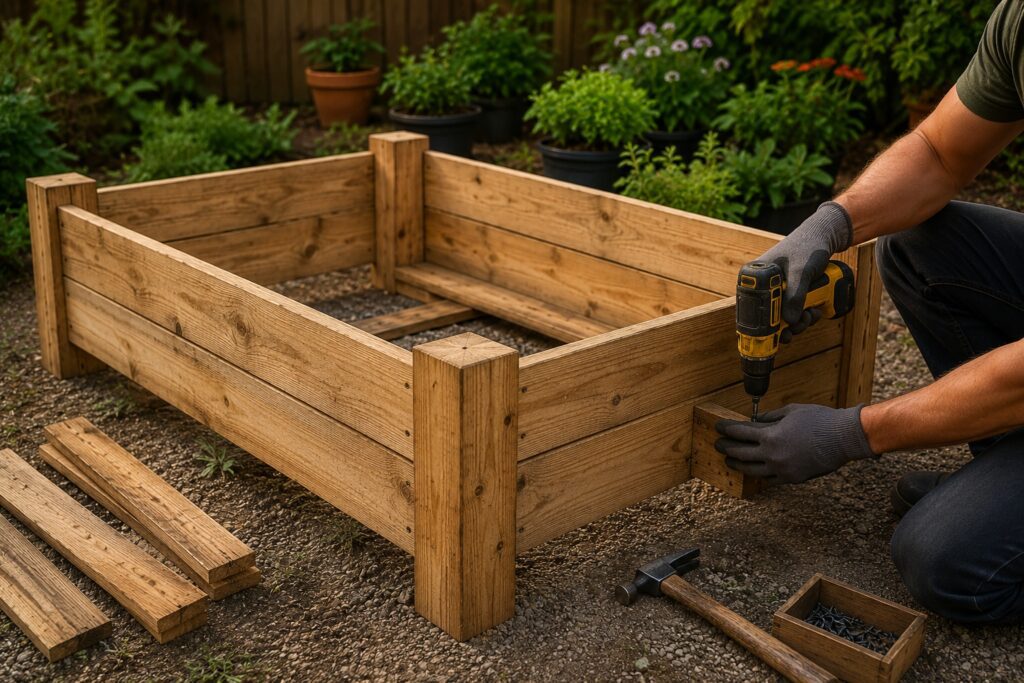
Screws work much better than nails because they create a tighter and stronger hold over time.
One thing I paid close attention to was keeping everything level. Even a slight imbalance becomes noticeable once the bed is filled with soil. I constantly checked the alignment while assembling the frame.
As the structure came together, I could finally visualize how the finished garden would look.
That moment made all the earlier hard work feel worthwhile.
The wooden texture from the pallet boards also gave the garden bed a rustic and natural appearance that fit beautifully with the outdoor environment.
Adding Base Slats and Support Braces Increased Stability
A raised garden bed becomes extremely heavy once filled with soil and water. Because of that, proper support underneath is essential.
I attached several pallet slats across the base to create a solid foundation.
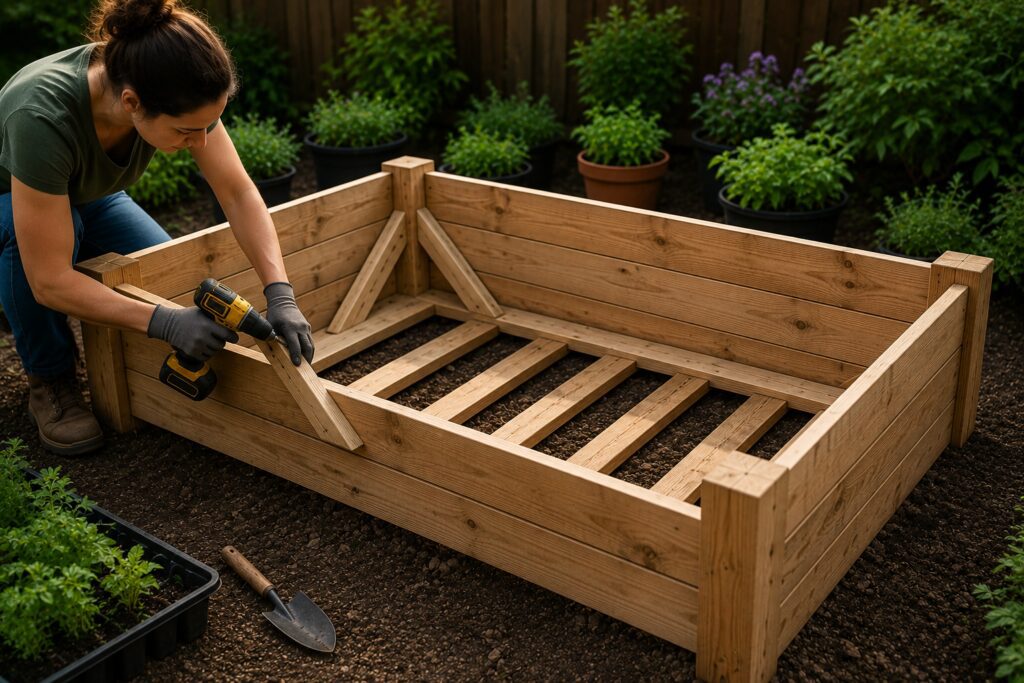
Then I added support braces underneath to prevent sagging in the middle. Without these supports, the structure might weaken over time.
This step may seem minor, but it dramatically improved the overall strength of the garden bed. I wanted something durable that could survive changing weather conditions and several gardening seasons.
I also left small gaps between some slats to improve drainage. Good drainage helps prevent root rot and keeps the soil healthy during rainy periods.
Natural Lining Helped Protect the Soil
After building the wooden structure, I added a natural lining inside the bed. This layer helps keep soil contained while improving moisture retention.
I considered using plastic, but I preferred a more natural and breathable option.
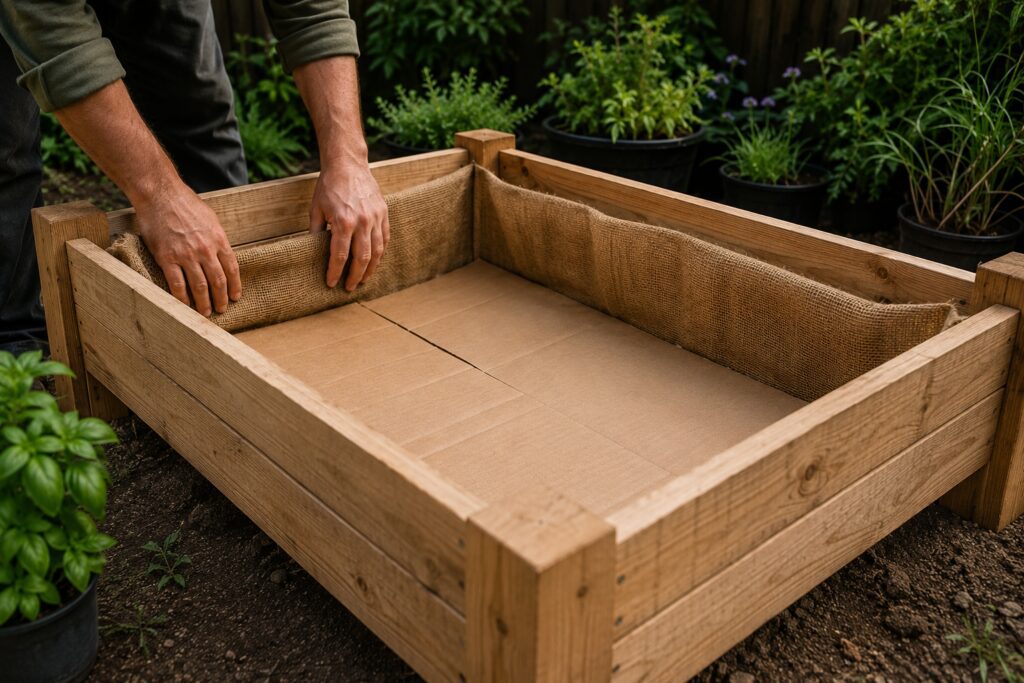
Instead, I used layers of cardboard and newspaper along the interior base.
Some gardeners also use hessian fabric, which works very well.
The cardboard serves multiple purposes. It helps suppress weeds, slowly decomposes into the soil, and improves moisture balance naturally.
One thing I liked about using natural lining materials was how environmentally friendly the entire project became. Repurposed wood combined with recyclable lining materials made the garden bed feel sustainable and responsible.
Filling the Raised Bed With Good Soil Changed Everything
The quality of the soil inside a raised garden bed matters more than almost anything else. Since raised beds allow complete control over the growing environment, I wanted to create the healthiest soil possible.
I filled the bed using a combination of organic garden soil, compost, and natural mulch.
The compost added nutrients while improving soil texture and water retention.
Immediately, I noticed how much softer and richer the soil felt compared to the hard ground in my yard. Plant roots grow far more easily in loose, nutrient rich soil.
I also avoided compacting the soil too tightly. Healthy soil needs airflow for roots and beneficial organisms to thrive properly.
Planting My First Crops Felt Incredibly Satisfying
Once the raised bed was complete, the most exciting part finally arrived. Planting.
I started with simple vegetables and herbs like lettuce, basil, spinach, and tomatoes. These plants grow relatively quickly and are beginner friendly.
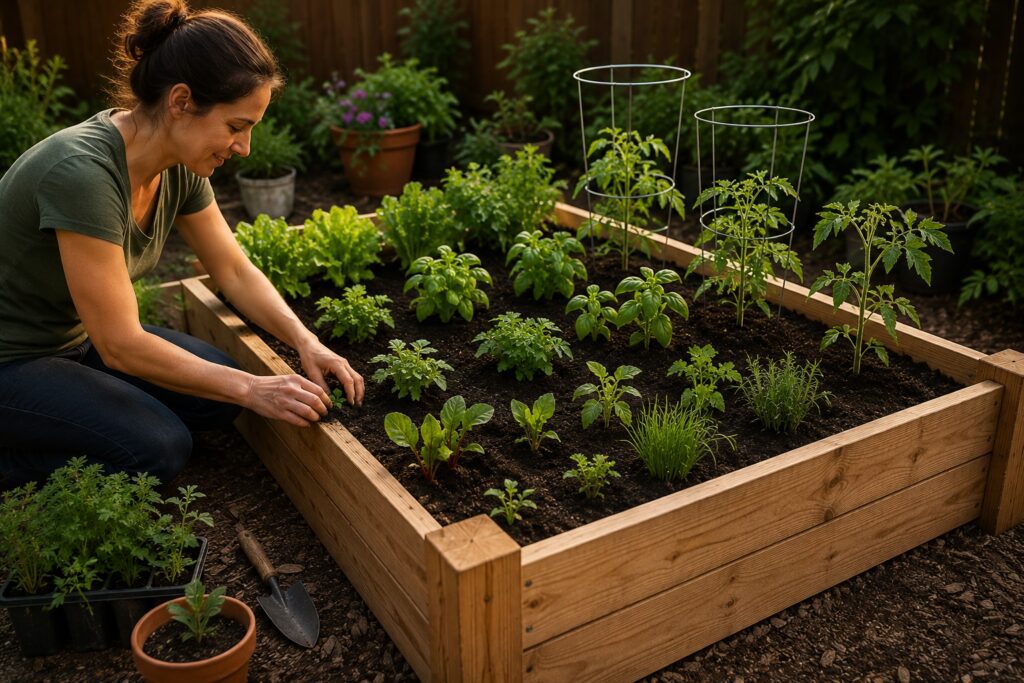
Seeing the first green sprouts emerge from the soil was genuinely rewarding. The raised bed drained better, stayed organized, and looked far cleaner than traditional ground gardening.
Maintenance also became easier. I spent less time bending over, weeding, and dealing with muddy soil.
Watering was more efficient because the soil retained moisture evenly.
Over time, the raised bed became one of the most productive parts of my backyard.
What I Would Do Differently Next Time?
Even though the project turned out successfully, I still learned valuable lessons for future builds.
First, I would sand the pallet wood more thoroughly before assembly. Some boards remained rough in certain areas, which could eventually cause splinters.
Second, I would seal the exterior wood with a safe outdoor wood protector to help extend its lifespan.
Exposure to rain and sun slowly wears down untreated wood over time.
Finally, I would probably build multiple beds instead of just one. Once I saw how effective raised gardening could be, I immediately wanted more planting space.
Final Thoughts on Building a Raised Garden Bed From Pallets
Building a raised garden bed from pallets turned out to be far easier and more rewarding than I expected. What started as a simple DIY experiment became one of my favorite gardening projects.
The entire process taught me that gardening does not need to be expensive or complicated.
With a few recycled materials, basic tools, and a little patience, it is possible to create a functional and beautiful growing space at home.
What I love most is that every scratch, board, and plant inside the garden bed carries a sense of personal effort. Every harvest feels more meaningful because I built the structure myself from the ground up.
If you have been thinking about starting a garden but feel intimidated by the cost or complexity, pallet raised beds are honestly one of the best places to begin.
They are affordable, practical, customizable, and surprisingly attractive once finished.
Sometimes the best gardening projects are not the most expensive ones. They are the ones built with creativity, effort, and the excitement of growing something with your own hands.


