Adding a water feature to your garden is one of the best ways to enhance its beauty and tranquility. The sound of running water, the way sunlight dances on its surface, and the way it attracts wildlife like birds and bees make any garden feel more alive.
However, building a traditional in-ground pond can be expensive and time-consuming, especially if you don’t have experience with digging or lining a pond.
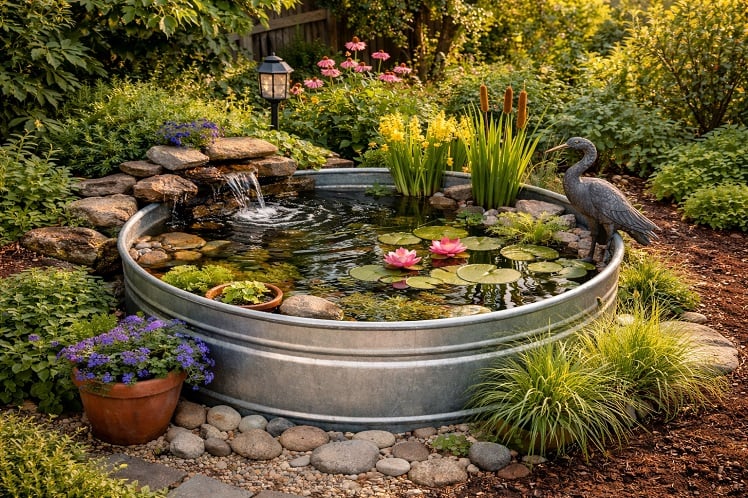
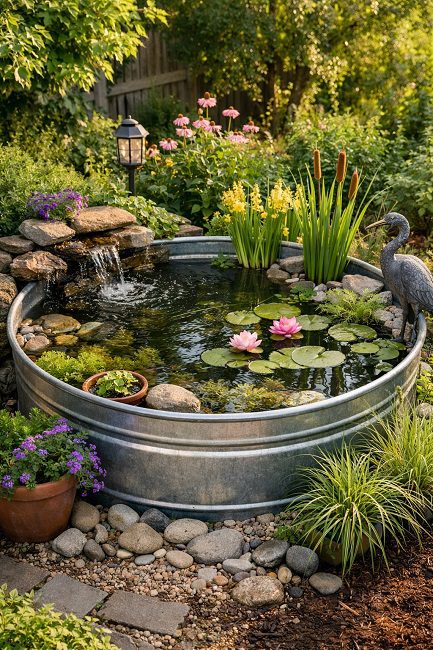
That’s where the stock tank pond comes in: a simple, no-dig solution that can be set up in just one weekend.
Originally designed for livestock, these galvanized metal tanks are perfect for creating an above-ground pond that adds both beauty and functionality to your outdoor space.
In this guide, I’ll walk you through the steps I took to build my own stock tank pond, sharing tips along the way that will help you achieve the same tranquil oasis in your garden.
Table of Contents
Why Choose a Stock Tank Pond?
One of the things I love about stock tank ponds is how easy and affordable they are to set up. I was able to create a beautiful water feature without the hassle and expense of digging a hole, lining the pond, or dealing with complicated construction.
The galvanized steel tanks are durable, rust-resistant, and come in various sizes to fit different yard sizes. Plus, they look great in almost any garden setting, from small urban backyards to larger suburban lawns.
Stock tank ponds are also highly customizable, allowing you to add plants, rocks, and even fish, making them a fantastic addition to any outdoor space.
Step 1: Planning and Choosing the Right Location
Before diving into the project, the first thing I had to do was choose the perfect location for my pond. It’s important to find a spot that not only fits the size of the tank but also provides the right environment for the aquatic plants and animals you plan to introduce.
If you’re hoping to grow flowering aquatic plants like water lilies, you’ll want to place your pond where it receives at least six hours of direct sunlight each day. These plants need the sunlight to thrive, so make sure to pick a sunny spot in your garden.
Once I found the perfect location, I focused on preparing the site. The most critical part of this step is ensuring that the base where the stock tank will sit is level. If the tank is not level, the water line will look crooked, which can negatively impact the aesthetics of your pond.
To prepare the ground, I cleared the grass and used crushed stone and sand to create a solid, flat foundation.
You can also use pavers if that’s more convenient. I made sure the surface was smooth and even to ensure the water stayed level once the tank was in place.
Step 2: Gathering Materials
Setting up a stock tank pond is relatively simple, and you don’t need a lot of complex materials. Here’s a rundown of the essential supplies I gathered:
1. Galvanized Stock Tank
I purchased my stock tank at a local farm supply store. They come in various sizes, typically ranging from 2 to 8 feet in diameter, which makes them suitable for any size garden.
The size you choose depends on how large you want your pond to be and how much space you have available.
2. Solar-Powered Pond Pump Kit
For water circulation, I chose a solar-powered pond pump kit. This was a great option because it doesn’t require outdoor electrical outlets, making it safer and more eco-friendly.
The solar pump also runs for free, so there’s no ongoing cost. If you live in a sunny area, this is an ideal solution for maintaining water movement without having to rely on electricity.
3. Washed River Rocks
To cover the bottom of the tank, I used washed river rocks. These help cover the pump and give the pond a natural look. They also provide a substrate for plants to root in.
I made sure to use washed river rocks because they are clean and free from any harmful chemicals that could affect the water quality.
4. Aquatic Plants
You will need a mix of deep-water plants and marginal plants to keep the water clean and healthy. I chose water lilies for the deep-water section, as they float on the surface and provide shade, which helps to keep the water cool and reduces algae growth.
I also added marginal plants like iris and papyrus, which prefer shallow water.
Step 3: Setting Up the Tank
Once I had gathered all my materials, it was time to assemble the pond. I began by wiping down the inside of the stock tank using a vinegar-water solution. This helped remove any residues from the manufacturing process, ensuring the tank was safe for aquatic plants and animals.
After rinsing it thoroughly, I placed the empty tank on the leveled foundation I had prepared earlier.
Next, I positioned the solar pump in the center of the tank. The pump will circulate the water, which is crucial for maintaining a healthy pond ecosystem.
I arranged the river rocks across the bottom, making sure to hide the pump cord and give the pond a more natural appearance. I also stacked some larger rocks around the edges to create underwater shelves for the plants to sit on.
Step 4: Planting Your Pond
A healthy pond relies on a variety of plants that help filter the water, provide shade, and support local wildlife. For my pond, I included a combination of deep-water plants and marginal plants.
The deep-water plants, like water lilies, were placed at the bottom of the tank, where they could float on the surface of the water. These plants provide shade and help prevent algae growth by blocking out sunlight.
The marginal plants, such as iris and papyrus, were placed on bricks or upturned terracotta pots to elevate them above the surface of the water. This allows their leaves to rise above the waterline, creating a natural and lush look
I made sure to cover about 60% of the water surface with vegetation, which helps keep the water cool and provides important habitat for pollinators like bees and dragonflies.
Step 5: Filling the Pond and Stocking with Fish
Now that the plants were in place, I filled the tank with water using a garden hose. It’s important to fill the tank slowly and gently so that you don’t disturb the plants or the rocks.
If you plan to add fish, make sure to condition the water to remove chlorine and chloramines, which are harmful to aquatic life.
I waited about a week before introducing any fish to allow the water to stabilize in temperature and let beneficial bacteria begin to grow.
For my pond, I chose goldfish and minnows, as they help control mosquito larvae and other pests in the water. Fish also add life and movement to the pond, making it even more attractive.
However, I made sure to wait a full week before adding the fish, as I wanted the environment to stabilize and for the plants to establish themselves first.
Step 6: Maintenance and Winter Care
One of the best parts about stock tank ponds is how low-maintenance they are. In the beginning, you may see some algae bloom, but be patient—it’s a natural process.
As the plants grow, they will consume the nutrients that algae need to thrive, and the water will clear up on its own.
In colder climates, you have a few options for winterizing your pond. I’ve had good results by using a floating de-icer to keep a small hole open in the ice. This helps ensure that the fish and plants stay healthy throughout the winter.
If you’re in an area where the pond will freeze completely, you can also drain the tank and move the plants and fish indoors to a cooler, frost-free space.
Final Thoughts
Building a stock tank pond is one of the easiest and most rewarding DIY projects I’ve done for my garden. It adds a beautiful, tranquil water feature to my yard without the complexity and expense of traditional ponds.
The best part is that it only takes a weekend to set up, and the results are well worth the effort.
By providing bees, birds, and other pollinators with a safe water source and creating a home for fish and plants, my stock tank pond has turned into a little oasis in my garden.
If you’re looking for a simple, affordable way to add a water feature to your garden, I highly recommend building your own stock tank pond. It’s a low-maintenance, eco-friendly option that will bring life and serenity to any outdoor space.


