Starting seeds indoors can be a rewarding and cost-effective way to grow your favorite plants. Having experienced the challenges and rewards of starting seeds from scratch, I can confidently say that this process is one of the most fulfilling aspects of gardenin
Table of Contents
- 1. Choosing the Right Containers for Seed Starting
- 2. Choosing the Right Seed Starting Mix
- 3. Determining the Correct Planting Depth
- 4. Moisture Control
- 5. Provide Heat Before Light
- 6. Provide Light After Sprouting
- 7. Thinning Seedlings to One
- 8. Hardening Off Your Seedlings
- 9. Ready to Transplant
- Seed Starting Made Easy
1. Choosing the Right Containers for Seed Starting
When I first started growing seeds indoors, I underestimated the importance of using the right containers. It turns out, choosing the right container is the first crucial step to ensuring your seedlings thrive.
The containers need to be large enough to accommodate the seeds and their roots as they begin to grow. But more importantly, they need good drainage.
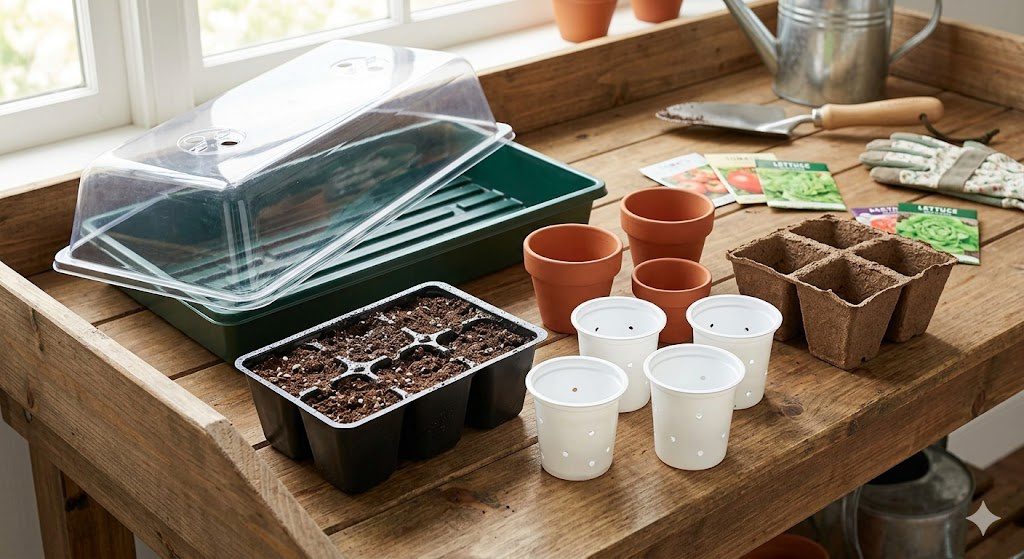
I learned that drainage is non-negotiable. If your containers don’t have drainage holes, excess water will collect at the bottom, leading to root rot and poor plant health.
I prefer using seed trays or pots that come with a drainage hole, but you can also repurpose yogurt cups or other small containers, as long as you poke a few holes in the bottom.
Best Containers for Seed Starting
Starting seeds indoors is an exciting and rewarding way to grow your favorite plants, but choosing the right container is key to ensuring healthy growth.
Whether you’re a beginner or seasoned gardener, selecting the appropriate containers can make a big difference in your seedlings’ success.
From seed trays to biodegradable pots, each option offers unique benefits that support strong root development and easy transplantation. Let’s dive into the best containers for seed starting to help you get your garden off to a great start!
- Seed trays or flat containers
- Plastic cups with holes punched in the bottom
- Peat pots or biodegradable pots
2. Choosing the Right Seed Starting Mix
Choosing the correct soil mix for seed starting was another crucial lesson I learned. I initially used garden soil, but it turned out to be too heavy and compact for seedlings.
It didn’t drain properly, which caused the seeds to struggle.
What I’ve learned is that seed starting mix is light, sterile, and soilless. It provides the perfect environment for young roots to establish themselves and allows the seeds to get the proper aeration and moisture they need to grow.
The seed starting mix is specially designed to give seedlings the best chance to thrive without the risk of disease or fungi that could come with using regular garden soil.
Why Use Seed Starting Mix?
Using the right soil mix is essential for successful seed starting, and a seed starting mix is designed specifically to give your seedlings the best start in life.
Unlike regular garden soil, seed starting mix offers a light, airy texture that promotes easy root development and ensures strong, healthy growth.
It’s also sterile, reducing the risk of disease, and well-draining, preventing waterlogging that can lead to root rot.
Let’s explore why seed starting mix is the secret to giving your seeds the ideal environment to thrive.
- Light texture for easy root growth
- Sterile to reduce disease risk
- Well-draining to prevent waterlogging
3. Determining the Correct Planting Depth
Knowing how deep to plant your seeds is a key step that I had to figure out early on. Each type of plant has its own ideal planting depth, which ensures the seed gets enough light and warmth to germinate but isn’t buried too deeply, preventing it from sprouting.
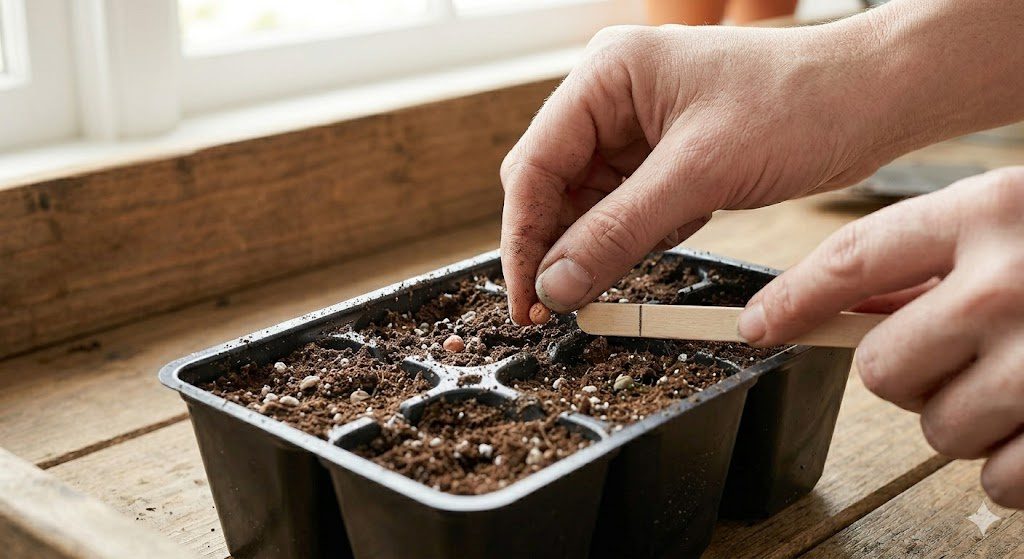
After a bit of trial and error, I found that the general rule is to plant seeds at a depth that’s about twice the size of the seed itself. For example, small seeds like lettuce or basil require shallower planting (about 1/8 inch deep), while larger seeds like tomato or squash need to be planted deeper (about 1/2 to 1 inch deep).
General Seed Planting Guidelines
When planting seeds, depth matters just as much as the type of seed you’re working with. Each plant has its own ideal planting depth to ensure it receives the right amount of light, warmth, and moisture for germination.
Whether you’re planting delicate herbs like lettuce and basil, sturdy vegetables like tomatoes and peppers, or hearty crops like squash and beans, understanding the correct depth is key to helping them grow strong.
Let’s take a look at the general seed planting guidelines to ensure your garden gets off to the right start!
- Lettuce and basil: 1/8 inch deep
- Tomato and pepper: 1/4 inch deep
- Squash and beans: 1/2 to 1 inch deep
4. Moisture Control
Watering is one of the trickiest aspects of starting seeds. I initially made the mistake of over-watering, thinking that more water would make the seeds grow faster. But it turns out that too much water can suffocate the seeds or promote mold growth.
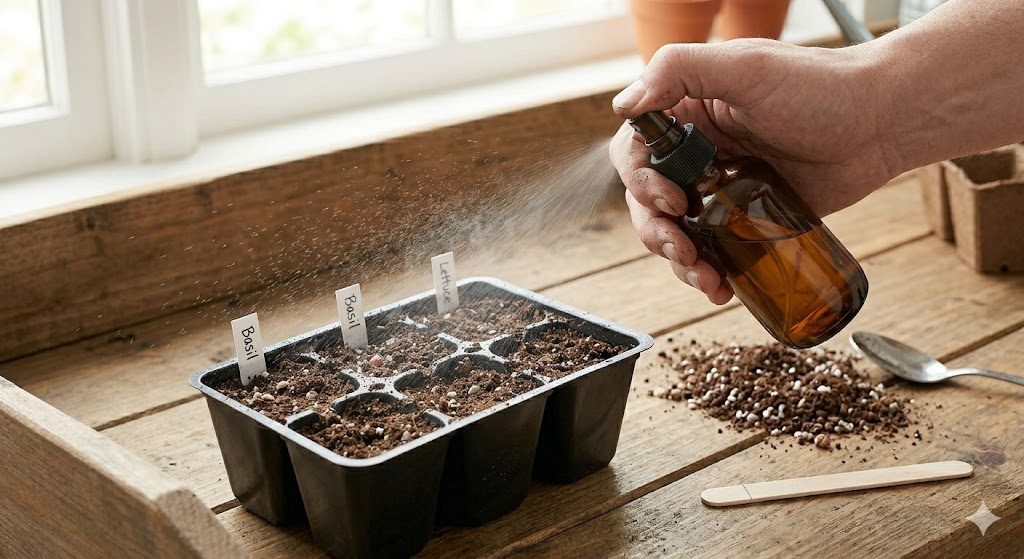
Moisture control is vital for seed germination, so I learned to mist the seeds gently rather than pouring water directly onto them.
Using a spray bottle to mist the seeds ensures that the soil remains evenly moist but not soaked. It helps create the perfect conditions for the seeds to sprout without causing waterlogging.
How to Control Moisture
Proper moisture control is crucial for seed germination and healthy seedling growth. Too much water can drown young roots, while too little can prevent seeds from sprouting.
The key is to keep the soil consistently moist without over-saturating it.
Using a spray bottle to mist your seeds gently, ensuring the soil remains damp but not soaking, helps create the perfect environment.
Additionally, it’s best to avoid watering from above to prevent disturbing delicate seeds. Here’s how to maintain the right moisture balance for your seedlings.
- Mist seeds lightly with a spray bottle
- Keep the soil moist, but not soaking wet
- Avoid watering from above, which can disturb delicate seeds
5. Provide Heat Before Light
One of the essential lessons I learned is that seeds need warmth to germinate. Most seeds prefer a temperature range of 65-75°F (18-24°C). Without the right heat, seeds may take longer to sprout or fail to germinate at all.
I found that using a seed heat mat was an easy and effective way to ensure the soil stays warm enough for the seeds.
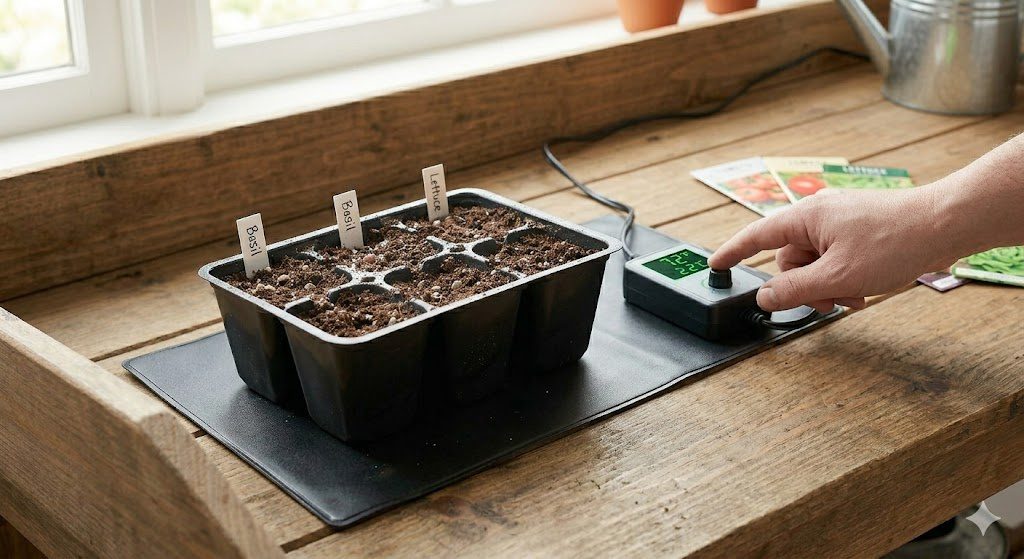
Heat mats are affordable and provide consistent warmth, which speeds up the germination process. I use one whenever I start seeds indoors, and I highly recommend it for anyone new to the seed starting process.
Why is Heat Important?
Heat plays a vital role in the germination process, providing the warmth seeds need to awaken and start growing. A consistent temperature creates an optimal environment that encourages faster sprouting, helping your seeds break through the soil more quickly.
Without enough warmth, seeds may remain dormant for longer than necessary, delaying growth.
Let’s explore why maintaining the right level of heat is essential for getting your seeds off to a strong start.
- Seeds need warmth to activate the germination process
- A consistent temperature encourages faster sprouting
- Helps prevent the seeds from staying dormant too long
6. Provide Light After Sprouting
Once your seeds begin to sprout, they’ll need light to grow strong and healthy. This is where I made another mistake early on. At first, I relied on natural sunlight, but my plants didn’t seem to be thriving.
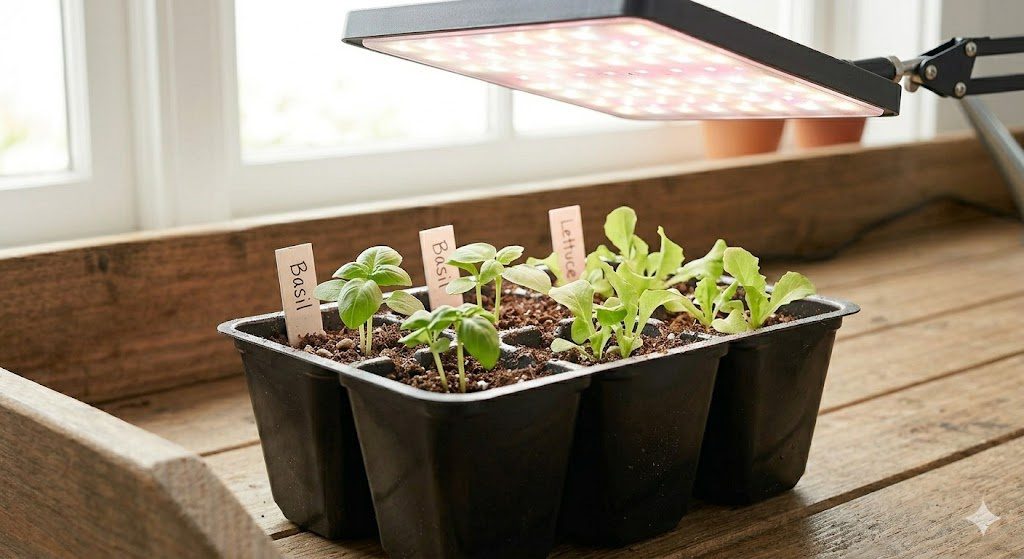
It turns out that most seeds need 14-16 hours of light a day to grow properly, and natural light alone often isn’t enough during the winter months.
I switched to using grow lights that are placed 2-3 inches above the seedlings. These lights simulate the intensity of the sun, giving the plants the light they need to photosynthesize and grow tall and strong.
Lighting Tips for Seedlings
Proper lighting is crucial for healthy seedlings, especially if natural sunlight isn’t enough to support their growth. If you’re growing indoors, using grow lights is an excellent solution to provide the consistent light your seedlings need.
To ensure they thrive, keep the lights just 2-3 inches above the seedlings and aim for 14-16 hours of light per day.
This helps mimic the ideal sunlight conditions, promoting strong, healthy growth for your plants. Let’s take a closer look at how to give your seedlings the right amount of light.
- Use grow lights if natural sunlight is insufficient
- Keep the lights 2-3 inches above seedlings
- Provide 14-16 hours of light per day
7. Thinning Seedlings to One
After your seedlings begin to grow, you’ll need to thin them out. This was one of the hardest steps for me because it feels counterproductive to remove healthy plants. But thinning is necessary to give each plant enough room to grow.
By leaving too many seedlings crowded together, they’ll compete for light, nutrients, and water, leading to weak growth.
I use scissors to snip out the excess seedlings, ensuring that I leave only the healthiest and most robust ones. Don’t pull the seedlings out by hand, as this can disturb the roots of the plants you want to keep.
Thinning Tips
Thinning is an important step in ensuring your seedlings grow healthy and strong. When too many plants are crowded together, they compete for space, light, and nutrients, which can hinder their growth.
To prevent this, gently snip the extra seedlings at soil level, leaving only the strongest plant in each space.
This gives your remaining plants the room they need to spread out, access resources, and thrive. Let’s dive into some essential thinning tips to help your seedlings flourish.
- Snip the extra seedlings at the soil level
- Leave only the strongest plant in each space
- Give plants room to grow and access resources
8. Hardening Off Your Seedlings
Before moving your plants outside, they need to acclimate to outdoor conditions. This process is called “hardening off,” and it helps your seedlings adjust to the sun, wind, and temperature fluctuations they will encounter in your garden.
I usually start hardening off by placing my plants outside for a couple of hours each day, gradually increasing their exposure over the course of a week.
By the end of the hardening-off process, your seedlings will be more resilient and able to survive in your garden.
How to Harden Off Your Seedlings
Hardening off your seedlings is a crucial step before transplanting them into the garden. This process helps them adjust to outdoor conditions, like sunlight and wind, gradually strengthening them for life in the garden.
Start by placing your seedlings outside for just 2-3 hours a day, slowly increasing the time each day.
By the end of the week, they will be toughened up and ready to thrive in their new outdoor home. Let’s explore how to successfully harden off your seedlings for a smooth transition.
- Gradually expose them to sunlight and wind
- Start with 2-3 hours outside, and increase daily
- By the end of the week, they should be ready for the garden
9. Ready to Transplant
Once your seedlings have been hardened off, they’re finally ready to be transplanted into the garden. I always wait until my seedlings have at least two to three true leaves and developed roots before moving them outside.
This ensures they are strong enough to survive the transition.
When transplanting, be sure to handle the seedlings carefully by the leaves, not the stems. Plant them in a well-prepared garden bed, making sure to give them the appropriate space for their growth.
Transplanting Tips
Transplanting your seedlings into the garden is an exciting step, but it’s important to do it at the right time to ensure success.
Wait until your seedlings have developed 2-3 true leaves, as this indicates they are strong enough to handle the move. When transplanting, always handle the plants by the leaves, not the stems, to avoid damage.
Additionally, make sure to provide each plant with enough space to grow and thrive. Let’s dive into some essential transplanting tips to help your seedlings adjust smoothly to their new environment.
- Wait until seedlings have 2-3 true leaves
- Handle plants by the leaves, not the stems
- Provide enough space for each plant to thrive
Seed Starting Made Easy
Starting seeds indoors may seem like a lot of work at first, but once you get the hang of it, it becomes an enjoyable and rewarding process.
Over the years, I’ve refined my seed starting technique, and I’m always amazed at how much healthier my plants are compared to those I’ve bought from the store.
By following these simple steps, you’ll have a garden full of strong, thriving plants ready to be transplanted outdoors.


