A clean border between lawn and garden beds does more than make a yard look polished. It solves one of the most annoying maintenance problems homeowners face: grass creeping into beds and mulch spilling back onto the lawn after mowing or rain.
Extension guidance from Illinois, Kansas, and Mississippi State all point to edging as a practical way to define beds, contain mulch, reduce erosion, and cut down on repeated trimming.
In particular, ground-level mowing strips made from brick or pavers can reduce the need for edge trimming because mower wheels can ride directly on the hard surface while cutting grass right to the border.
That matters even more now because gardening in 2026 is moving toward lower-maintenance, more resilient landscapes.
University of Minnesota Extension says current sustainable gardening trends include reducing turf, creating wildlife-friendly planting, and building landscapes that are easier to maintain under growing climate variability.
A mow-over brick border fits that shift well because it helps gardeners keep beds neat while supporting mulched or pollinator-friendly planting areas beside turf.
Table of Contents
What a mow-over brick border actually does?
This border works because it solves two problems at once. First, a raised inner row forms a small retaining wall that helps keep soil and mulch in the bed. Second, a flat outer row creates a stable track for mower wheels, which means less need for hand edging or string trimming.
Kansas State notes that raised edging helps prevent erosion by keeping soil and mulch from washing out during heavy rains, while Mississippi State specifically recommends brick or concrete mowing strips next to turf to reduce edging work.
In practical terms, the border is usually built in an L-shape layout, often described as a soldier and runner pattern. The “soldier” row stands vertically against the bed, and the “runner” row lies flat on the lawn side.
This creates both a barrier and a mowing lane. It is not just decorative. It is a functional hardscape detail that makes weekly lawn care faster and more consistent.
Step 1: Plan the line before you dig
Start by deciding exactly where the border should go. Smooth, generous curves are usually easier to mow and install than tight zigzags. Kansas State recommends laying out the edge first with a hose or rope so you can adjust the shape before digging.
This step sounds simple, but it prevents one of the most common DIY mistakes: building an attractive border that is awkward to mow around later.
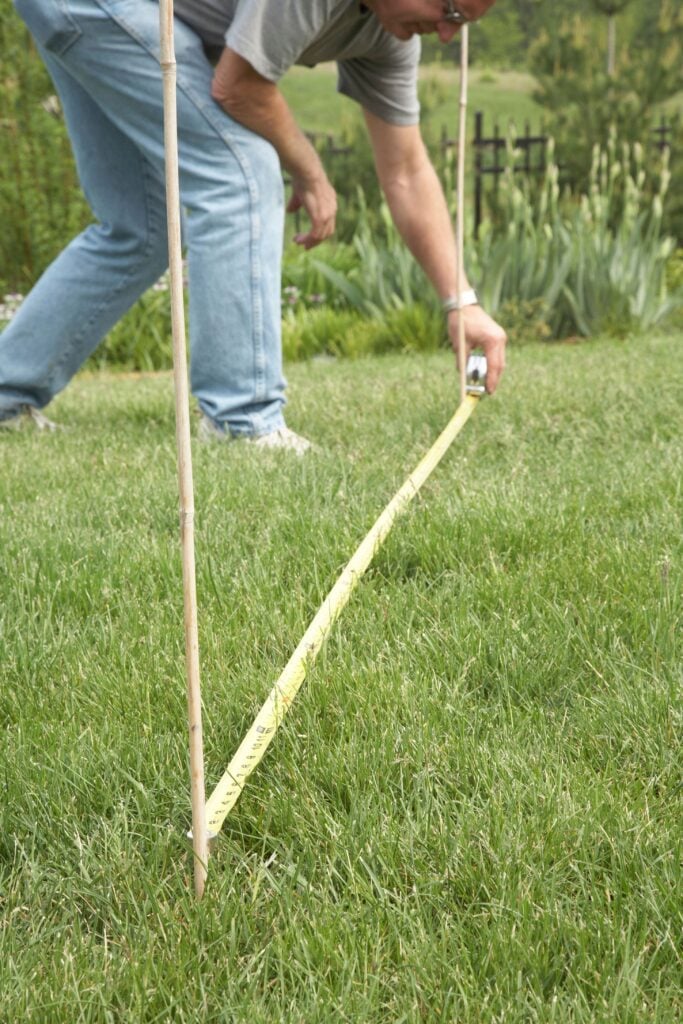
Measure the total length so you can estimate materials. Since the system uses two rows of brick, your final count will be higher than a simple single-row edge.
If you are using reclaimed materials, sort them first and remove pieces that are badly chipped or inconsistent in size. Reclaimed brick can be a smart choice environmentally because reuse avoids new raw-material extraction, kiln firing, transport, and landfill disposal.
Step 2: Dig a trench wider than the bricks
Once the layout is marked, dig a trench that is wide enough for both rows plus a little working room. The trench should also be deep enough to allow for the bedding layer and for the flat mowing strip to sit flush with the lawn. The goal is not just to bury brick.
It is to create a stable base that will stay level under weather and mower traffic. Extension and paver-installation guidance consistently stress that proper base prep is what determines long-term performance.
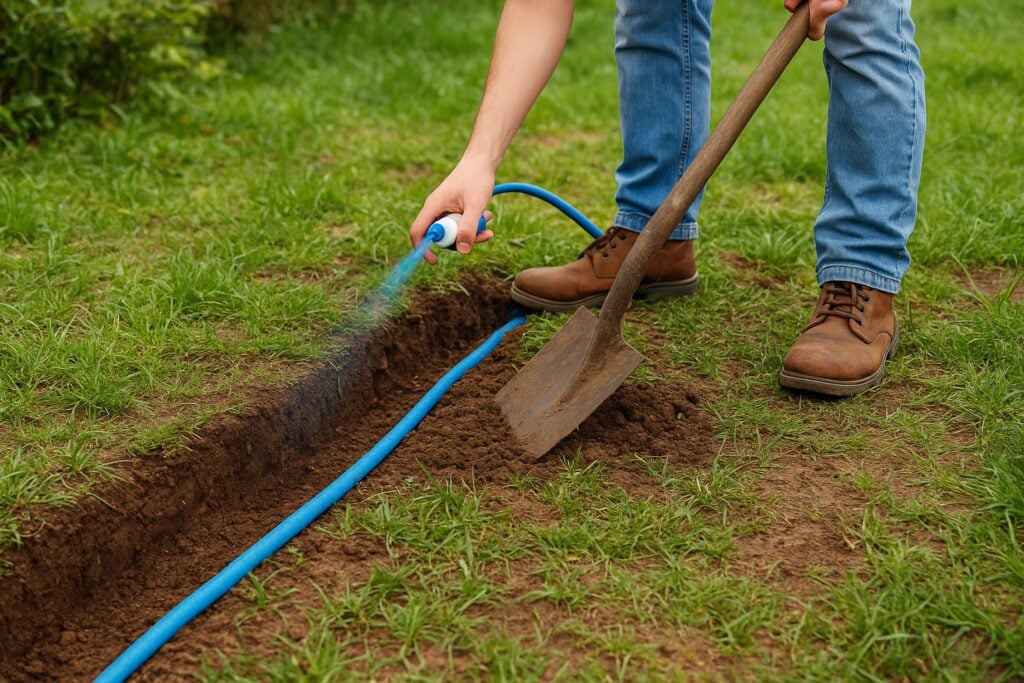
If the lawn edge is irregular or heavily rooted, take extra time here. A rough trench creates leveling problems later, and those small errors become very obvious once the bricks are set.
Step 3: Add fabric carefully, and know the debate
The proposed method uses heavy-duty landscape fabric under the brick base. This can help separate the bedding layer from soft soil and slow the upward push of some weeds.
However, this is one part of the project where experts are more divided. Colorado State Extension warns that landscape fabric often performs poorly in planting beds over time because pores clog, weeds germinate on top, and the material can harm soil life when used broadly under mulched planting areas.
At the same time, the same source acknowledges that fabric can have a place in hardscape situations such as lining paths or rock areas.
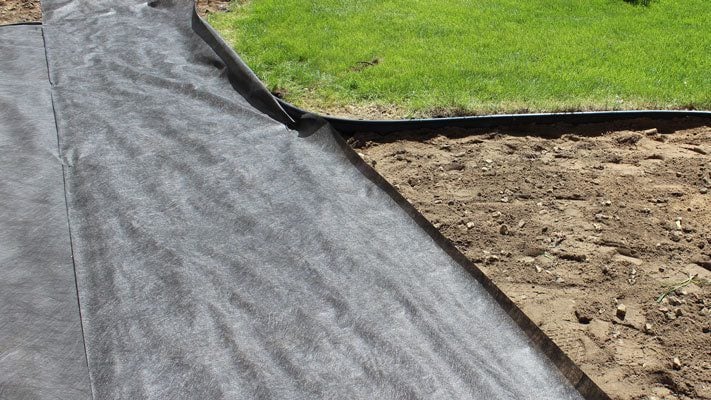
So the balanced view is this: using fabric only in a narrow trench under bricks is more defensible than covering entire planting beds with it. In this application, it functions more like a separator in a hardscape assembly than a blanket over living soil.
Still, gardeners who want to avoid synthetic fabric entirely may prefer a compacted aggregate-and-sand base without fabric, especially in well-drained soils.
That is the critical perspective worth considering.
Step 4: Build a level sand bed
After the fabric, spread and screed a bedding layer of fine sand. Oregon State’s paver guide recommends a uniform bedding layer and notes that fine-grained sand compacts better and fills joints more effectively than coarse sand.
The point of this layer is to let you tap bricks into a consistent plane and fine-tune the finished height.
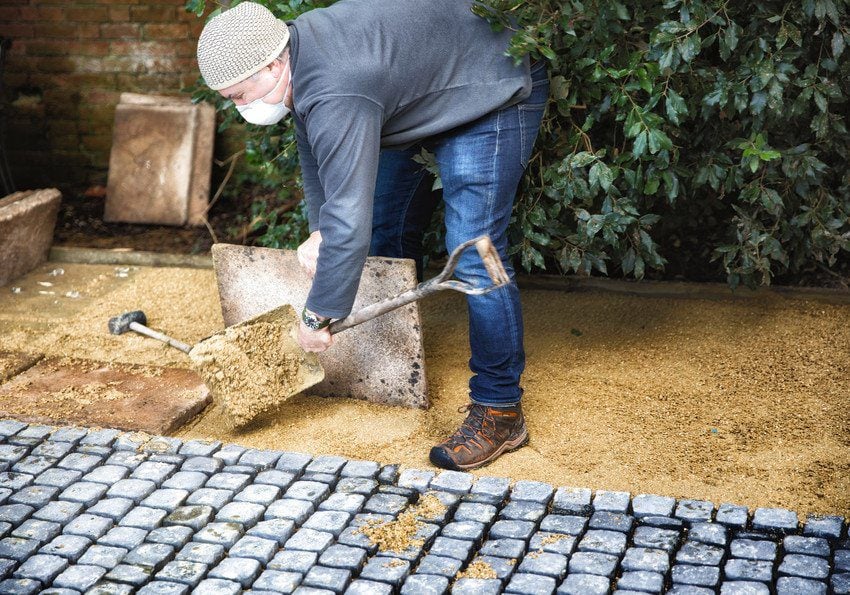
This step is where patience pays off. Use a straight board and level, not just your eye. If the flat row sits too high, mower wheels will bump against it. If it sits too low, soil and grass will wash over it.
For a mow-over border, flush with lawn grade is the sweet spot.
Step 5: Set the bricks in the L-shape pattern
Place the first row vertically on the bed side so it acts as a small retaining wall. Then place the second row flat against it on the lawn side. Tap each piece gently with a rubber mallet until the line is level and tight.
The vertical row holds the bed, and the horizontal row becomes the mower path. This is the step where the system starts to make sense visually and functionally.
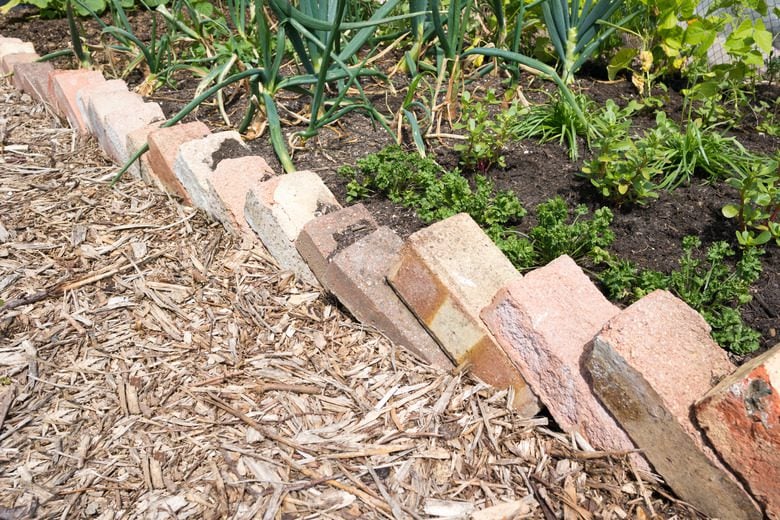
Classic red brick gives a traditional look, while concrete pavers feel more modern and uniform. Either can work as long as dimensions are consistent enough to keep the strip stable and even.
Step 6: Lock the joints
When the bricks are in place, sweep joint material into the gaps. Research-based paver guidance recommends fine joint sand, followed by a stabilizing or sealing product to keep the sand from disappearing and to reduce plant growth in the joints.
UC IPM also notes that polymeric sand can help reduce weeds and often ants, though it is not a perfect fix.
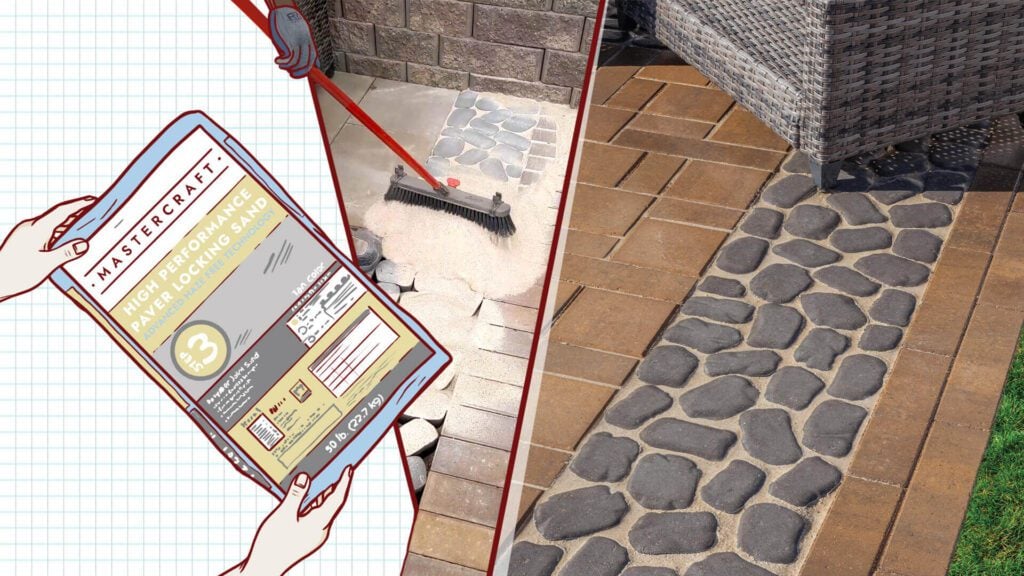
This matters because unfinished joints are where many DIY borders start to fail. Loose gaps invite weed seeds, shifting, and washout. A stabilized joint gives the border a cleaner, longer-lasting finish.
Supportive and critical perspectives
Supporters of this system like it because it saves time, improves appearance, and reduces repeated trimming. It can also support more sustainable garden design by making mulched or native-planted beds easier to manage beside turf.
That aligns with broader 2026 gardening trends emphasizing lower-maintenance landscapes and greater ecological function.
Critics raise valid concerns too. Brick edging is more labor-intensive and more expensive upfront than simple hand edging. Kansas State also notes that permanent edging can limit future bed expansion, which matters for gardeners who frequently redesign planting areas.
And as noted earlier, landscape fabric should be used cautiously because it can create ecological and maintenance problems when overused in living beds.
Real-world impact and what comes next
For homeowners, the biggest payoff is less weekend maintenance. For communities, cleaner bed edges and reused materials can improve curb appeal while cutting waste.
For the environment, the real benefit comes when borders make it easier to maintain mulched beds, native planting, or reduced-turf areas that need less mowing, irrigation, and chemical input over time.
In the years ahead, expect more landscapes to mix turf with durable hardscape edges, pollinator beds, and lower-maintenance planting zones. A mow-over brick border is a small project, but it reflects a larger shift in gardening: making landscapes work better, last longer, and demand less constant correction.
Done well, it is not just a weekend upgrade. It is a long-term truce between lawn and garden.


