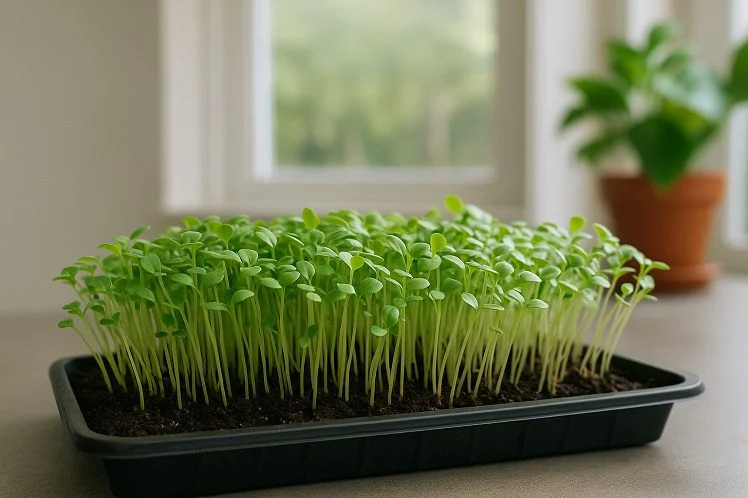
When winter arrives, my garden usually slows down. The outdoor beds are too cold, and sunlight becomes scarce. But I still want something fresh and green to harvest. That’s when I discovered microgreens.
Growing them indoors quickly became one of my favorite gardening habits. They grow fast, need very little space, and give me a steady supply of nutritious greens even in the coldest months.
Table of Contents
- Why I Started Growing Microgreens in Winter?
- Setting Up My Indoor Microgreen Space
- Choosing the Right Seeds for Winter
- My Step-by-Step Microgreen Growing Routine
- Harvesting and Storing
- My Favorite Tricks for Healthier Microgreens
- Mistakes I Avoid Now
- Why I Keep Growing Microgreens Every Winter?
- My Final Advice
Why I Started Growing Microgreens in Winter?
I began growing microgreens because I missed the taste of fresh vegetables during winter. Store-bought greens always felt dull and expensive, especially in colder months.
I realized I didn’t need a garden bed or fancy greenhouse, just a bright windowsill and a few trays.
Microgreens became my solution for staying connected to gardening year-round. Within a week or two, I can harvest trays full of greens like kale, radish, or sunflower.
They add flavor to every meal and make my kitchen feel alive even when everything outside is frozen.
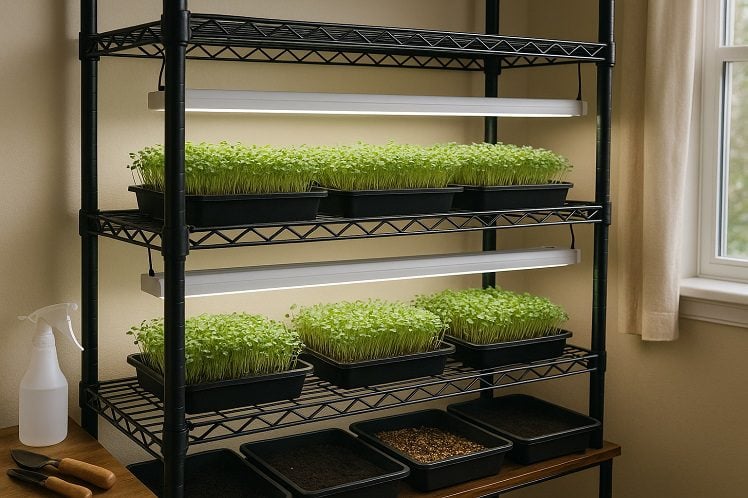
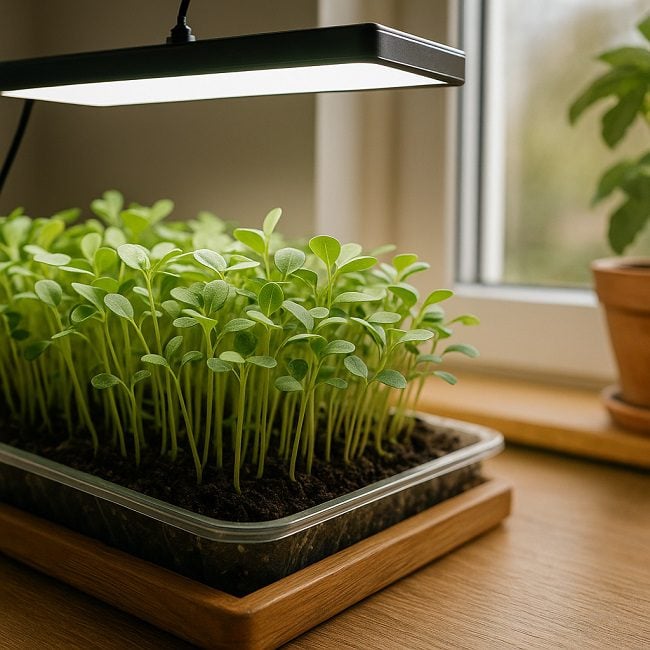
Setting Up My Indoor Microgreen Space
I didn’t have a dedicated space at first. I started with one tray on my kitchen counter. Now, I’ve set up a small growing shelf near a south-facing window.
Here’s what worked for me:
- Light. Natural sunlight works if you have bright windows, but I use a small LED grow light when days are short. It makes a huge difference in growth speed and color.
- Temperature. I keep my microgreens in a spot that stays between 18°C and 24°C (65°F–75°F). Too cold slows germination, too warm causes mold.
- Air circulation. I learned to use a small fan for a few hours daily. It prevents moisture buildup and keeps mold away.
The setup doesn’t need to be complicated. Even a few trays stacked on a rack with a light can produce plenty of greens each week.
Choosing the Right Seeds for Winter
After trying many types, I’ve found some varieties grow better indoors during winter:
- Radish. Fast, colorful, and flavorful. Ready in 6–8 days.
- Broccoli. Mild taste and packed with nutrients.
- Sunflower. Thick stems and nutty flavor, but they need more light.
- Pea shoots. Sweet, crisp, and forgiving for beginners.
- Kale and mustard. Handle cooler indoor temperatures well.
I buy seeds labeled for microgreens rather than garden seeds. They germinate more evenly and are often untreated.
Tip: Store your seeds in an airtight container in a cool, dry place. I learned this the hard way after humidity ruined half my supply one winter.
My Step-by-Step Microgreen Growing Routine
Here’s the routine I follow for every batch, whether it’s kale or radish:
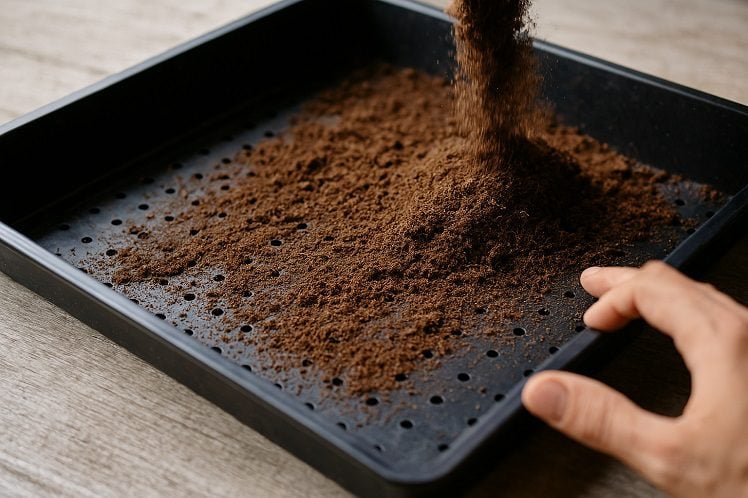
- Prepare the trays. I use shallow trays with small drainage holes. I fill them with about 3 cm of seed-starting mix or coconut coir.
- Moisten the soil. The mix should be damp but not wet. I mist it evenly with a spray bottle before planting.
- Sow the seeds. I scatter seeds evenly across the surface, aiming for full coverage but no overlapping.
- Press lightly. I press the seeds gently into the soil using a small board to ensure good contact.
- Cover for germination. I stack another empty tray on top for 2–3 days. This creates darkness and keeps moisture in.
- Uncover and light. Once the seeds sprout, I remove the top tray and place them under the grow light for 12–14 hours daily.
- Water carefully. I bottom-water by adding water to the lower tray. This prevents splashing and mold on the leaves.
Most microgreens are ready to harvest in 7–14 days, depending on the variety and temperature.
Harvesting and Storing
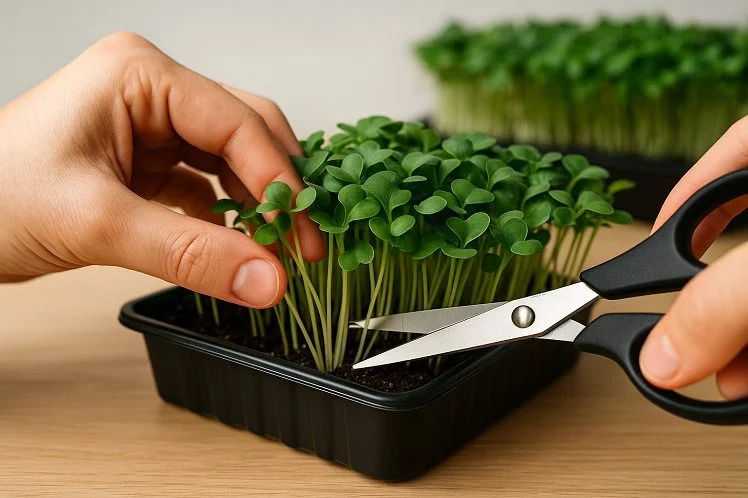
I harvest when the seedlings are about 5–10 cm tall and have their first true leaves. I use clean scissors to cut them just above the soil surface.
Harvesting tip: Water a few hours before cutting. It makes the stems firm and crisp.
After cutting, I rinse the greens gently, spin them dry, and store them in a container with a paper towel to absorb moisture.
They stay fresh for about five days in the fridge, though I usually finish them sooner.
My Favorite Tricks for Healthier Microgreens
After growing dozens of batches, these are the small tricks that made a big difference:
- Use bottom watering only. It keeps leaves dry and mold-free.
- Sterilize trays before each use. A quick rinse with vinegar or diluted bleach prevents fungus buildup.
- Add a thin layer of vermiculite. It keeps humidity even and reduces surface mold.
- Rotate trays daily. If you rely on natural light, rotating ensures even growth.
- Don’t over-seed. Too many seeds cause poor air circulation and slow growth.
One thing I noticed: certain varieties like sunflower or pea shoots grow better when soaked overnight before planting. It speeds up germination and gives thicker stems.
Mistakes I Avoid Now

When I first started, I made several mistakes. I watered too much, used garden soil, and didn’t have enough light. The results were pale, weak greens.
Now, I always stick to sterile growing medium and ensure proper airflow. I also learned that less is more. Using fewer seeds per tray and watering sparingly gives stronger plants.
Another mistake was leaving trays under the light too long after maturity. Microgreens lose flavor quickly once they get too big. Harvesting on time keeps the taste fresh and crisp.
Why I Keep Growing Microgreens Every Winter?
Microgreens have become my favorite winter gardening project because they grow fast and don’t need much space. They also give me control over what I eat.
I know exactly how they were grown, and I can cut them fresh whenever I need them.
The best part is that I can grow them continuously. After one tray is harvested, I start another. It only takes a few minutes of care each day.
Once you have the routine set up, growing microgreens is one of the easiest ways to garden indoors during winter. They add color, freshness, and nutrition to meals while keeping your gardening spirit active year-round.
My Final Advice
If you’re new to indoor gardening, microgreens are the perfect way to start. You don’t need fancy tools or experience. All you need is good light, a clean tray, and fresh seeds.
Start with radish or broccoli, they germinate quickly and show results within a week.
Once you see how rewarding it is, you’ll likely keep growing them just like I do every winter.
I now grow microgreens all year, but winter is when I appreciate them most. They remind me that fresh, healthy food doesn’t depend on the weather, it just needs a little planning and consistency.


