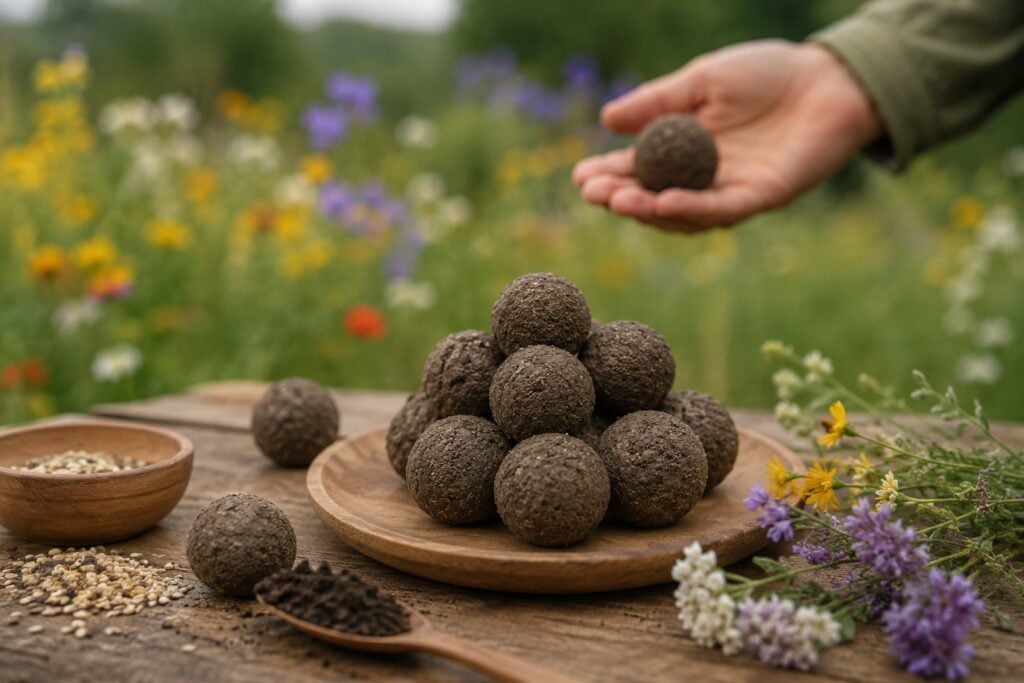
There’s something incredibly satisfying about tossing a tiny ball of seeds into empty soil and watching flowers slowly appear weeks later. The first time I made seed bombs, I honestly expected them to be messy little dirt balls that probably would not work very well.
But after rain arrived and small green sprouts started emerging from areas that had looked dry and lifeless before, I completely fell in love with the process.
Seed bombs are simple, affordable, beginner friendly, and surprisingly effective for growing wildflowers in empty garden spaces, roadside patches, neglected corners, or even containers.
I especially love them because they combine creativity, gardening, and environmental care into one easy project.
They are also a fun activity for kids, families, and anyone wanting to help pollinators naturally.
Table of Contents
- What Are Seed Bombs and Why I Started Making Them?
- Why Seed Bombs Work So Well?
- The Materials I Personally Use
- Step 1: Shredding the Paper
- Step 2: Adding Soil or Compost
- Step 3: Mixing in the Seeds
- Step 4: Shaping the Seed Bombs
- Step 5: Letting Them Dry Naturally
- Step 6: Scattering and Planting
- My Favorite Seeds for Seed Bombs
- Mistakes I Made When Starting
- Why Pollinator Friendly Flowers Matter?
- Why Seed Bombs Are Great for Kids?
- My Final Thoughts
What Are Seed Bombs and Why I Started Making Them?
The first thing I realized about seed bombs is that they are much simpler than they sound. A seed bomb is basically a small ball made from compost or soil, seeds, paper pulp, and water.
Once dried, the ball protects the seeds until rain and moisture help trigger germination.
I originally started making seed bombs because I wanted an easier way to spread wildflowers around empty areas of my garden without digging dozens of small holes.
Some sections of my yard looked dry and forgotten, and I wanted a low effort way to bring more life and color into those spaces.
What surprised me most was, how effective they were.
After a few rainy weeks, flowers started appearing in random corners where nothing attractive had grown before.
Now I use seed bombs regularly because they are:
- Easy to make
- Inexpensive
- Beginner friendly
- Great for pollinators
- Perfect for kids
- Useful for neglected spaces
- Fun to gift to others
They also make gardening feel less rigid and more natural.
Why Seed Bombs Work So Well?
One thing I learned quickly is that the outer layer of the seed bomb plays an important role in protecting seeds during the early stages.
Instead of leaving loose seeds exposed on the soil surface where birds, wind, or dryness can destroy them, the seed bomb acts like a protective shell. The paper and soil mixture helps:
- Hold moisture
- Protect seeds from drying out
- Reduce seed movement
- Create better contact with soil
- Improve germination chances
I noticed much higher success rates using seed bombs compared to simply scattering seeds directly onto dry ground. The process also feels surprisingly satisfying because you can prepare dozens at once and store them until planting season arrives.
The Materials I Personally Use
One of the reasons I enjoy making seed bombs so much is because the materials are simple, affordable, and usually already sitting around the house. I personally use compost or rich garden soil because it helps retain moisture and gives young seedlings a better start once they begin growing.
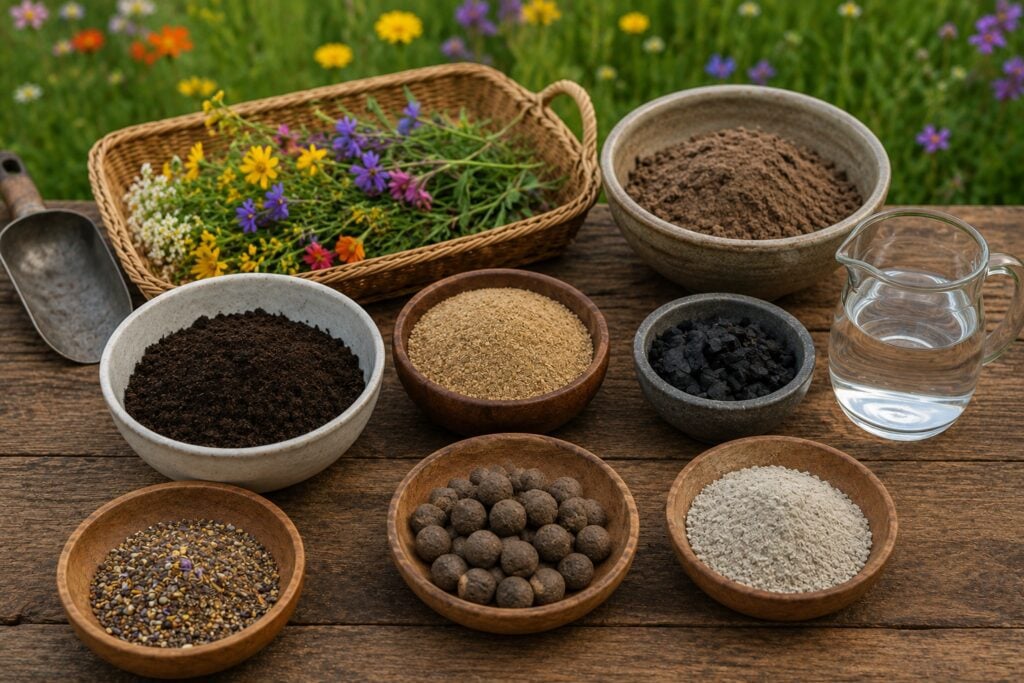
For the paper base, I normally recycle old newspapers, cardboard scraps, or paper towels since they break down naturally and hold the mixture together well.
I also prefer using native wildflower seeds because they adapt better to local conditions and attract far more bees and butterflies to the garden. The only other thing I need is water to soften the paper into pulp and create the perfect texture for shaping the seed bombs.
I love how this project turns basic everyday materials into something that can eventually fill empty spaces with flowers and life.
1. Soil or Compost
I usually use compost because it holds moisture well and provides nutrients once the seeds begin sprouting.
I quickly learned that the quality of the soil or compost makes a huge difference when making seed bombs. I personally prefer using compost because it holds moisture better and gives young seedlings extra nutrients once they begin sprouting.
The texture also helps the seed bombs stay together more easily while drying. When I first experimented with poor, dry soil, the seed bombs cracked quickly and the seeds struggled to germinate properly after rain.
Once I switched to rich compost mixed with healthy garden soil, the results improved dramatically.
The seed bombs stayed moist longer, broke down more naturally outdoors, and produced stronger, healthier seedlings.
Good compost basically gives the seeds a much better environment to wake up and begin growing successfully.
2. Wildflower Seeds
Wildflower mixes are my favorite because they create colorful, natural looking results while helping bees and butterflies.
Wildflower seeds became my favorite choice for seed bombs because they create the most natural, colorful, and rewarding results with very little effort.
I love how a simple mix of seeds can transform an empty patch of soil into a lively space filled with different colors, textures, and pollinators.
After trying several seed types, I noticed that native wildflowers performed the best because they adapted more easily to the local climate and required less maintenance once established.
They also attracted far more bees, butterflies, and beneficial insects to the garden, which made the entire area feel more alive and active.
Every time the flowers bloom, it feels exciting because the results are always slightly different, giving the garden a softer and more natural appearance instead of looking overly planned or formal.
3. Old Newspaper or Paper Scraps
Paper helps bind the seed bomb together. I normally use:
- Newspaper
- Paper towels
- Egg cartons
- Brown paper scraps
I avoid glossy paper because it does not break down as naturally.
4. Water
Water transforms the paper into soft pulp that holds everything together. It may seem like the simplest ingredient in seed bombs, but I learned that using the right amount makes a huge difference in how well they hold together and dry properly.
In the beginning, I added too much water and ended up with a sticky, muddy mixture that took forever to dry and cracked badly afterward.
Over time, I found that the perfect texture should feel damp enough to shape easily but not so wet that it falls apart in your hands.
Water softens the paper into pulp, helps bind the compost and seeds together, and creates the smooth consistency needed for rolling the seed bombs properly.
Once I understood the balance, the entire process became much easier and the finished seed bombs turned out stronger, cleaner, and far more successful once planted outdoors.
Step 1: Shredding the Paper
The first step I always do is tear or shred the paper into small pieces. Smaller pieces soften much faster and create smoother pulp later. I usually place the shredded paper into a bowl of warm water and let it soak for several hours.
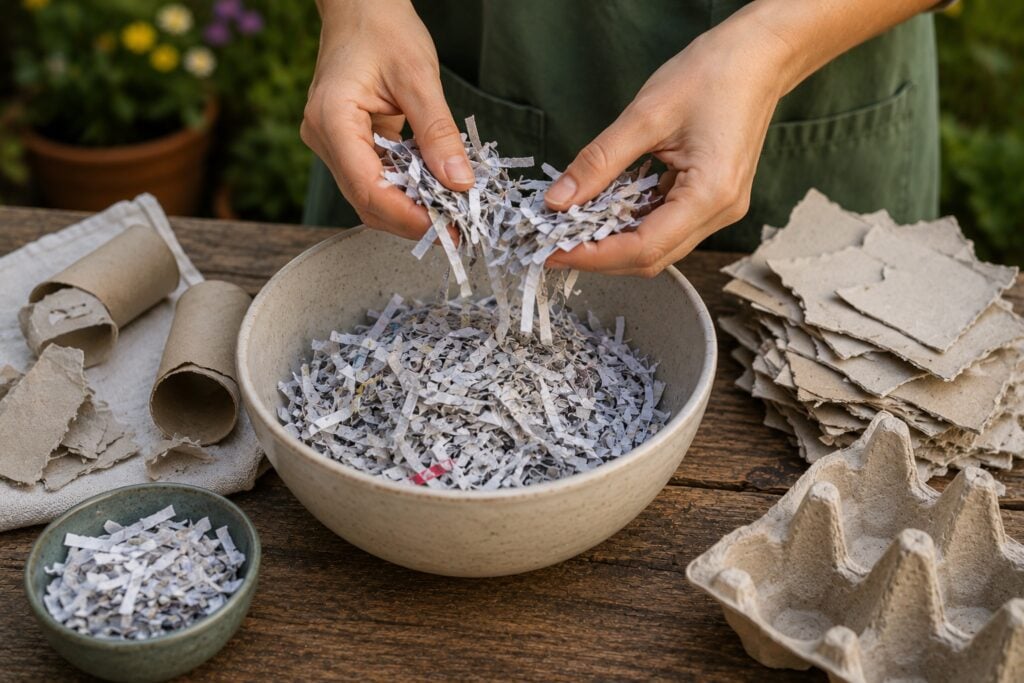
Sometimes I leave it overnight if I want extra soft pulp.
Once soaked, the paper becomes easy to squeeze and break apart by hand. This step may seem small, but properly softened paper makes the entire process much easier later.
Step 2: Adding Soil or Compost
Once the paper becomes soft pulp, I mix in compost or soil gradually. At this stage, the mixture starts feeling more like clay or dough.
I usually add enough compost until the mixture can hold its shape without falling apart.
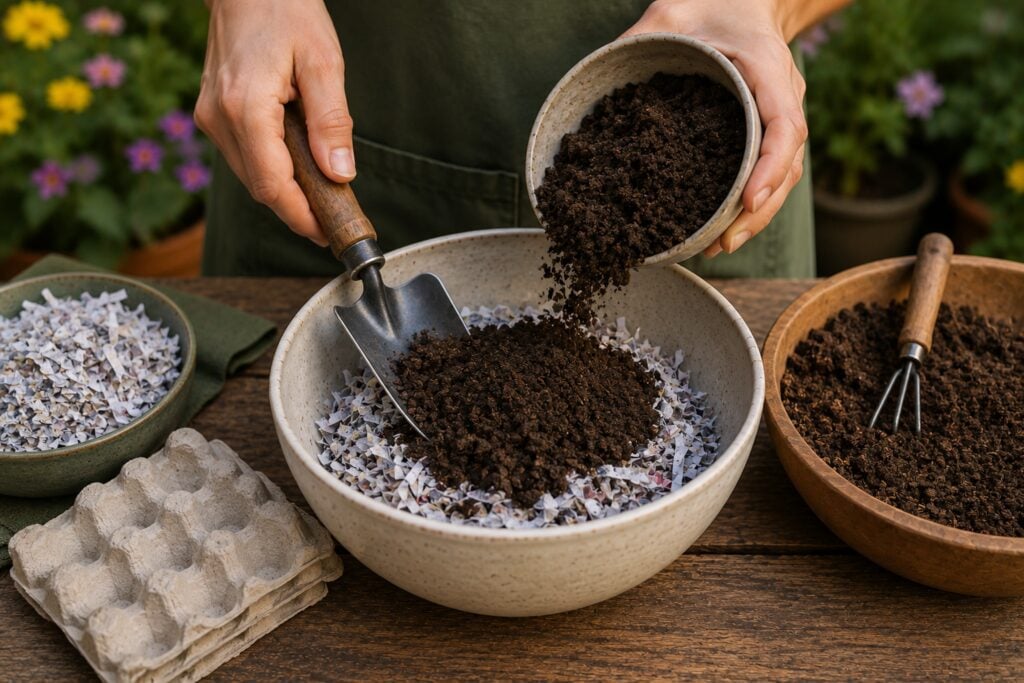
Too much water creates mushy seed bombs that crack badly while drying.
The texture I aim for feels soft but firm enough to roll into balls. This balance took me a few attempts to learn properly.
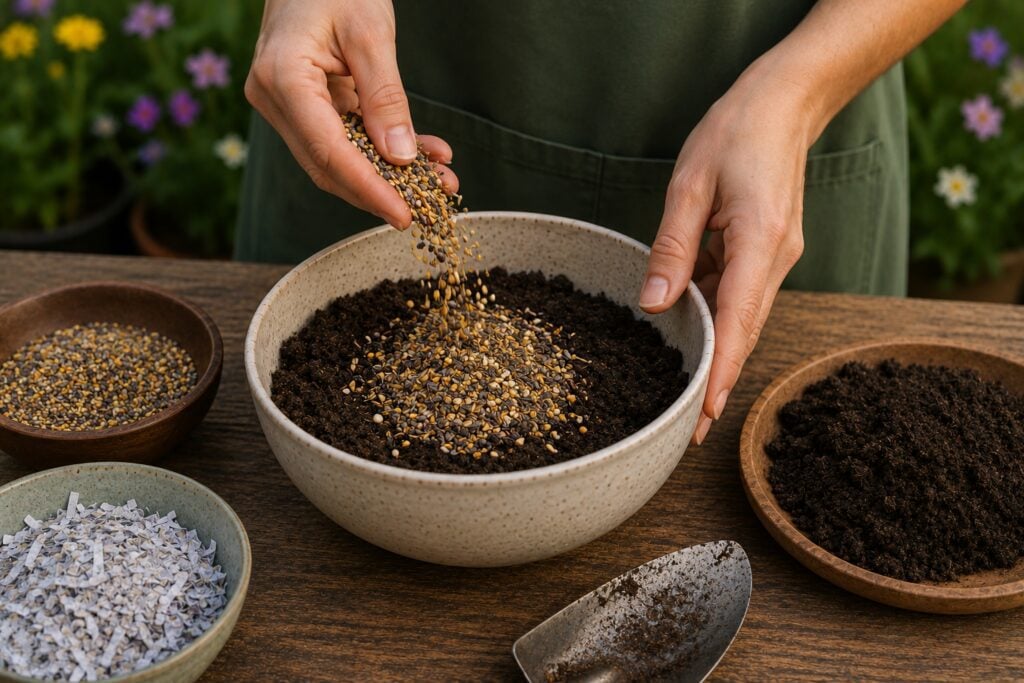
Step 3: Mixing in the Seeds
Adding seeds is probably my favorite part because it feels like planting potential into every small ball.
I gently mix the seeds into the pulp by hand rather than aggressively stirring them. That helps avoid damaging delicate seeds.
One mistake I made early on was using too many seeds in each bomb. I assumed more seeds meant more flowers, but overcrowding actually reduced growth because seedlings competed for space.
Now I use a moderate amount of seeds so plants have room to establish themselves properly.
Step 4: Shaping the Seed Bombs
Once everything is combined, I roll the mixture into small balls about the size of a golf ball or slightly smaller. I try not to make them too large because oversized seed bombs take much longer to dry and sometimes crack unevenly.

This step is honestly relaxing and enjoyable. There’s something satisfying about shaping them by hand while imagining the future flowers they may produce.
If the mixture sticks heavily to my hands, I simply add a little more compost or paper pulp.
Step 5: Letting Them Dry Naturally
Drying the seed bombs properly is extremely important. I place mine on cardboard, trays, or paper and allow them to air dry naturally for one to three days depending on humidity.
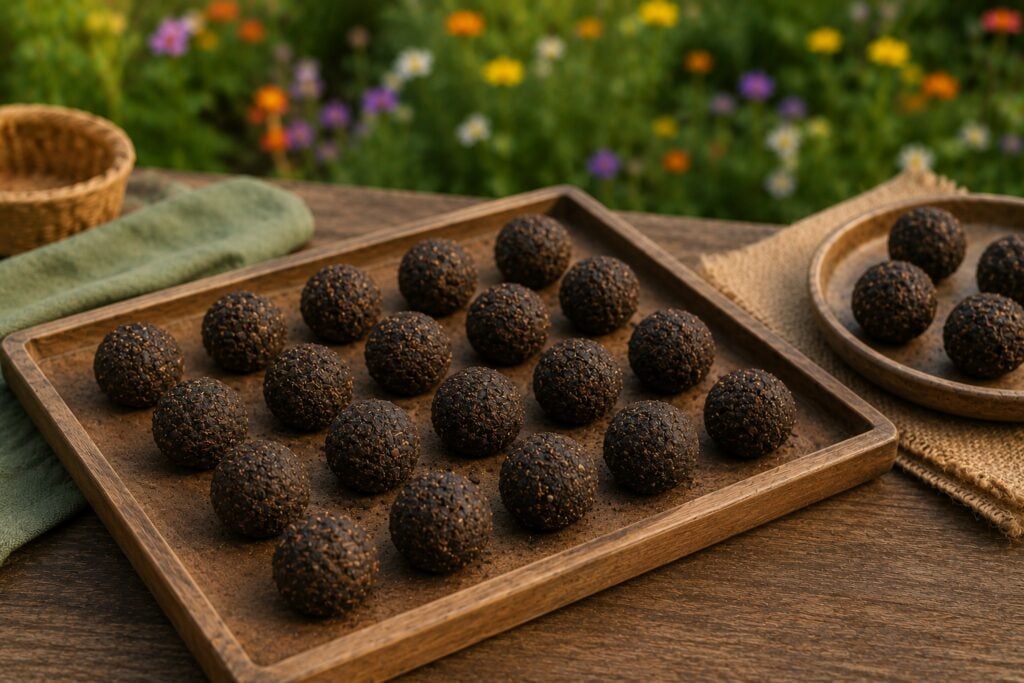
I avoid placing them under harsh direct sunlight because drying too quickly can cause cracking.
Once dry, the seed bombs become firm and easy to store. I usually keep extras in a dry container until I’m ready to use them later.
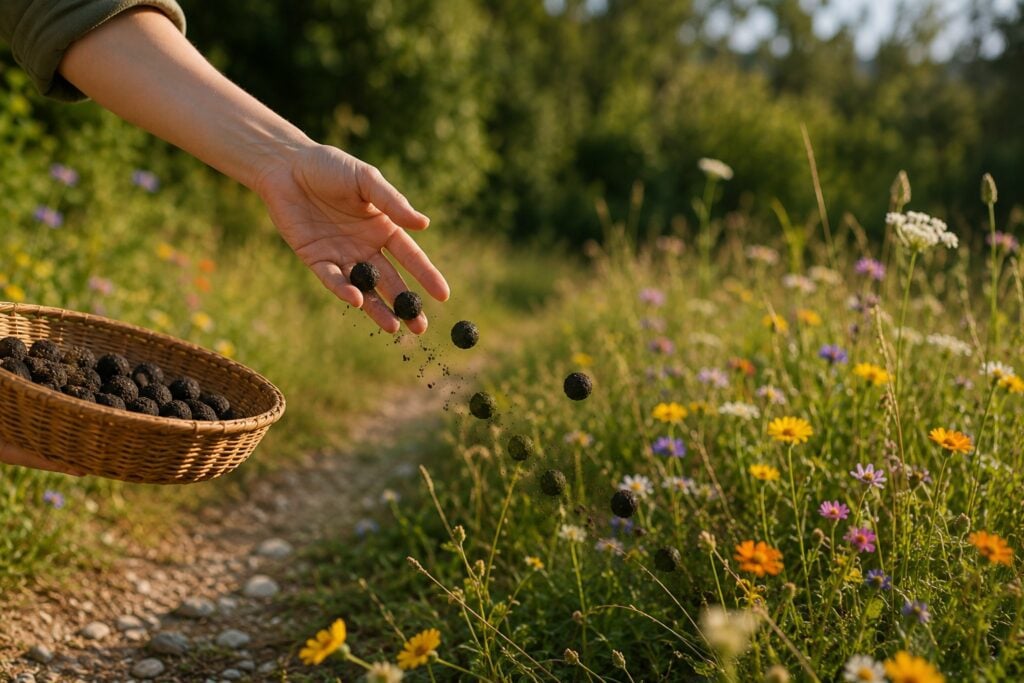
Step 6: Scattering and Planting
One of the best things about seed bombs is how simple planting becomes. Instead of digging complicated rows, I simply toss or place the seed bombs where I want flowers to grow.
I’ve used them successfully in:
- Empty garden corners
- Raised beds
- Roadside edges
- Pollinator gardens
- Containers
- Bare patches near fences
The best timing is usually before expected rainfall because moisture helps soften the seed bomb naturally and encourages germination. After rain arrives, the outer layer slowly breaks down and allows the seeds to begin growing.
My Favorite Seeds for Seed Bombs
Over time, I discovered that some flowers work especially well inside seed bombs. Some of my favorites include:
1. Cosmos
Cosmos quickly became one of my favorite flowers to use in seed bombs because they grow fast, bloom generously, and create a soft, natural look in the garden with very little effort.
I love how their delicate petals move gently in the wind and bring bright shades of pink, white, orange, and purple into empty spaces that once looked dull and lifeless.
One thing I especially appreciate about cosmos is how forgiving they are, even in poor soil or warmer weather.
After scattering seed bombs filled with cosmos seeds, I noticed they germinated surprisingly well and continued blooming for a long time throughout the season.
They also attracted plenty of bees and butterflies, making the garden feel more vibrant, colorful, and full of movement every day.
2. California Poppies
California poppies became one of my favorite flowers for seed bombs because they are incredibly hardy, easy to grow, and able to thrive even in dry or difficult conditions.
I love how their bright orange blooms instantly bring warmth and energy into the garden, especially in empty spaces that previously looked dusty and lifeless.
One thing that impressed me most was how quickly they adapted after rain softened the seed bombs and triggered germination.
Even with minimal care, the plants continued growing strongly and produced cheerful flowers that opened beautifully in the sunlight. They also added a more natural, wild meadow appearance to the garden while attracting bees and other pollinators throughout the season.
3. Black Eyed Susans
Black Eyed Susans became one of the most reliable flowers I’ve ever used in seed bombs because they are tough, vibrant, and incredibly easy to grow in different conditions.
I love how their bright golden petals and dark centers instantly make a garden feel warmer and more alive, especially when planted in large natural looking patches.
After using them in seed bombs, I noticed they germinated consistently and handled heat, sun, and occasional dry weather much better than many other flowers I tried.
They also bloomed for a long time and attracted plenty of bees and butterflies, which brought constant movement and energy into the garden.
What I appreciate most is how effortless they feel once established, making them perfect for beginners or anyone wanting dependable color with very little maintenance.
4. Cornflowers
Cornflowers quickly became one of my favorite additions to seed bombs because their intense blue blooms create such a striking contrast in the garden.
I still remember how surprised I was the first time they bloomed among softer wildflowers, instantly drawing attention with their vivid color and delicate shape.
They germinated very well from seed bombs and adapted easily even in areas where the soil was not perfect.
Besides their beauty, I noticed bees absolutely loved visiting them throughout the day, which made the garden feel constantly alive and active.
Cornflowers also blended beautifully with poppies, cosmos, and other meadow style flowers, helping create a natural, colorful landscape that looked both wild and carefully balanced at the same time.
5. Native Wildflower Mixes
These usually produce the healthiest long term results because they adapt naturally to local conditions.
Native wildflower mixes became my favorite option for seed bombs because they consistently produced the healthiest and most natural looking results in my garden.
I noticed that native flowers adapted much more easily to the local climate, required less watering, and handled changing weather conditions far better than many imported varieties.
Once the seed bombs began sprouting, the plants seemed stronger, more resilient, and more attractive to local bees, butterflies, and other pollinators.
What I love most is how balanced and organic the garden feels when native wildflowers bloom together naturally, creating a colorful meadow effect that changes beautifully throughout the season.
Instead of looking overly designed or artificial, the space feels alive, relaxed, and perfectly connected to the surrounding environment.
Mistakes I Made When Starting
When I first started making seed bombs, I made plenty of small mistakes that taught me important lessons later on. One of my biggest problems was using too much water, which turned the mixture into sticky mud that cracked badly while drying.
I also made the seed bombs far too large, thinking bigger balls would produce more flowers, but they dried unevenly and often failed to break down properly after rain.
Another mistake was planting them during long dry periods when the seeds simply sat in hard soil without enough moisture to germinate.
I even overcrowded some seed bombs with too many seeds, causing the seedlings to compete for space once they sprouted.
Thankfully, after a few experiments and adjustments, the process became much easier and the results improved dramatically with healthier flowers and far better germination rates.
1. Using Too Much Water
Using too much water was one of the first mistakes I made when creating seed bombs, and it caused far more problems than I expected.
In the beginning, I thought a wetter mixture would make the seed bombs easier to shape, but instead it turned into sticky mud that clung to my hands and refused to hold its form properly.
When the seed bombs finally dried, many of them cracked badly or stayed soft in the center for too long, which made storage difficult and reduced germination success later.
I eventually learned that the mixture should feel damp and moldable, not soaked or dripping wet.
Once I found the right balance, the seed bombs became much easier to roll, dried more evenly, and produced much healthier results after planting.
2. Making Giant Seed Bombs
Making giant seed bombs was a mistake I made early on because I assumed larger balls would hold more seeds and create bigger patches of flowers. Instead, the oversized seed bombs took much longer to dry and often cracked unevenly before I could even use them.
Some stayed damp in the center for days, which sometimes caused mold or weak germination later.
I also noticed that larger seed bombs did not break down as easily after rain, making it harder for the seeds inside to reach the soil properly.
Once I started making smaller seed bombs around the size of a golf ball, everything worked much better. They dried faster, held their shape more evenly, scattered more easily, and produced healthier, more successful flower growth overall.
3. Planting During Dry Weather
Planting seed bombs during dry weather was one of the biggest reasons my early attempts failed because the seeds simply did not receive enough moisture to begin germinating properly.
I remember scattering several seed bombs across empty areas of the garden, only to watch them sit there unchanged for weeks under hot, dry conditions.
Without consistent rain or damp soil, the outer layer stayed hard and the seeds inside remained dormant instead of sprouting. Some eventually dried out completely before they even had a chance to grow.
Once I started timing my seed bomb planting just before expected rainfall or during cooler, wetter periods, the results improved dramatically.
The moisture softened the seed bombs naturally, activated the seeds, and helped healthy sprouts appear much faster and more consistently.
4. Using Poor Seed Quality
Using poor seed quality was a mistake that taught me how important good seeds are for successful seed bombs. In the beginning, I used old leftover seed packets that had been sitting around for years, assuming they would still grow normally.
Unfortunately, many of the seeds either germinated very weakly or failed to sprout at all after rain.
Some seedlings emerged thin and unhealthy, while others disappeared quickly before establishing themselves properly.
Once I switched to fresher, higher quality seeds from reliable sources, the difference became obvious almost immediately.
Germination rates improved, the plants grew stronger, and the flowers looked far healthier and more vibrant throughout the season. Good seeds gave the entire project a much better chance of success from the very beginning.
5. Overcrowding Seeds
Too many seedlings competing together reduced growth quality. Overcrowding seeds was another mistake I made early on because I assumed packing more seeds into each seed bomb would create fuller, more colorful flower patches.
Instead, too many seedlings ended up competing for the same water, sunlight, and nutrients once they began sprouting.
I noticed that many of the young plants grew thin, weak, or tangled together instead of developing into healthy flowers.
Some seedlings completely overwhelmed others before they had a chance to establish themselves properly.
Once I started using a more balanced amount of seeds in each seed bomb, the results became much healthier and more natural looking. The plants had enough space to grow stronger roots, spread more evenly, and produce larger, more vibrant blooms throughout the garden.
Why Pollinator Friendly Flowers Matter?
One reason I became passionate about seed bombs is because they help support pollinators naturally. Once my wildflowers began blooming, I started noticing far more:
- Bees
- Butterflies
- Ladybugs
- Hoverflies
The garden suddenly felt more alive and active. Pollinator friendly flowers help strengthen local ecosystems while also making outdoor spaces more beautiful and dynamic.
Even small patches of flowers can provide important food sources for insects.
Why Seed Bombs Are Great for Kids?
Another thing I love about seed bombs is how fun they are for children. Kids enjoy the messy, hands on process while also learning about nature, seeds, flowers, and pollinators.
The excitement becomes even bigger once sprouts start appearing later.
It turns gardening into something playful rather than complicated. I’ve found that seed bombs help children feel personally connected to the growth process because they physically create the planting material themselves.
My Final Thoughts
After making seed bombs many times, I honestly think they are one of the easiest and most rewarding gardening projects anyone can try.
They require very little money, almost no gardening experience, and only a few simple materials.
Yet the results can completely transform empty spaces into colorful, living environments filled with flowers and pollinators.
What I love most is how natural the process feels.
Instead of forcing perfection, seed bombs encourage a softer, more organic style of gardening where nature slowly takes over and surprises you.
Every time I scatter seed bombs before rain arrives, it feels like planting small possibilities into the soil. And weeks later, when flowers begin appearing where bare dirt once existed, the entire process feels incredibly rewarding.


