If there’s one mistake I made when growing clematis for the first time, it was ignoring the roots. I focused so much on the beautiful flowers climbing the wall that I completely forgot what was happening underground.
The plant survived, but it looked weak, dry, and stressed. The blooms were smaller, the leaves curled during hot afternoons, and growth slowed down far too early in the season.
Everything changed after I learned one simple rule that experienced gardeners always repeat.
Clematis loves sunshine on its vines but prefers cool, shaded roots.
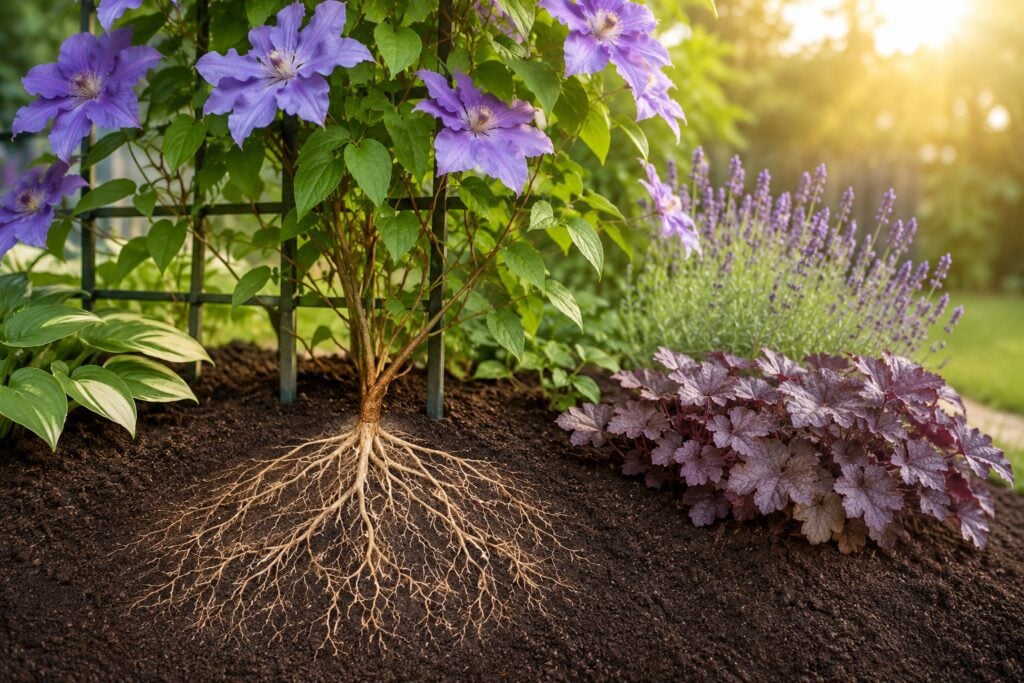
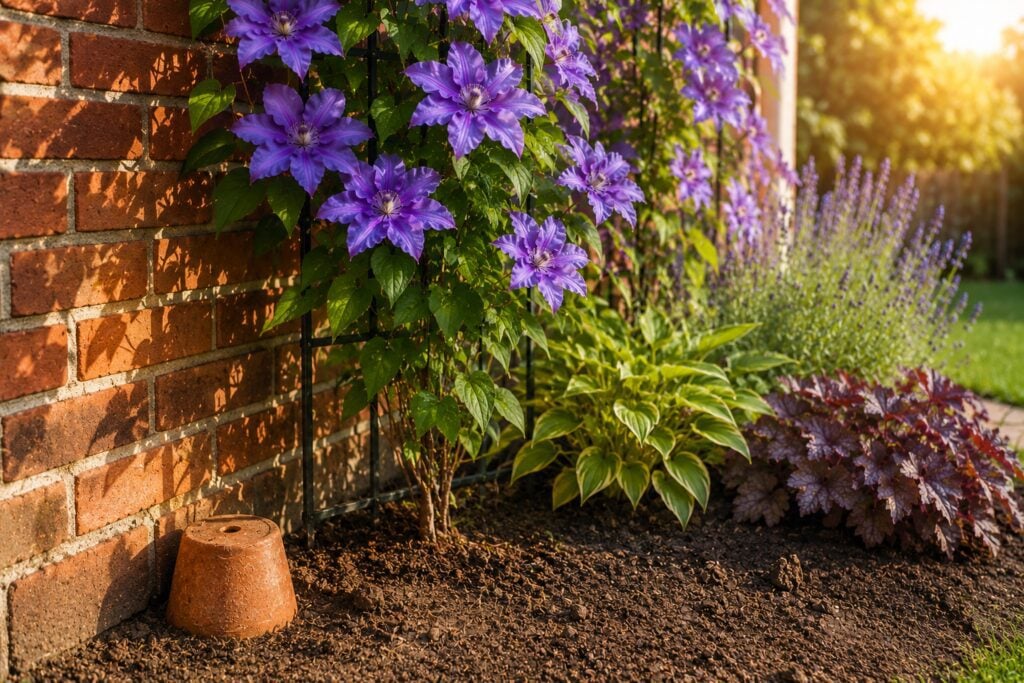
Once I started protecting the root zone properly, the difference was incredible. The plant became fuller, greener, and covered itself with flowers for much longer. The image above perfectly demonstrates this concept.
On one side, the roots are exposed to heat and dry soil. On the other side, a terracotta pot shades the roots while mulch keeps moisture trapped in the soil. That small adjustment creates a huge improvement.
Table of Contents
- Why Clematis Roots Need Shade?
- What Happens When Clematis Roots Are Exposed?
- The Terracotta Pot Trick That Changed Everything
- Why Mulch Makes a Huge Difference?
- My Favorite Companion Plants for Clematis
- Watering Tips That Actually Help
- Why Brick Walls Make Heat Worse?
- Signs Your Clematis Is Happier
- Common Mistakes I See Gardeners Make
- My Final Thoughts
Why Clematis Roots Need Shade?
The first thing I learned about clematis is that it behaves differently from many other flowering climbers. The top growth wants sunlight, but the roots prefer cooler conditions.
In nature, clematis often grows among shrubs, rocks, or other plants that naturally protect the base from direct heat.
In a garden setting, especially against brick walls or fences, the soil can become extremely hot during the afternoon. That heat travels directly into the root system.
When roots overheat, the plant begins to struggle. I noticed several warning signs in my own garden:
- Leaves drooping even after watering
- Dry soil only hours after irrigation
- Fewer flowers
- Weak new growth
- Brown or crispy leaf edges
- Slower climbing
At first, I thought the problem was lack of fertilizer. Then I assumed I needed more water. But the real issue was root temperature.
Once the root zone stays cooler, the plant can hold moisture better, absorb nutrients more effectively, and continue producing healthy growth throughout the season.
What Happens When Clematis Roots Are Exposed?
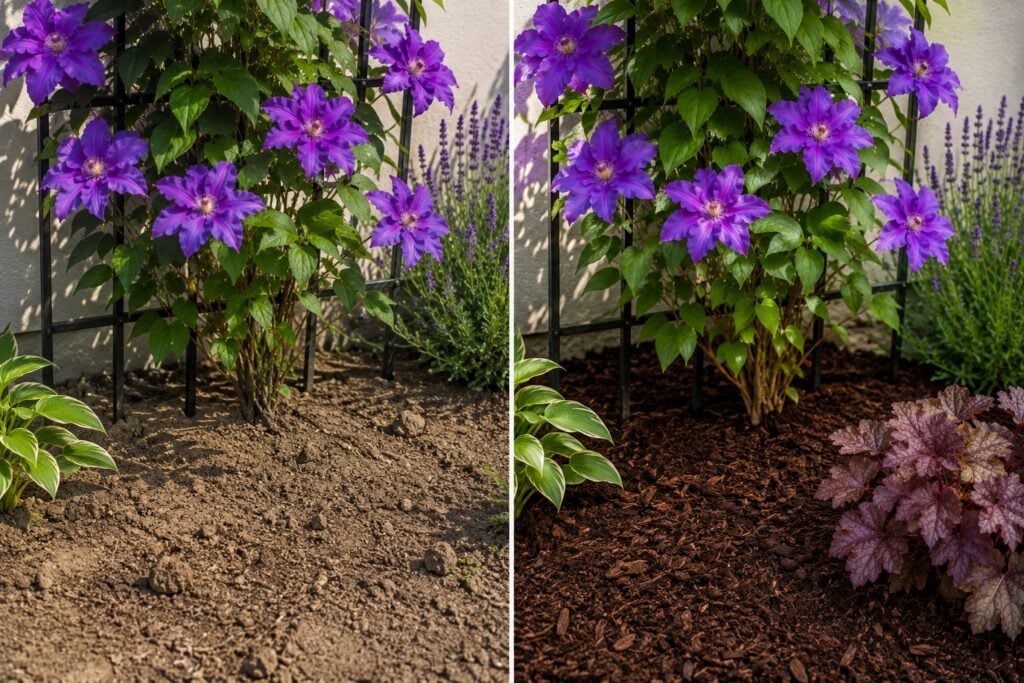
The left side of the image shows a common gardening mistake. The roots are exposed to direct sunlight, and the surrounding soil looks dry and compacted.
I used to think exposed soil helped plants “breathe,” but with clematis, it often creates stress instead.
Hot soil dries rapidly, especially near brick walls because bricks absorb and radiate heat. During summer afternoons, the ground temperature can become far hotter than the air temperature itself.
When this happens, the clematis root system works overtime trying to survive. Instead of using energy for flowers and foliage, the plant spends its energy dealing with stress.
I remember touching the soil around my clematis one afternoon and being shocked by how warm it felt. The surface was almost too hot to keep my hand on comfortably.
Meanwhile, the leaves looked tired and lifeless despite regular watering.
That was the moment I realized cooling the roots was just as important as watering the plant.
The Terracotta Pot Trick That Changed Everything
One of the easiest methods I started using was placing an upside down terracotta pot near the base of the plant, just like the image demonstrates.
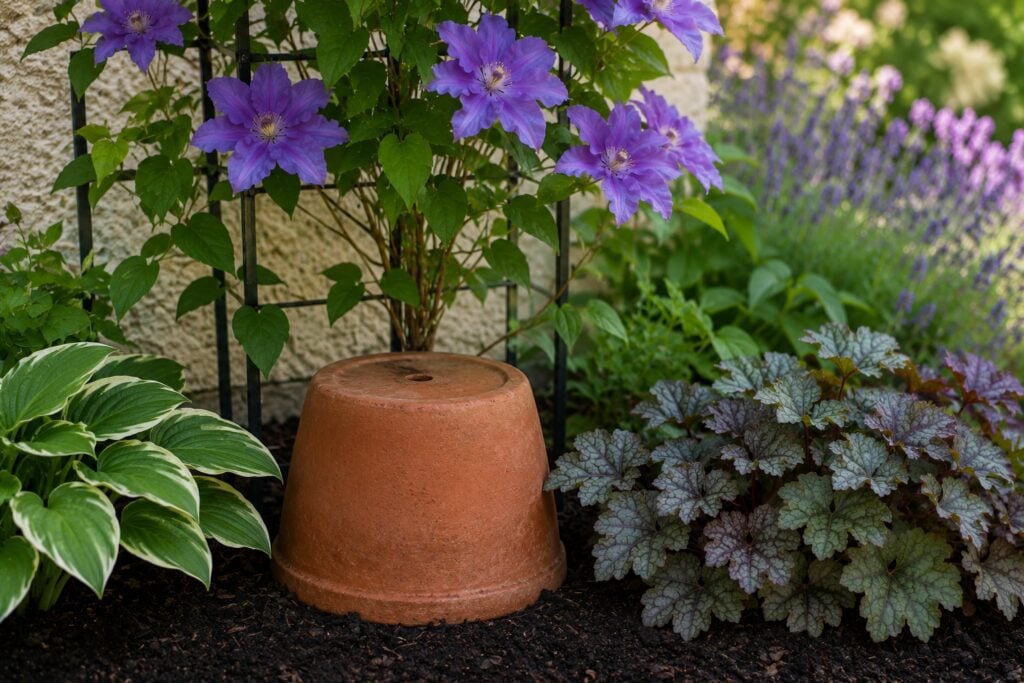
This technique works surprisingly well because terracotta naturally helps regulate temperature. Instead of sunlight directly hitting the soil, the pot creates shade over the root zone.
The benefits became obvious very quickly in my garden.
1. Cooler Soil Temperature
The shaded area beneath the pot stays significantly cooler during the hottest parts of the day. Even when the surrounding soil feels warm, the protected area remains comfortable for the roots.
One thing I noticed almost immediately after shading my clematis roots was how much cooler the soil stayed throughout the day.
Before, the ground would become dry and warm very quickly under direct sunlight, especially near the brick wall where heat reflected back onto the plant.
After placing a terracotta pot over the root zone and adding mulch around the base, the soil remained noticeably damp and cool even during hot afternoons.
This cooler environment reduced stress on the roots, helped the plant retain moisture longer, and encouraged healthier growth overall.
My clematis stopped looking tired during the day and began producing stronger vines and more vibrant flowers because the roots finally had the stable conditions they needed to thrive.
2. Better Moisture Retention
After I started shading the roots and adding a thick layer of mulch around my clematis, I noticed the soil stayed moist far longer than before.
Previously, the ground would dry out only a few hours after watering, especially during warm and windy days, forcing me to water constantly just to keep the plant from looking stressed.
Once the root zone was protected, the moisture remained trapped in the soil instead of evaporating quickly under the sun.
This helped the roots absorb water more steadily, reduced heat stress, and made the entire plant look healthier and fuller.
I also found that deep watering became much more effective because the soil could actually hold the moisture instead of losing it rapidly to the heat.
3. Less Stress During Heatwaves
During intense summer heatwaves, my clematis used to look exhausted by midday no matter how much I watered it. The leaves would droop, the flowers faded faster, and the entire plant seemed stressed from the constant heat.
After I began protecting the roots with shade and mulch, the difference during hot weather became surprisingly noticeable.
The cooler root zone helped the plant stay hydrated longer and reduced the shock caused by extreme temperatures. Even on very hot afternoons, the foliage remained firmer and healthier, and the plant continued growing instead of struggling to survive.
I realized that keeping the roots cool gave my clematis the stability it needed to handle heatwaves far more effectively.
4. Cleaner Garden Appearance
One unexpected benefit I discovered from shading my clematis roots was how much cleaner and more polished the garden started to look.
Before, the exposed dry soil around the base made the area feel unfinished and messy, especially during hot weather when the ground became cracked and dusty.
Adding a terracotta pot and a layer of mulch instantly created a softer, more intentional appearance that blended beautifully with the climbing vine and surrounding plants.
The terracotta added warmth and texture, while the mulch gave the garden bed a tidy and well maintained look.
It made the entire planting area feel more balanced and visually appealing without requiring expensive landscaping or complicated changes.
Why Mulch Makes a Huge Difference?
Adding mulch around clematis is another simple step that made a massive improvement in my garden.
Before using mulch, the soil dried out incredibly fast. Water would evaporate quickly, especially during windy days. After mulching, the moisture remained trapped in the soil far longer.
Mulch acts like insulation for the ground. It protects the roots from temperature swings while reducing evaporation. I usually use:
- Bark mulch
- Wood chips
- Straw
- Leaf compost
- Pine bark
The key is keeping the mulch a few inches away from the main stem so excess moisture does not cause rot.
A thick mulch layer also improves soil structure over time. As organic mulch breaks down, it feeds the soil naturally and encourages healthier root development.
After several months of mulching consistently, I noticed the soil became darker, softer, and easier to work with.
My Favorite Companion Plants for Clematis
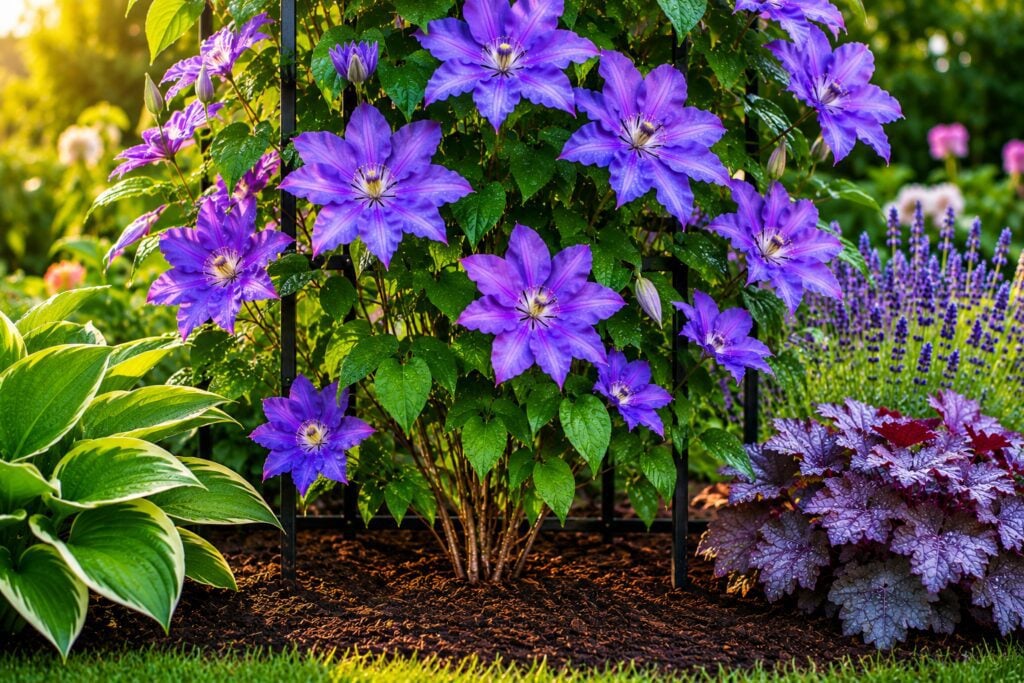
Another method I personally enjoy is planting low growing companions around the base of the clematis. This creates natural shade while making the garden look fuller and more layered.
Some companion plants I’ve had success with include:
1. Hostas
Hostas quickly became one of my favorite companion plants for clematis because their large, leafy foliage naturally shades the soil and keeps the root zone cooler throughout the day.
I love how their soft green leaves spread around the base of the vine, creating a lush and layered garden look while also helping the soil retain moisture longer.
Before planting hostas nearby, the ground around my clematis would heat up and dry out much faster under direct sunlight.
Once the hostas filled in the area, the difference was obvious. The soil stayed cooler, watering became more effective, and the clematis looked healthier overall.
Besides the practical benefits, the contrast between the elegant climbing flowers and the rich hosta foliage made the entire garden corner feel fuller, calmer, and more visually balanced.
2. Heuchera
Heuchera became one of my favorite plants to pair with clematis because it combines beauty and function so naturally in the garden. Its colorful foliage spreads gently around the base of the vine, helping shade the soil and protect the roots from harsh afternoon heat.
I especially love how the deep purple, bronze, or bright green leaves create a beautiful contrast against the climbing flowers, making the entire area feel more vibrant and layered.
Beyond appearance, I noticed the soil stayed cooler and retained moisture longer once the heuchera filled in around the base.
The clematis seemed less stressed during warm weather, and the garden looked more balanced and alive throughout the season.
3. Lavender
Lavender turned out to be one of the most beautiful and practical companion plants I’ve used around my clematis. Its soft purple flowers and fragrant foliage add a calming garden atmosphere while naturally helping shade the soil near the roots.
Since lavender thrives in sunny conditions, it pairs surprisingly well with clematis growing against warm walls or fences.
I noticed that once the lavender matured around the base, the soil stayed cooler and dried out less quickly during hot afternoons.
The combination also created a stunning visual contrast between the climbing blooms above and the compact lavender below, making the garden feel fuller, more colorful, and much more inviting throughout the growing season.
4. Small Ornamental Grasses
These create movement and texture while helping reduce direct sunlight exposure near the base. I love this approach because it makes the garden feel more natural instead of looking overly designed.
Watering Tips That Actually Help
One mistake I made early on was shallow watering. I watered frequently but only lightly, which caused the roots to stay near the surface where heat is strongest.
Now I water deeply but less often.
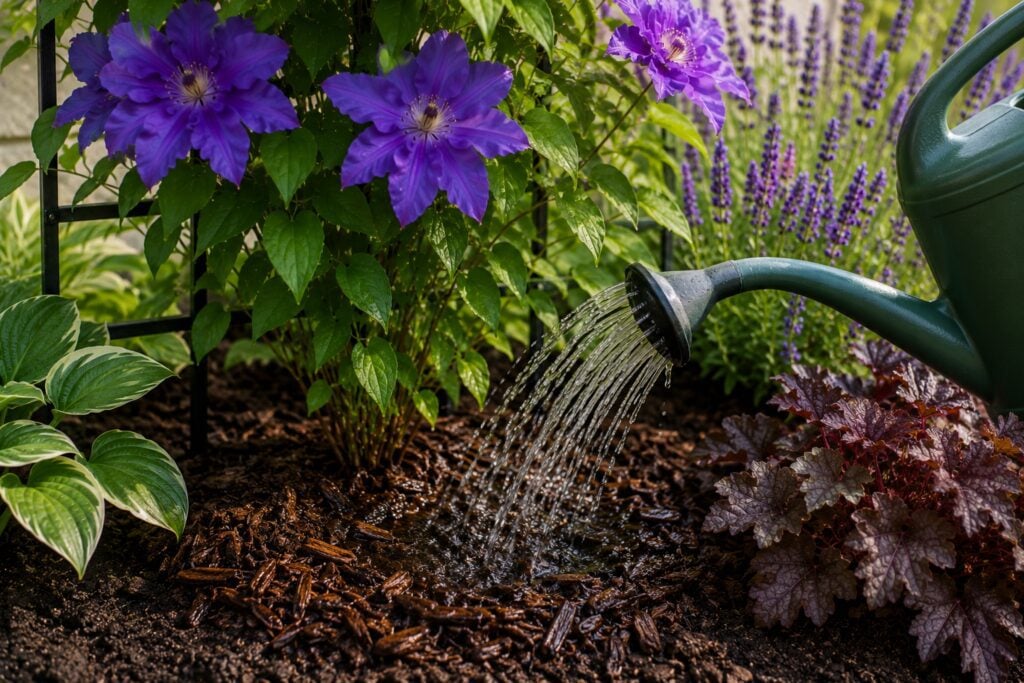
Deep watering encourages roots to grow downward into cooler soil layers. That makes the plant more resilient during hot weather. Here’s the routine I personally follow:
- Water slowly at the base
- Avoid spraying leaves excessively
- Water early in the morning
- Check soil moisture before watering again
- Add mulch after watering
Morning watering works best because the plant has time to absorb moisture before afternoon heat arrives. I also avoid watering during intense midday heat because much of the moisture evaporates too quickly.
Why Brick Walls Make Heat Worse?
The image above shows clematis growing against a brick wall, which is very common in gardens. While brick walls look beautiful with climbing plants, they also create extra heat challenges.
Bricks absorb sunlight throughout the day and slowly release heat back into the surrounding environment. That means the root zone experiences heat from both above and behind.
I learned this the hard way when my clematis near a south facing wall struggled much more than the one growing near a wooden fence. If your clematis grows against brick or stone, root protection becomes even more important.
In those situations, I strongly recommend:
- Thick mulch
- Terracotta shading
- Companion plants
- Consistent deep watering
These small adjustments can completely change how the plant performs.
Signs Your Clematis Is Happier
Once I started protecting the roots properly, the improvements became obvious within weeks. Healthy clematis usually shows:
- Strong green foliage
- More flower buds
- Longer blooming periods
- Faster climbing growth
- Less afternoon wilting
- Healthier stems
One of the biggest differences I noticed was flower production. The blooms became larger, more vibrant, and appeared for a longer period throughout the season.
The plant simply looked more alive.
Common Mistakes I See Gardeners Make
One of the most common mistakes I see gardeners make with clematis is focusing only on the flowers and forgetting how important the roots are. Many people plant clematis in full sun without protecting the base, leaving the soil exposed to intense heat that dries it out quickly.
I made the same mistake when I first started growing clematis and couldn’t understand why the plant looked stressed even after regular watering.
Another issue I often notice is shallow watering, which encourages weak surface roots instead of deep, healthy growth.
Some gardeners also skip mulch entirely or place the plant too close to hot brick walls without providing any root shade.
These small mistakes may not seem serious at first, but over time they can lead to weaker growth, fewer blooms, and a plant that struggles during warm weather.
1. Leaving Soil Bare
Leaving the soil bare around clematis is a mistake I used to make without realizing how much stress it caused the plant. Exposed soil absorbs direct sunlight all day, which quickly raises the temperature around the roots and causes moisture to evaporate much faster.
During hot weather, I noticed the ground became dry, hard, and warm within just a few hours after watering, leaving the clematis struggling to stay hydrated.
Once I started covering the soil with mulch and companion plants, the difference was immediate.
The soil stayed cooler, moisture lasted longer, and the entire plant looked healthier and less stressed.
Bare soil may seem harmless, but for clematis, protecting the root zone makes a huge difference in overall growth and blooming performance.
2. Planting Too Close to Hot Surfaces
Planting clematis too close to hot surfaces like brick walls, concrete paths, or stone fences is something I learned can create serious stress for the plant, especially during summer.
These surfaces absorb heat throughout the day and slowly release it back into the surrounding soil, causing the root zone to become much warmer than expected.
I noticed this problem clearly with one of my clematis plants growing beside a sunny brick wall where the soil dried out extremely fast and the leaves often wilted by afternoon.
Even regular watering did not fully solve the issue because the roots were constantly exposed to trapped heat.
Once I added mulch, shaded the base, and created more protection around the roots, the plant recovered noticeably and began growing much more vigorously.
3. Using Thin Mulch Layers
Using mulch is incredibly helpful for clematis, but I learned that applying a very thin layer often does not provide enough protection for the roots.
In the beginning, I only sprinkled a small amount of mulch around the base, thinking it would be enough to keep the soil cool and moist.
Unfortunately, the heat still reached the soil quickly, and moisture continued evaporating faster than expected during warm days.
Once I started using a thicker mulch layer, the difference became much more noticeable. The soil stayed cooler for longer periods, watering became more effective, and the clematis looked healthier and less stressed overall.
A proper mulch layer acts like insulation for the roots, helping protect the plant from both heat and sudden temperature changes throughout the season.
4. Overwatering Shallowly
Overwatering shallowly was one of the biggest mistakes I made when caring for my clematis because I assumed frequent light watering would keep the plant healthy.
Instead, it encouraged the roots to stay near the surface where the soil heats up and dries out the fastest. During hot weather, the plant would still become stressed even though I was watering almost every day.
I eventually realized that shallow watering was preventing the roots from growing deeper into the cooler, more stable soil below.
Once I switched to deep, slower watering less often, the roots became stronger and the clematis handled heat much better.
The soil stayed moist longer, the foliage looked healthier, and the plant became far more resilient during warm afternoons.
5. Ignoring Root Protection Entirely
Many gardeners focus only on sunlight for the vines while forgetting the roots completely. I made nearly all of these mistakes myself before understanding what the plant truly needed.
My Final Thoughts
Clematis may look delicate, but once its roots are protected properly, it becomes surprisingly strong and rewarding to grow.
The biggest lesson I learned is that healthy flowers begin underground. Beautiful vines and blooms are simply the result of a comfortable root system.
Now, whenever I plant a new clematis, I immediately think about root shade before anything else. Whether I use a terracotta pot, mulch, companion plants, or all three together, protecting the base has become part of my routine.
And honestly, it’s one of the simplest gardening tricks with one of the biggest results.
If your clematis looks stressed, dry, or slow growing, the answer might not be more fertilizer or more water. Sometimes the plant is simply asking for cooler roots.


