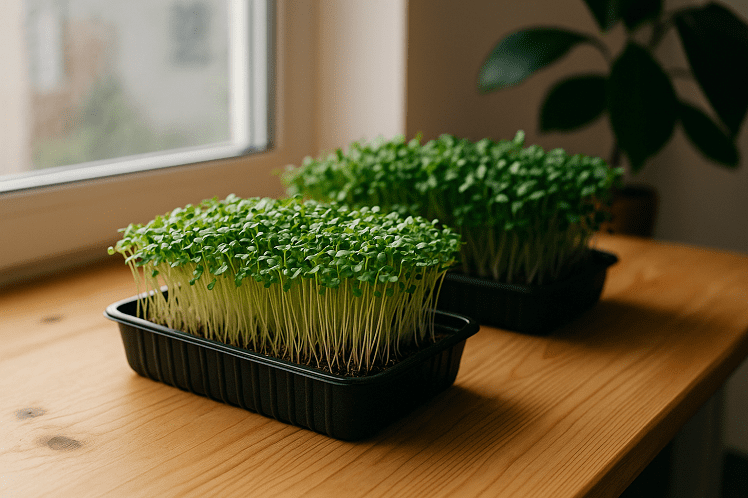
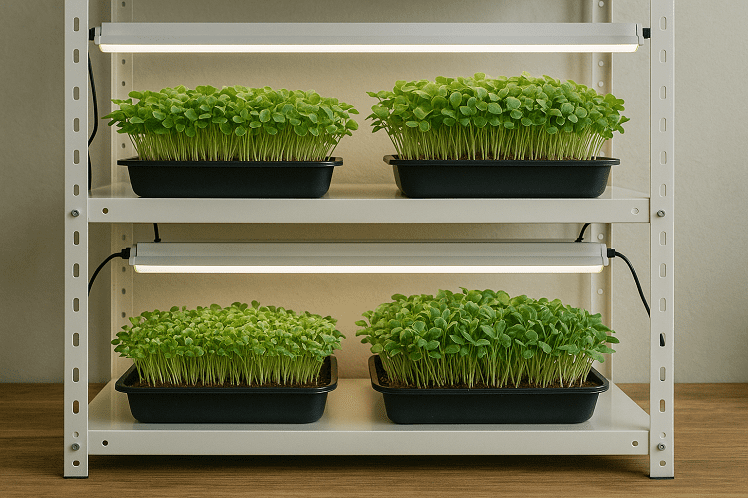
Growing microgreens has become one of my favorite gardening routines. They grow fast, don’t need much space, and are packed with nutrients. But over time, I learned that the real secret isn’t just how you grow them, it’s when you harvest them. Harvesting microgreens at the right stage makes all the difference in taste, texture, and even their shelf life.
Here’s exactly how I decide when to harvest my microgreens and what steps I follow to get the best results every time.
Table of Contents
- Understanding the Growth Stages of Microgreens
- Recognizing the Signs That Microgreens Are Ready
- Tools and Preparation Before Harvesting
- The Right Way to Harvest Microgreens
- Cleaning and Drying After Harvest
- Storing Microgreens for Freshness
- How I Extend the Harvest Window?
- Different Harvest Times for Common Microgreens
- How Harvest Timing Affects Flavor and Nutrition?
- What I’ve Learned About Harvesting Microgreens?
Understanding the Growth Stages of Microgreens
Before I ever started harvesting properly, I used to cut them too early or too late. The result was either weak, flavorless greens or bitter, fibrous ones.
Microgreens go through three simple stages:
- Germination. This is when the seeds sprout and form small roots.
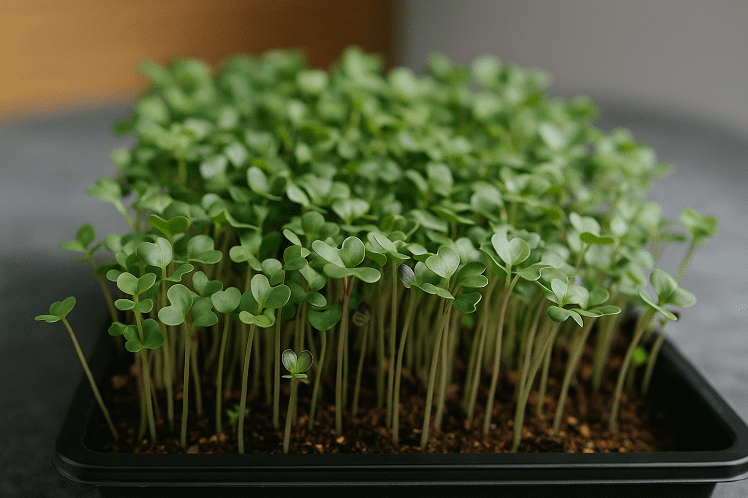
- Cotyledon stage. The first two leaves (called seed leaves) appear. They’re smooth, tender, and full of nutrients.
- True leaf stage. After a few days, the first set of true leaves grows. These are usually smaller and shaped differently from the seed leaves.
For most microgreens, the best harvesting time is when they’re between 7 to 14 days old, when the cotyledons are fully opened and the first true leaves just start to appear. That’s when the flavor is mild, the stems are crisp, and the nutrition level is at its peak.
Recognizing the Signs That Microgreens Are Ready
Every type of microgreen grows at a slightly different rate, but I’ve found a few reliable signs to look for:
- The plants are about 2 to 3 inches tall.
- The cotyledon leaves are open and vibrant in color.
- The stems are firm but not woody.
- You can see the first tiny true leaves beginning to form.
I usually grow several varieties at once (like radish, broccoli, kale, sunflower, and pea shoots) and each has its own perfect window. For example, radish microgreens are ready in 7 to 8 days, while pea shoots may take closer to 14 days.
When I’m not sure, I gently pinch a stem and taste it. If it’s crisp and flavorful, it’s ready to harvest.
Tools and Preparation Before Harvesting
Before I harvest, I always prepare my tools and workspace. Keeping things clean makes a big difference in shelf life and prevents contamination.
Here’s what I prepare:
- Sharp scissors or a clean knife (A clean, sharp edge gives a neat cut and prevents crushing the stems).
- Clean cutting surface or tray (I use a tray lined with paper towels to collect the microgreens as I cut them).
- Cool storage container (If I don’t use them right away, I prepare airtight containers or resealable bags lined with dry paper towels).
I wash and dry my tools before every harvest. Any leftover residue or moisture can introduce bacteria and cause spoilage later.
The Right Way to Harvest Microgreens
I always harvest in the morning, right after the greens have absorbed moisture overnight but before they experience the heat of the day. This helps preserve their freshness and crisp texture.
Here’s my harvesting process:
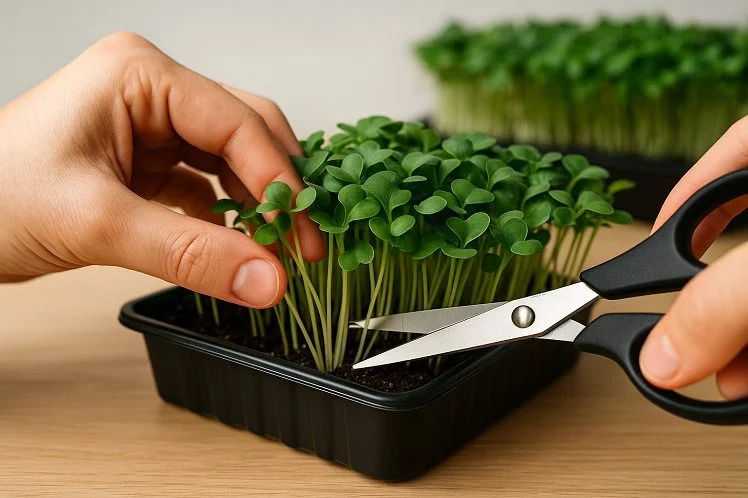
- I gently hold a handful of microgreens near the base.
- Using scissors or a knife, I cut them about half an inch above the soil line. Cutting too low can introduce dirt, while cutting too high wastes part of the stem.
- I let the harvested greens fall gently onto a clean tray instead of piling them up. Stacking them can bruise the delicate stems.
- I avoid watering the plants right before harvest. Wet leaves are harder to cut cleanly and can shorten storage life.
After cutting, I inspect the tray and remove any seed hulls or discolored leaves before washing.
Cleaning and Drying After Harvest
Once I’m done harvesting, I rinse the microgreens in cold, clean water to remove soil particles and seed shells. I swish them gently — never scrub or press them, because the leaves are delicate.
After rinsing, I spread them on a clean towel or use a salad spinner to dry them completely. Moisture is the main reason microgreens spoil quickly, so drying them well is important if I plan to store them.
If I’m eating them immediately, I skip the drying process and rinse just before serving.
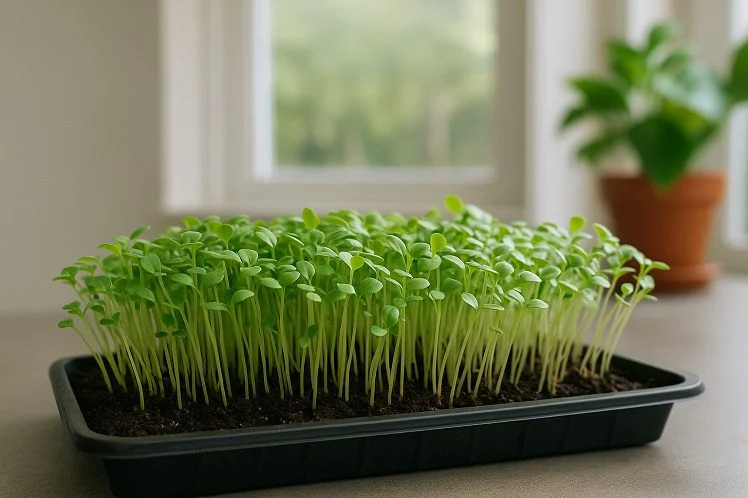
Storing Microgreens for Freshness
When stored properly, microgreens can stay fresh for up to five to seven days. I use these steps to keep them crisp:
- I line a container with dry paper towels to absorb moisture.
- I loosely pack the microgreens inside (never press them down).
- I cover and store them in the refrigerator’s vegetable drawer.
If any condensation appears inside the container, I replace the paper towel to keep it dry. This simple habit keeps them from turning soggy or moldy.
How I Extend the Harvest Window?
I don’t harvest all at once unless I plan to sell or share them. For personal use, I harvest a portion each day. Microgreens can stay healthy under lights for another few days if they’re kept moist and not overcrowded.
For slower-growing types like sunflower or pea shoots, I start cutting from one side of the tray and move across over several days. This way, I always have fresh microgreens ready to eat without losing quality.
If the greens start growing too tall or develop tougher stems, I harvest them immediately before they lose their mild flavor.
Different Harvest Times for Common Microgreens
Here are the time frames I’ve found most reliable for the varieties I grow most often:
- Radish: 6 to 8 days
- Broccoli: 8 to 10 days
- Kale: 9 to 11 days
- Sunflower: 10 to 12 days
- Pea shoots: 12 to 14 days
- Basil: 14 to 16 days
These aren’t fixed rules, but they’re a good starting point. The key is to observe the color, height, and leaf development.
How Harvest Timing Affects Flavor and Nutrition?
I used to think microgreens would taste the same no matter when I picked them, but that’s not true. Timing affects both flavor and nutritional content.
If harvested too early, they taste bland and lack texture. If harvested too late, they can become fibrous and bitter. At the ideal stage (just as the true leaves start forming) they contain the highest levels of vitamins A, C, E, and K, and the flavor is fresh, slightly sweet, and concentrated.
Different varieties have distinct flavor profiles: radish is spicy, pea shoots are sweet, and sunflower greens are nutty. Getting the timing right helps each one reach its best taste.
What I’ve Learned About Harvesting Microgreens?
Harvesting microgreens taught me that observation matters more than the calendar. Every growing condition like temperature, humidity, and light, affects timing. Instead of relying only on the number of days, I look for signs of maturity like height, leaf color, and texture.
I’ve also learned that freshness begins at harvest. Clean tools, dry hands, and cool conditions keep microgreens at their best. Now, I spend a few extra minutes preparing before I cut, it saves me from losing an entire batch to spoilage later.
Microgreens are forgiving plants. Even if I harvest a little late, they’re still better than store-bought ones that sit for days. But hitting that perfect window (crisp stems, bright leaves, and full flavor) is always worth the effort.


