When it comes to creating an outdoor oasis, the right patio can completely transform your garden. One of the most budget-friendly and creative ways to achieve this is by using wooden pallets.
Over the years, DIY pallet decking has gained massive popularity among garden enthusiasts, and I’m here to share my experience with you on how to create a stunning outdoor space using pallets.
Whether you want a cozy corner for relaxation or a perfect spot for entertaining guests, pallet decking offers endless possibilities.
Table of Contents
- Choosing the Right Pallets for Your Project
- Preparing the Ground for Your Pallet Deck
- Assembling the Pallets: Step-by-Step Guide
- Sanding and Staining the Wood for a Sleek Finish
- Adding Comfort and Style to Your Pallet Patio
- Maintenance Tips to Keep Your Pallet Patio Looking Great
- Enjoy Your DIY Pallet Patio
Choosing the Right Pallets for Your Project
When embarking on a DIY pallet project, choosing the right pallets is the foundation of a successful build. Whether you’re crafting furniture, decking, or garden features, selecting sturdy, reliable pallets ensures your project will stand the test of time.
In this section, I’ll guide you through the key factors to consider when choosing pallets, so you can make an informed decision and set yourself up for a smooth and rewarding experience.
1. Picking the Right Pallets
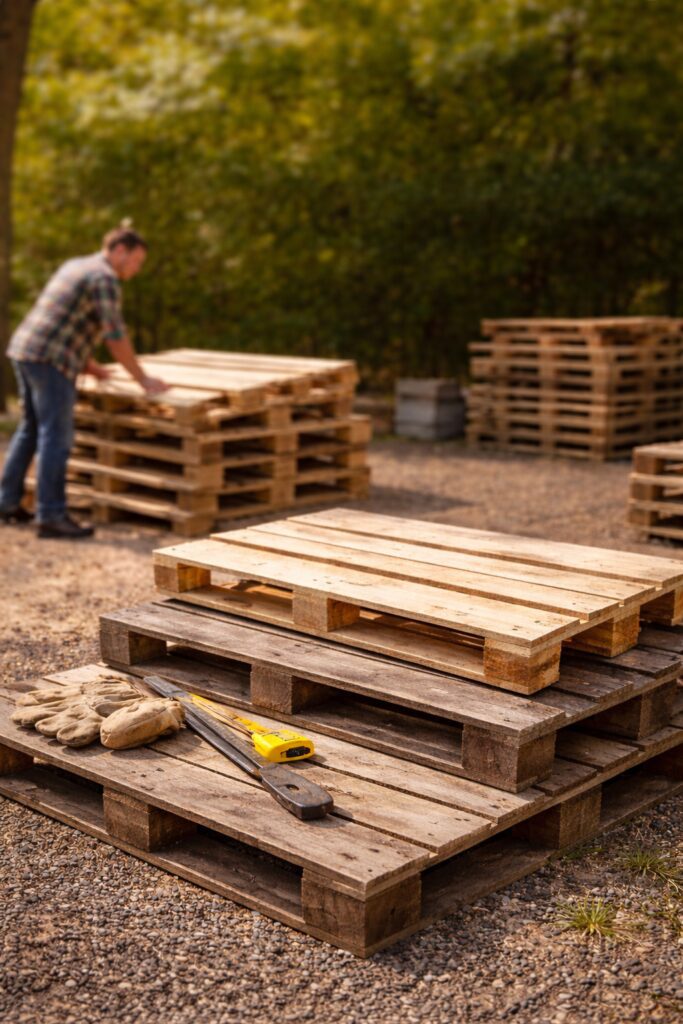
The first step in building a DIY pallet patio is choosing the right pallets. Not all pallets are created equal, so selecting sturdy, well-maintained pallets is essential.
I always recommend checking for pallets that have minimal damage, no splinters, and are made of solid wood.
Some of the best pallets are those marked with the “HT” symbol, which stands for “heat-treated.” This indicates that the pallet has been treated to avoid pests, making it a safer choice for outdoor projects.
I personally avoid chemically treated pallets marked with “MB” as the chemicals can be harmful.
2. What to Look for in Pallets?
When it comes to building a durable and functional DIY project, not all pallets are created equal. The quality of the pallet you choose can significantly impact the success and longevity of your creation.
From wood type to condition, there are several factors to keep in mind when selecting pallets.
- Condition: Make sure the pallets are free from cracks or broken slats. They need to be strong enough to support weight.
- Size: Pallets come in different sizes, so choose one that fits your patio space and meets your design needs. The standard pallet size is 48×40 inches, but you can find larger or smaller pallets depending on your project.
- Wood Type: The type of wood matters for durability and appearance. Look for pallets made from hardwood (like oak or pine) for longevity.
Preparing the Ground for Your Pallet Deck
Before you start laying down your pallets to create the perfect outdoor deck, proper ground preparation is essential to ensure stability and longevity.
A well-prepared foundation will prevent issues like uneven surfaces, water drainage problems, and shifting over time.
1. Creating a Solid Foundation
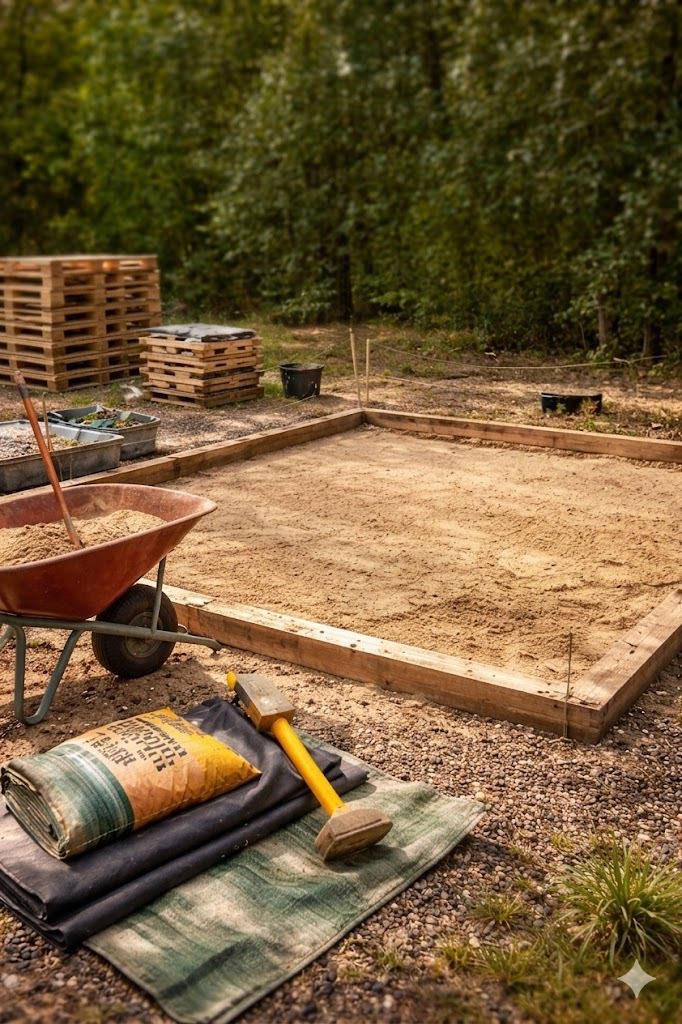
Before laying down the pallets, you must ensure that the ground is prepared and level. I found that clearing the area of weeds, debris, and rocks is crucial.
This helps prevent any uneven surfaces once the pallets are laid down.
2. How to Level the Ground?
Leveling the ground is a critical step in creating a sturdy foundation for your pallet deck. Without a smooth, even surface, your pallets could shift, leading to instability and wear over time.
Whether you’re working with a small garden space or a larger backyard, properly leveling the ground ensures that your deck will be both functional and aesthetically pleasing.
- Remove Any Grass or Weeds: Use a shovel or a garden hoe to clear the area. If you’re dealing with stubborn weeds, consider using a weed barrier fabric.
- Level the Soil: If the ground is uneven, use a rake to level it out. For larger patios, you may need to use a shovel and level it manually.
- Compact the Soil: After leveling, I always compact the soil to create a solid base. A tamper tool can be used to ensure the soil is firm.
Having a level and clean surface is key to a successful pallet patio because this foundation ensures stability for your decking.
Assembling the Pallets: Step-by-Step Guide
Assembling the pallets is where your DIY project truly starts to come together, transforming a pile of wood into a beautiful and functional outdoor deck.
While it might seem like a daunting task, with the right approach and tools, the process is straightforward and incredibly rewarding.
In this step-by-step guide, I’ll walk you through the entire assembly process, from laying down the first pallet to securing them all together for a sturdy, long-lasting deck.
Let’s dive in and turn those pallets into the perfect outdoor retreat!
1. Laying the Pallets
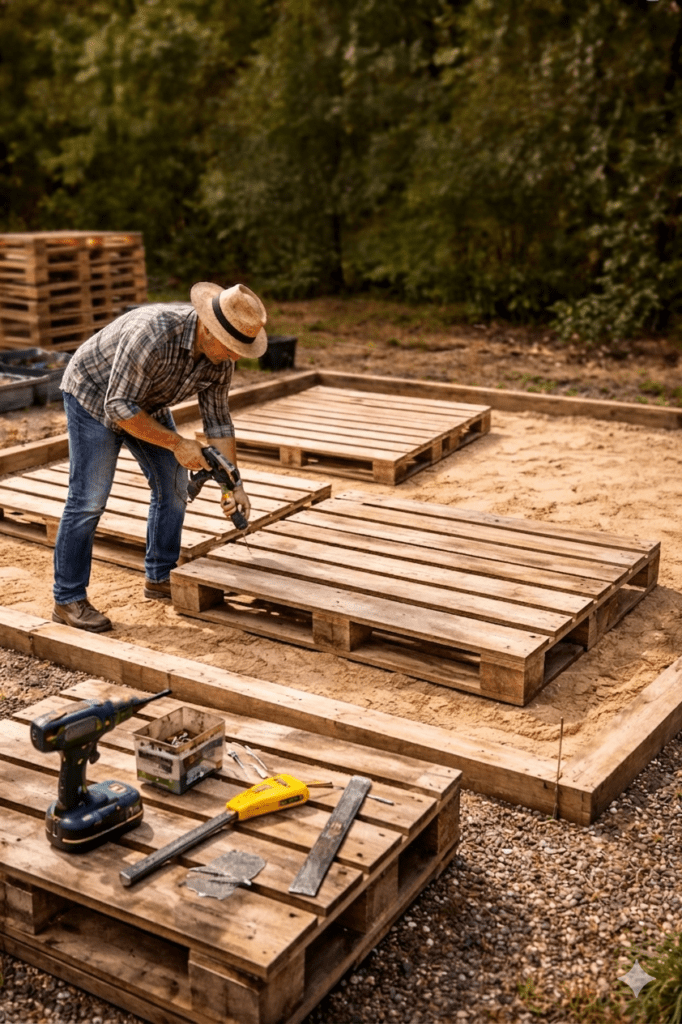
Once the ground is ready, it’s time to start assembling the pallets. Begin by laying the pallets in a row, side by side, in your desired pattern.
I like to leave a small gap between each pallet for better drainage, which is important for avoiding water accumulation underneath the patio.
2. Joining the Pallets
To ensure that the pallets stay together, I use screws to attach them at the corners. You can use a drill to make small pilot holes to avoid splitting the wood.
I’ve found that 2.5-inch screws work well to hold the pallets securely. As you attach them, be sure to check the alignment to ensure they are perfectly straight.
For added strength, I like to add cross-support beams underneath the pallets. These beams help prevent any sagging over time and add stability to the entire structure. Simply cut the wood beams to the length of the pallets and screw them into place.
3. Creating the Desired Shape
Now that the basic structure is in place, you can customize the shape. I opted for a rectangular design, but you can go for circular or other creative shapes depending on your garden layout.
If you want to add extra flair, you can leave a section open for planting or add a border around the pallets.
Sanding and Staining the Wood for a Sleek Finish
Sanding and staining are essential steps in bringing out the natural beauty of your pallet deck while also ensuring its durability against the elements.
These finishing touches not only smooth out rough surfaces but also add depth and character to the wood.
Whether you’re aiming for a rustic, natural look or a sleek, modern finish, the right sanding and staining techniques will elevate your project to the next level.
1. Sanding the Pallets
Once the pallets are secured, I highly recommend sanding the surface to remove any rough spots and splinters. You want the patio to be comfortable to walk on, especially if you plan to use it for sitting or eating.
I use a power sander for this task, but if you don’t have one, a sanding block will do the job as well. Make sure to sand the edges and the top of the pallets thoroughly to smooth out any imperfections.
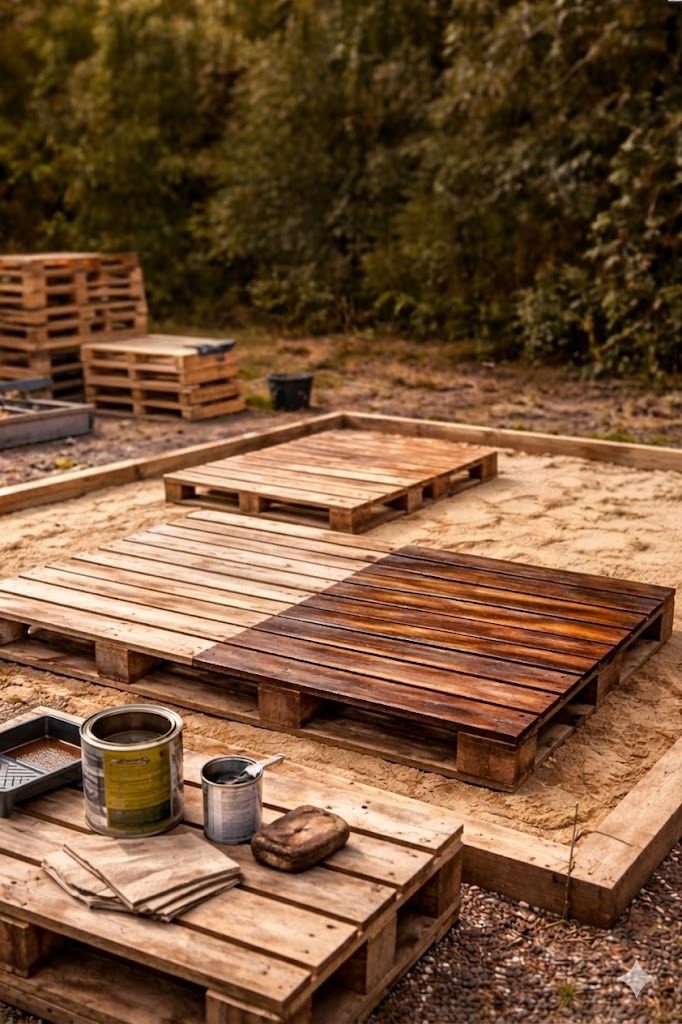
2. Staining or Painting the Pallets
To protect the wood from the elements, I stain or paint the pallets. I prefer using an outdoor wood stain because it penetrates the wood, protecting it from moisture while maintaining its natural look.
If you prefer a splash of color, outdoor paint works too!
For extra protection, I apply a coat of clear sealant after staining. This step helps the stain last longer and gives the wood a polished finish.
Adding Comfort and Style to Your Pallet Patio
Once your pallet patio is assembled and finished, it’s time to add the comfort and style that will truly make it your own. This is where your personal touch comes in, from cozy seating to beautiful decor, turning a functional outdoor space into a relaxing retreat.
1. Outdoor Furniture and Accessories
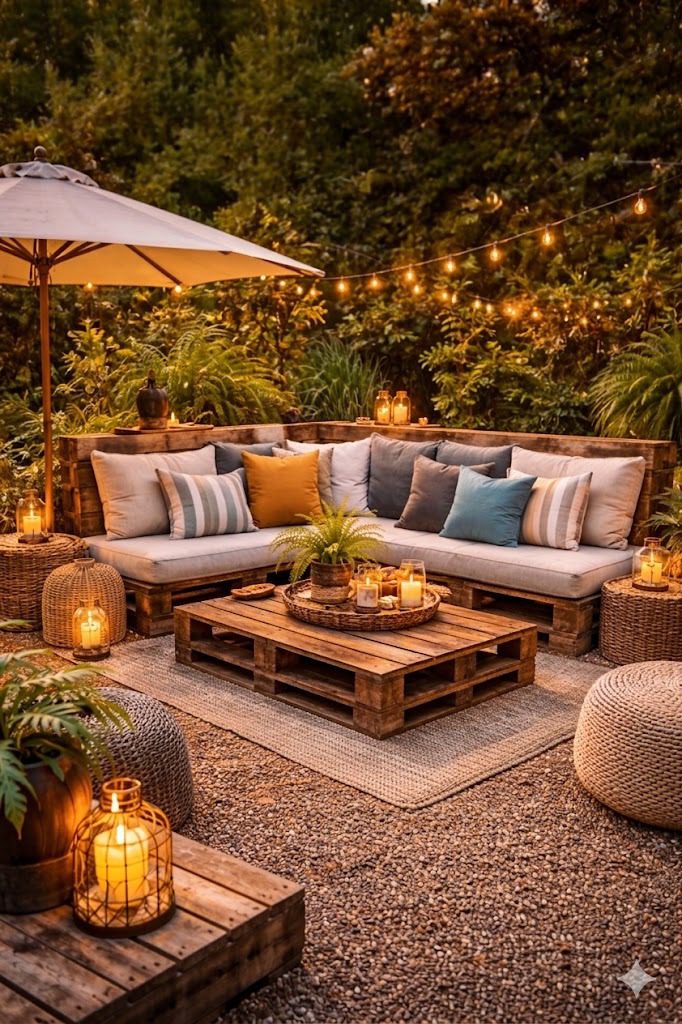
Now comes the fun part—decorating! A pallet patio isn’t complete without comfortable seating and stylish decor. I added a few chairs, a small table, and some cushions to create a cozy seating area.
You can repurpose old furniture, use outdoor cushions, or even build additional pallet furniture for a cohesive look.
Don’t forget to add plants! I placed a few potted plants around my patio for a touch of greenery. You can hang them from the edges of the pallets or place them on top of the pallets for an elevated garden feel.
2. Lighting for Ambiance
To extend the use of my pallet patio into the evening, I added some string lights. The warm glow of string lights can instantly create a relaxed and inviting atmosphere, perfect for evening gatherings.
3. Decorative Touches
Lastly, I added a few decorative touches like candles in lanterns, a small rug, and throw pillows to complete the space. These simple items made the patio feel homey and personalized.
Maintenance Tips to Keep Your Pallet Patio Looking Great
Maintaining your pallet patio is key to ensuring it stays as beautiful and functional as the day you built it. With exposure to the elements, wear and tear are inevitable, but with the right care, your deck can last for years to come.
From cleaning and re-staining to simple checks that keep everything sturdy and secure. Let’s dive into the easy steps that will keep your outdoor space looking fresh and inviting all year round.
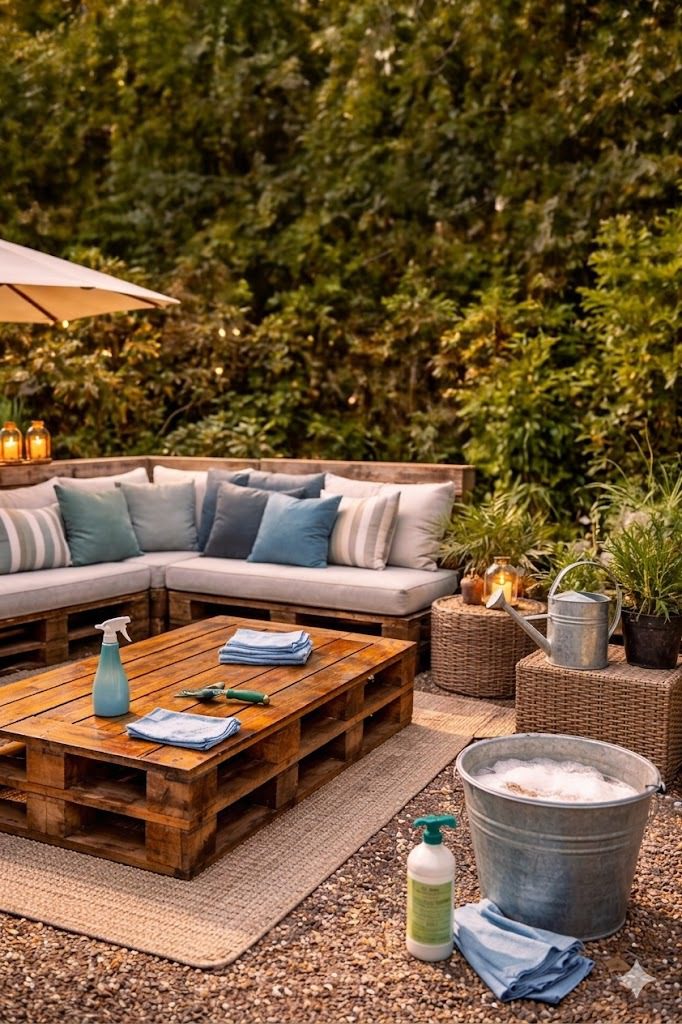
1. Cleaning and Maintaining the Wood
Since pallets are exposed to the elements, maintenance is key to keeping your patio looking fresh. Regularly sweep the area to remove dirt and debris. If needed, use a damp cloth to wipe down the wood.
2. Re-staining or Repainting
I find that reapplying stain or paint every few years helps keep the wood in top condition. This will also prevent the wood from weathering too quickly and losing its color.
3. Check for Loose Pallets
Periodically, I check the screws and tighten any loose pallets to ensure the structure remains solid. This simple step ensures that the patio stays safe and functional.
Enjoy Your DIY Pallet Patio
Building a pallet patio is a rewarding project that not only enhances the beauty of your garden but also gives you a cozy, functional outdoor space to enjoy with family and friends.
By following these steps (selecting quality pallets, preparing the ground, assembling and finishing the pallets, and adding your personal style), you can create an inviting outdoor oasis without breaking the bank.
The best part?
Every time you sit on your new pallet patio, you’ll feel proud of the hard work and creativity that went into building it. I encourage you to give this project a try, and I promise you’ll love the results!


