
At first glance, the blackened post looked damaged. In reality, the fire may have been the reason it survived.
Beside a newer treated post stood an older timber post protected by a dark charred surface. No plastic sleeve, glossy coating, or complicated treatment—just wood, heat, and patience.
The method becomes more interesting when I think about what usually destroys a fence post: moisture trapped in the soil, poor drainage, fungi, insects, and decay around ground level. Over time, the wood can soften, split, lean, and finally break.
Charring does not make timber indestructible, but it changes the outer surface. The carbon layer can slow moisture absorption and make the wood less inviting to some pests and decay.
What stayed with me was how something that looked burned and ruined could actually be wearing its protection on the outside.
What It Shows About Replaced Timber Post?
A new fence post can look perfect above ground while already losing the battle below it.
Fresh pressure-treated timber feels solid, straight, and dependable, but the real danger sits around the base where wet soil holds moisture against the wood. That is often where rot begins, hidden long before the post starts leaning.
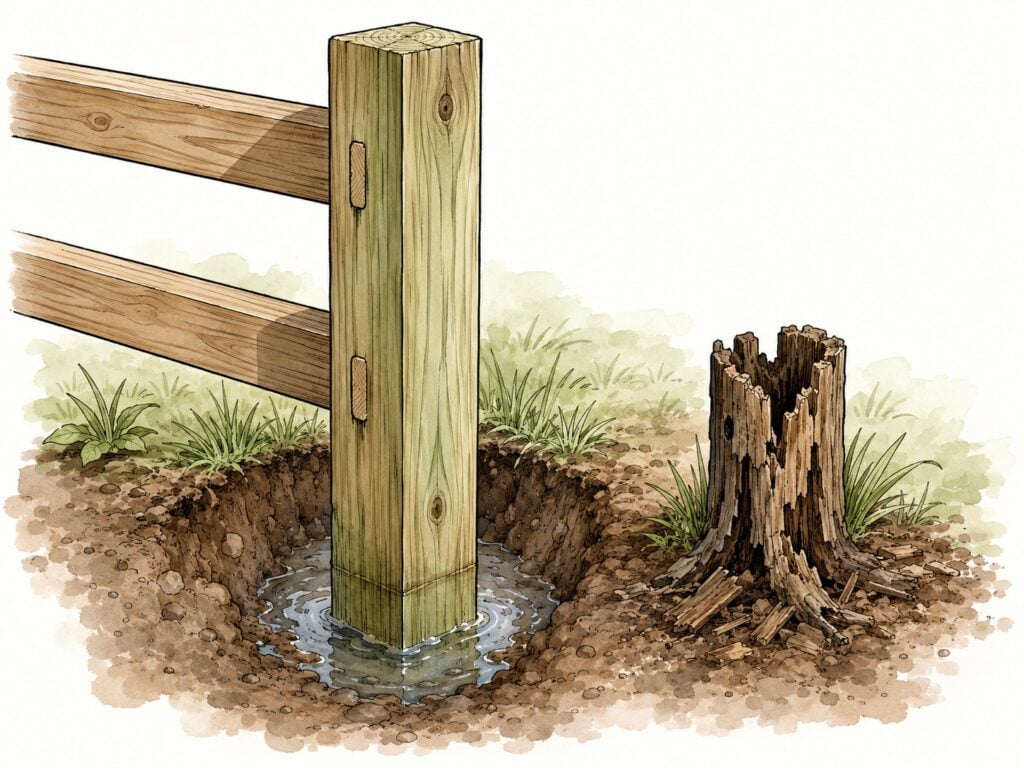
I have seen damaged posts replaced without fixing the soggy conditions around them. The fence looks new again, but the same trapped water keeps attacking the replacement.
Treated timber can last well, yet it still relies on preservatives and proper drainage. That makes me more thoughtful when using it near vegetable beds, children’s spaces, or anywhere I prefer a simpler, more natural solution.
Replacing the wood matters, but changing the conditions around it matters just as much.
Why Timber Posts Rot in Wet Soil?
The strongest-looking part of a fence post is not always the part that decides how long it will last.
I used to think thicker timber automatically meant better durability. Then I learned that the real battle happens at ground level, where moisture can sit against the wood for days.
A post may look solid above the soil while fungi and microorganisms are already weakening the base.
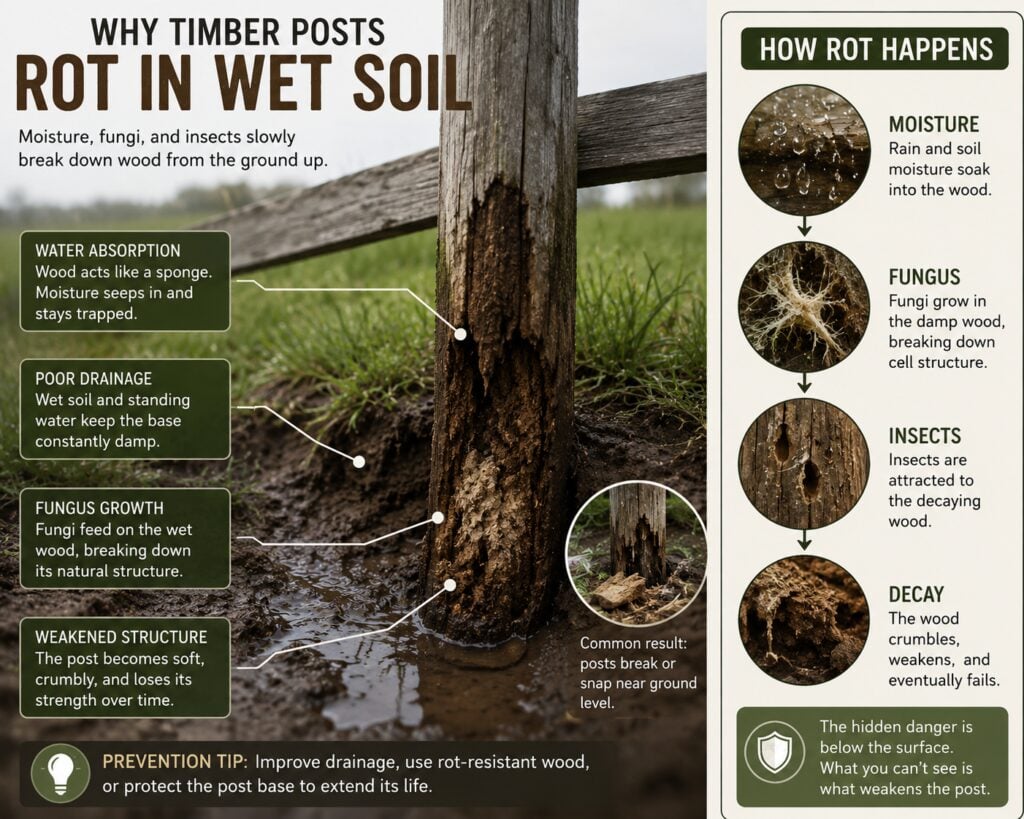
The soil line is especially vulnerable because it receives both moisture and oxygen, creating ideal conditions for decay. That is why so many posts eventually snap just above or below the ground.
Heavy clay makes the problem worse by trapping water around the timber. In those conditions, drainage matters as much as the post itself.
This is what makes charring so interesting to me: it places an extra protective layer exactly where the wood faces the greatest pressure.
How Charring Timber Helps Protect the Wood?
The goal is not to burn the post. It is to give the wood a tougher outer skin.
Controlled charring turns the surface black and slightly cracked while leaving the solid core intact. That dark carbon layer can help slow moisture from reaching the raw timber underneath and may make the surface less inviting to insects.
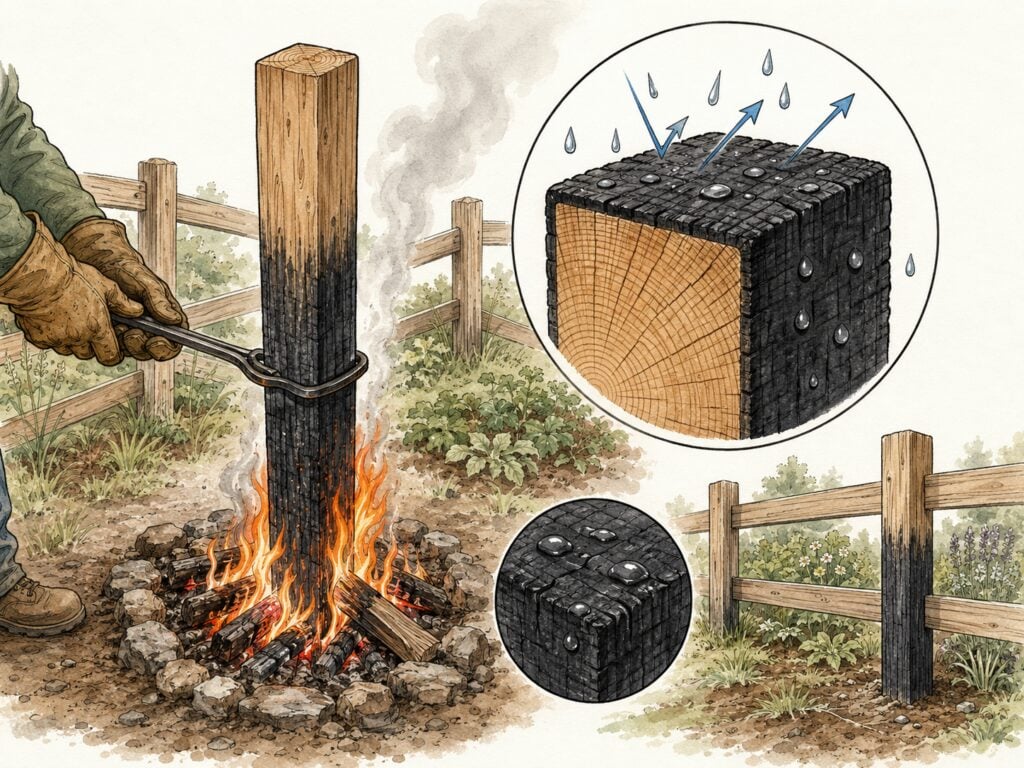
This is where the method is often misunderstood. Charring is not the same as reducing wood to ash.
I burn only the outside, then brush away the loose soot and check that the post still feels firm.
It will not make timber indestructible, especially in poorly drained soil, but it adds protection exactly where outdoor wood needs it most. For fence posts, garden edging, and rustic projects, that simple burned surface can make a practical difference.
The Beauty of the Traditional Method
Charred timber proves that old methods can still solve modern problems.
I love it because the blackened surface is not just decorative. It comes from generations of observation, using fire to help outdoor wood resist harsh conditions.
The finish also has a natural beauty. The grain, texture, and deep color blend effortlessly with soil, stone, and plants.
It feels rustic, practical, and full of purpose.
How I Would Prepare Charred Timber Posts?
When I prepare timber posts, I start by choosing untreated wood. This is very important. I never burn pressure-treated timber because it can release harmful fumes. I only use raw timber that is safe to char outdoors.
I usually focus on the section that will go into the ground and a little above ground level. That is the part that needs the most protection.
I mark the post so I know how deep it will be buried, then I char beyond that line to protect the vulnerable transition area.
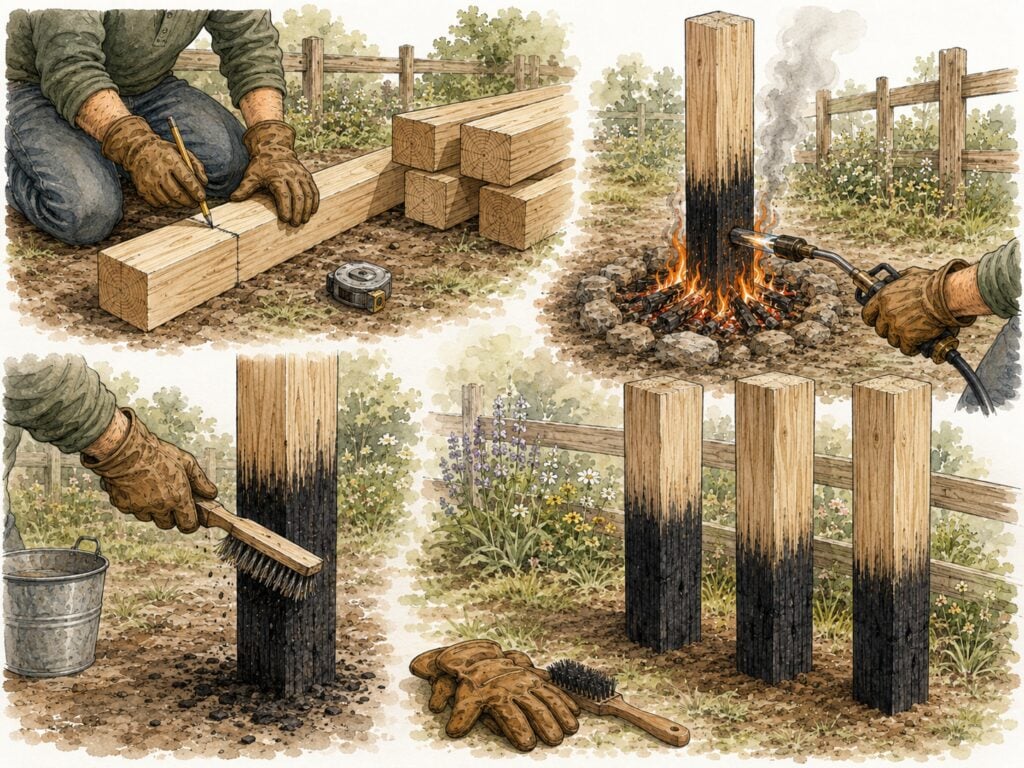
The burning should be controlled. I want an even black surface, not deep damage. A gas torch can work well for smaller projects, while a fire can be used for larger posts if handled carefully.
I rotate the post and make sure all sides are charred evenly, especially the corners.
After charring, I let the timber cool completely. Then I brush the surface lightly to remove loose ash. I do not scrub too aggressively because I want the carbon layer to remain.
Some people apply oil afterward for extra protection. I like this step when the post will be visible because it deepens the finish and helps seal the surface.
Installing the Post the Right Way
A charred post can still fail if it is planted in the wrong conditions.
When I install one, I focus on drainage first. In heavy soil, I avoid creating a hole that traps water and use gravel where it helps moisture move away from the base.
The post must stay firm without sitting in constantly soggy ground. I also extend the charred section slightly above the soil line, because that vulnerable border between earth and air is often where decay begins.
The burned surface adds protection, but smart installation is what gives it a real chance to last.
Why I Prefer This Method for Garden Projects?
Charred timber feels right in a garden because it looks natural and works hard.
I like being able to see the protection for myself instead of relying only on a treatment label. The dark surface, visible grain, and uneven finish make each post feel handmade rather than manufactured.
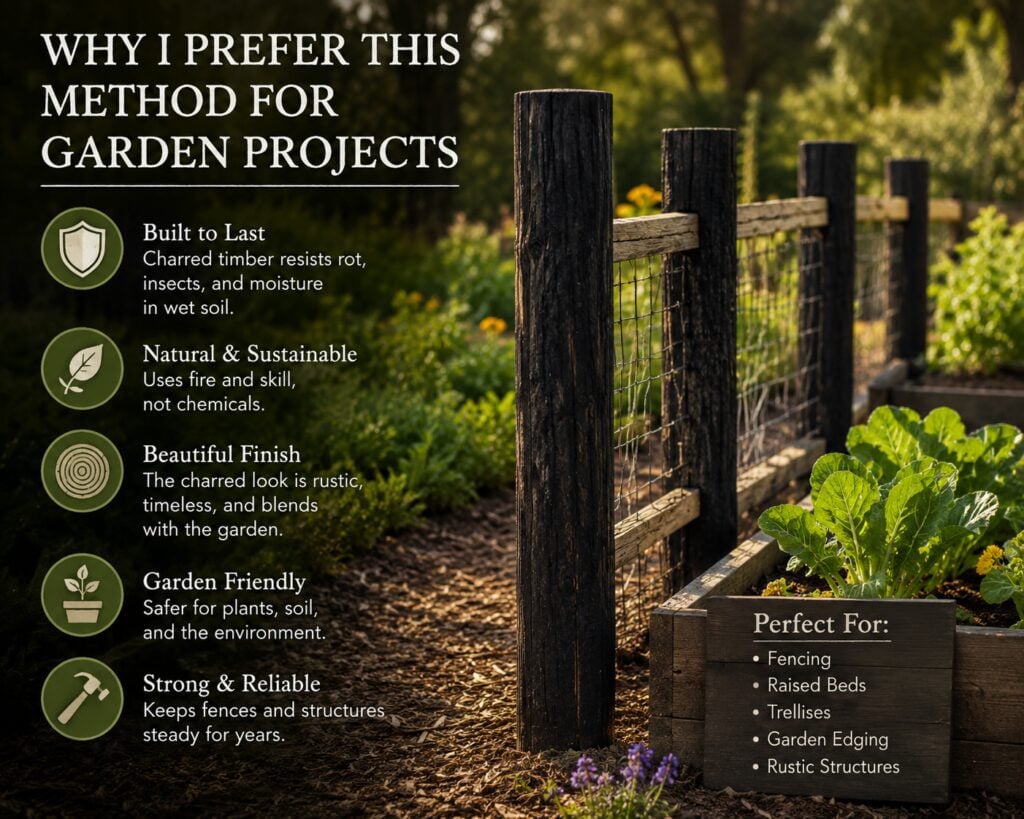
The process is simple and honest: char the wood carefully, check the surface, then install it with good drainage. It is practical, beautiful, and built for the outdoors.
Important Safety Notes I Always Follow
Fire can protect timber, but only when it is handled with respect.
I char wood outdoors, away from wind, dry leaves, chemicals, and anything flammable. Water stays nearby, and I always wear gloves and eye protection. The post must cool completely before I move it.
Most importantly, I never burn treated, painted, stained, or unknown timber. Toxic smoke is not worth the risk.
Charring can improve durability, but it does not make wood invincible. Safe burning, good drainage, proper timber, and careful installation still matter.
Why This Old Method Still Makes Sense?
The ground does not care how new a fence post looks. It tests the wood with moisture, soil, and time.
That is why charred timber interests me. The method is simple, but it addresses the real problem by creating a protective outer layer where decay often begins.
It is not perfect, and it still needs good drainage and careful installation, but it offers a natural mix of durability, function, and character.
For me, the lesson is clear: better does not always mean newer or more complicated. Sometimes an old, well-tested method still makes the most sense.


