I still remember the moment I realized my backyard was missing something. It had grass, a bit of space, and potential, but it didn’t feel like a place where people would gather. That’s when I decided to build a DIY fire pit backyard setup that would bring warmth, conversation, and life into the space.
Instead of buying a ready-made fire pit, I wanted something more personal and budget-friendly. I also wanted to understand the process from start to finish so I could customize it exactly the way I wanted.
Looking back, building this fire pit was one of the most satisfying DIY projects I have ever done, and surprisingly, it was much easier than I expected.
Table of Contents
Getting the Basics Right
Before I touched a shovel or bought any materials, I spent time planning. This step made a huge difference because it helped me avoid costly mistakes later.
I started by choosing the right location. I made sure the fire pit was far enough from the house, fences, and any flammable structures. Safety is always the priority when dealing with fire.
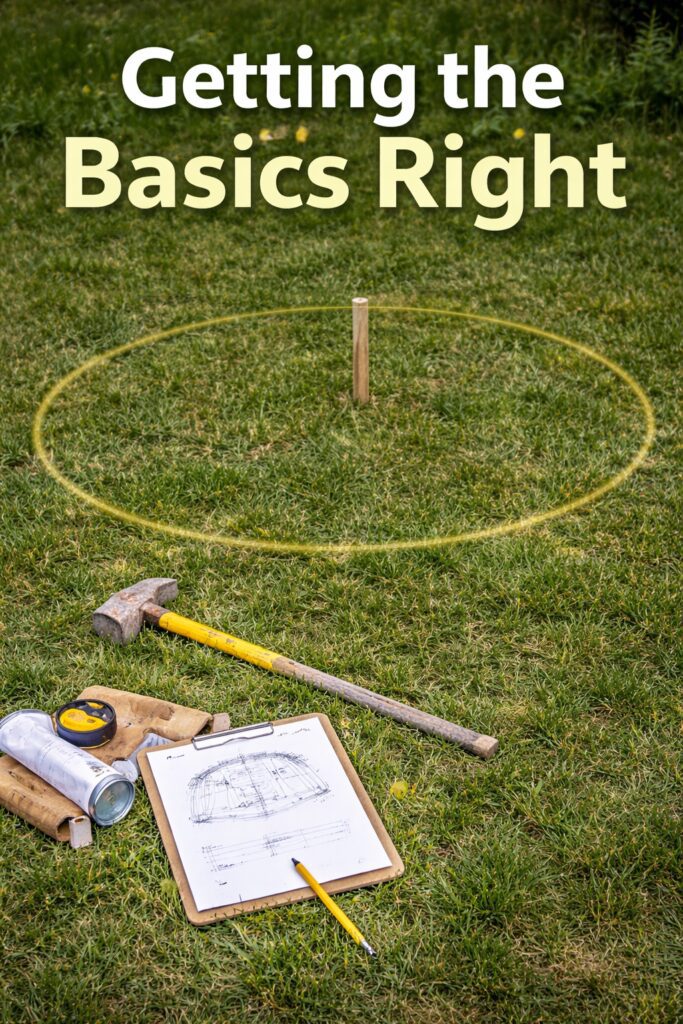
I also checked that the ground was relatively level and had good drainage.
Next, I decided on the size. Based on my space and how many people I wanted to accommodate, I chose a medium-sized circular design. This size felt perfect for small gatherings without overwhelming the yard.
I also selected materials. I went with concrete retaining wall blocks because they are durable, easy to stack, and give a clean, modern look. For the base, I planned to use gravel and sand to ensure stability.
The Foundation of Everything
The most important part of the entire project was preparing the ground properly. If the base is not solid, the fire pit can shift, sink, or become uneven over time.
I began by marking a perfect circle on the grass using a string and a stake. Once I had the shape, I removed the grass and dug down a few inches. This created a shallow pit that would hold the base layers.
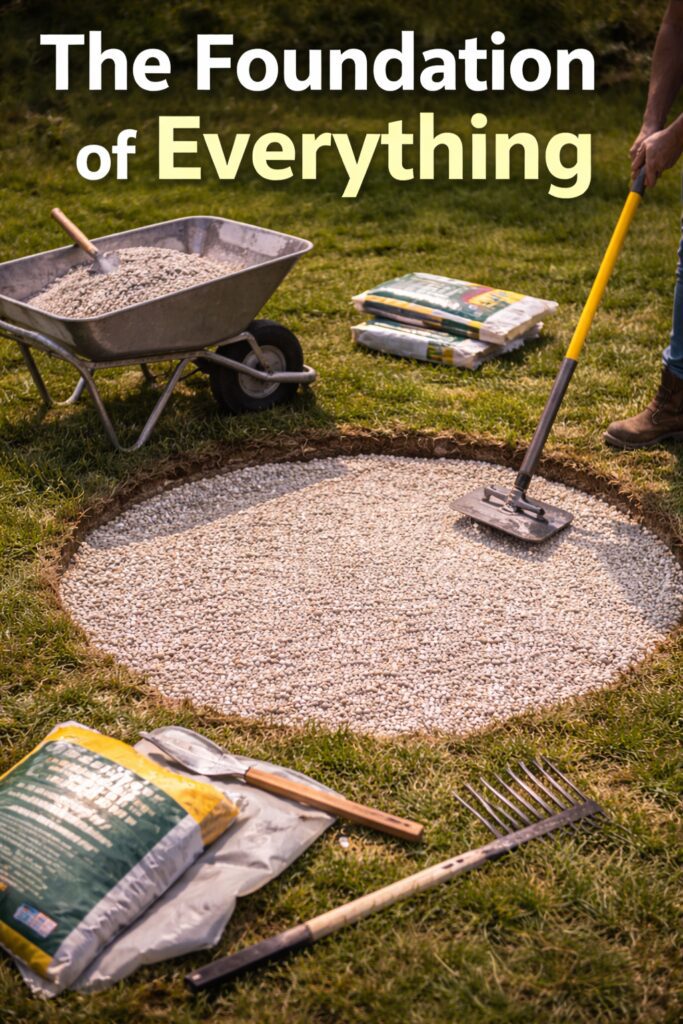
After digging, I compacted the soil as much as possible. This step is often overlooked, but it is crucial. A compacted base prevents movement and keeps everything stable.
Then I added a layer of gravel. The gravel helps with drainage and provides a strong foundation. I spread it evenly and compacted it again. On top of the gravel, I added a layer of sand to create a smooth and level surface for the blocks.
Setting the Structure
Once the base was ready, I moved on to laying the first layer of blocks. This is the most critical layer because everything else depends on it being perfectly level.
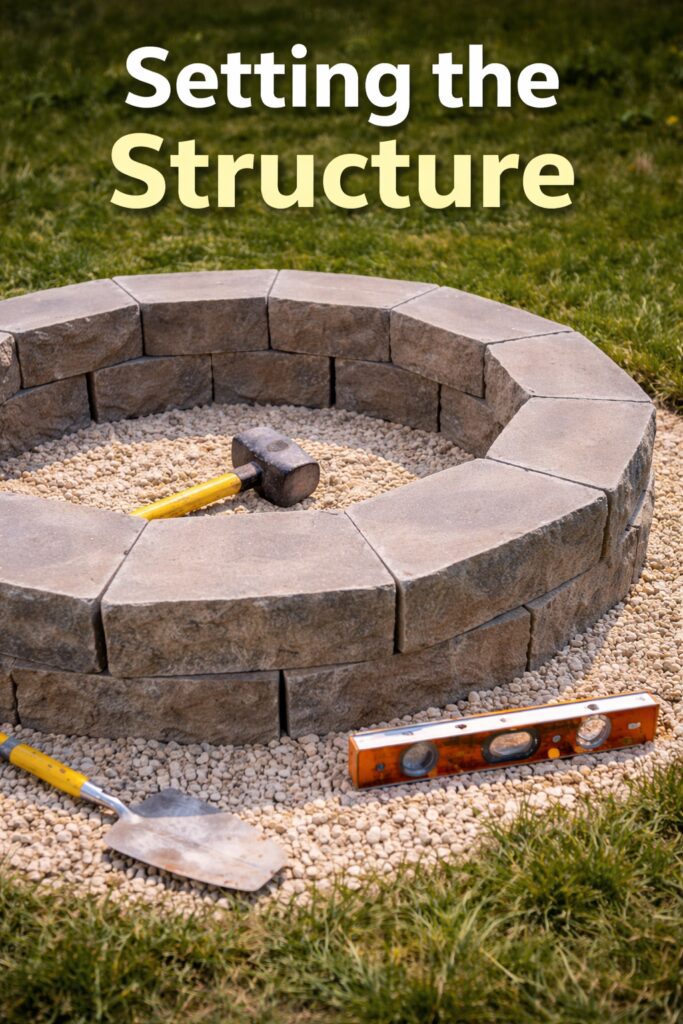
I carefully placed each block in a circular pattern, checking the level after every few pieces. It took some patience, but I made sure there were no gaps and that the circle was symmetrical.
If a block was slightly uneven, I adjusted the sand underneath until it sat perfectly. This step required attention to detail, but it paid off later when stacking additional layers became much easier.
Creating the Fire Pit Shape
After the first layer was complete, the rest of the build felt much faster and more enjoyable.
I stacked additional layers of blocks on top of the first one, slightly staggering the joints for better stability. This not only made the structure stronger but also gave it a more professional look.
As the walls grew higher, I could finally start to see the fire pit taking shape. I chose a height that was comfortable for seating around and safe for containing the fire.
Between some layers, I used construction adhesive to secure the blocks. This added extra stability and ensured the structure would stay intact over time.
Preparing for Fire Use
With the walls finished, I focused on the inside of the fire pit. This part is just as important as the outer structure.
I added a layer of gravel inside the pit to help with drainage and heat distribution. Gravel also prevents water from pooling inside the pit, which can cause damage over time.
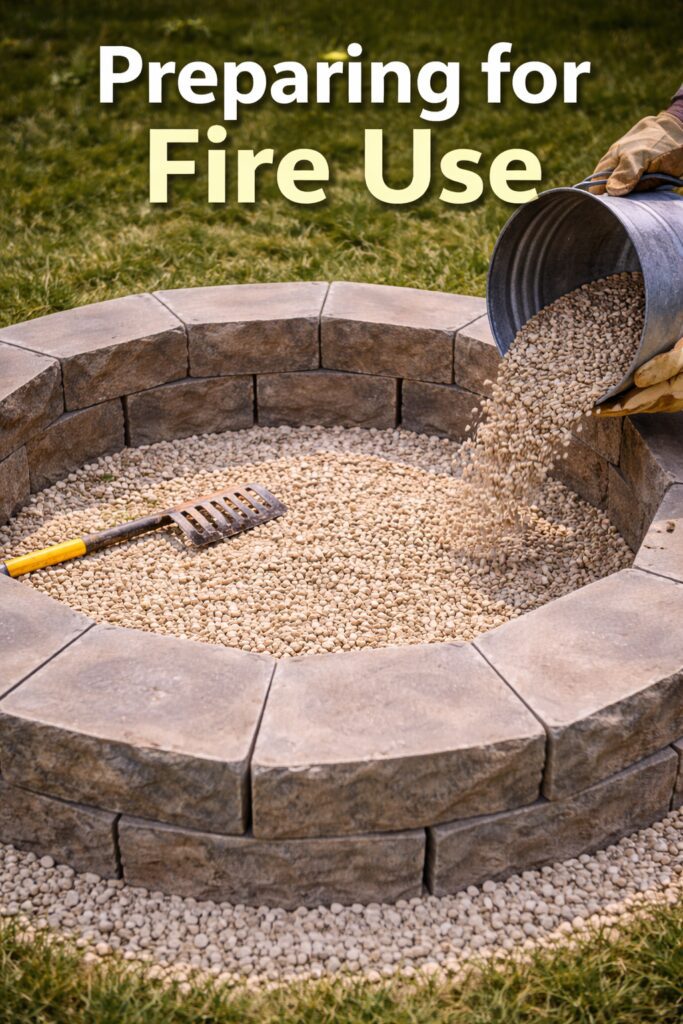
Some people choose to add a metal fire ring inside for extra protection. In my case, I kept it simple, but I made sure the materials I used could handle high temperatures.
Making It Look Clean and Professional
Once the structure was complete, I spent time on the finishing details that really made the project stand out.
Around the outside of the fire pit, I added a border of decorative gravel. This not only improved the appearance but also helped keep the surrounding area clean and mud-free.
I also cleaned up the edges of the grass to create a neat and defined look. These small touches made a big difference in how the final result looked.
At this point, the fire pit didn’t just look like a DIY project. It looked like a professionally installed feature in my backyard.
Seeing It All Come Together

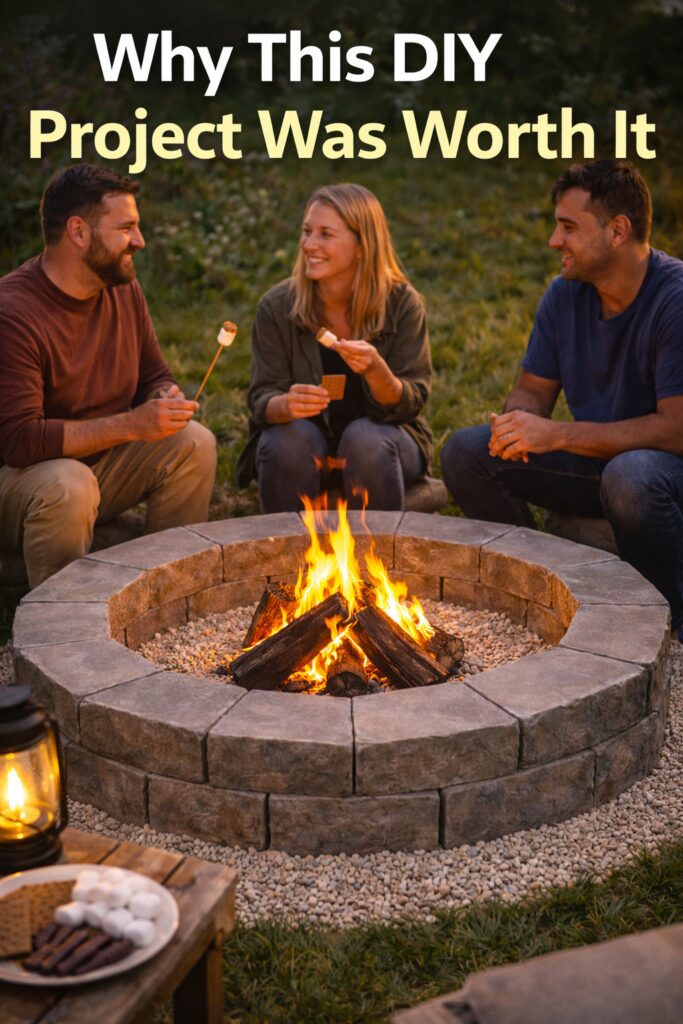
The first time I lit a fire in my new fire pit was incredibly rewarding. All the planning, digging, and building paid off in that moment.
The fire burned evenly, the structure felt solid, and the space instantly became more inviting. Sitting around the fire with family and friends, I realized that this project was not just about building something.
It was about creating a place for connection.
Common Mistakes I Avoided
Looking back, there were a few key mistakes I managed to avoid, and I think they made a big difference in the success of the project. One mistake is skipping the base preparation.
Without a proper foundation, the fire pit can become unstable over time.
Another mistake is not checking the level frequently. Even small uneven sections can cause problems when stacking layers. I also made sure not to rush the process. Taking my time at each step ensured a better final result.
Why This DIY Project Was Worth It?
Building my own DIY fire pit backyard setup was one of the most satisfying projects I have ever completed. It saved me money, gave me full control over the design, and added real value to my outdoor space.
More importantly, it created a place where people can gather, relax, and enjoy each other’s company. Every time I use it, I feel a sense of pride knowing that I built it with my own hands.
You Can Build This Too
If you have been thinking about adding a fire pit to your backyard, I highly recommend building it yourself. The process is simple, the materials are accessible, and the result is incredibly rewarding.
You don’t need to be an expert or have special skills. With careful planning, patience, and attention to detail, anyone can create a beautiful and functional fire pit.
And trust me, once it is done, it will quickly become your favorite spot in the entire backyard.


