As someone who’s always been passionate about gardening, I can tell you that the journey of transforming a dull, overgrown yard into a vibrant, flourishing garden is one of the most rewarding experiences.
It’s not just about planting a few flowers or trimming the grass; it’s about creating an inviting space that reflects your personal style and provides a peaceful retreat.
Table of Contents
- Step 1: Assessing Your Garden’s Current State
- Step 2: Clearing the Space
- Step 3: Planning Your Garden Layout
- Step 4: Choosing the Right Plants for Your Garden
- Step 5: Adding Garden Features and Structures
- Step 6: Mulching and Fertilizing the Soil
- Step 7: Regular Maintenance and Watering
- Step 8: Enjoying Your Transformed Garden
- Your Garden Transformation Journey
Step 1: Assessing Your Garden’s Current State
Before diving into any project, it’s crucial to assess the existing condition of your garden. In my case, the garden was overrun with weeds, dead plants, and untidy pathways.
The first thing I did was take a step back and really look at the space I had.
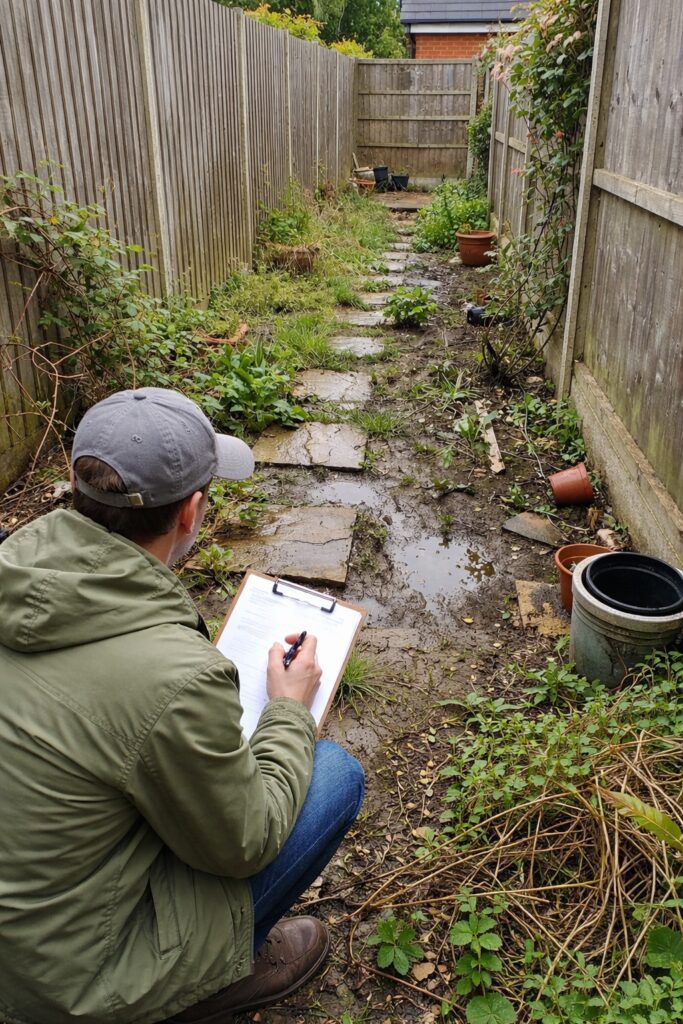
I asked myself some important questions: What is the overall size of the area? Are there any existing structures like fences, pathways, or benches that I can keep and enhance? What is the soil condition? Is there enough sunlight?
These are the types of questions that will help you understand where to start.
Step 2: Clearing the Space
The next step in my garden transformation was clearing the space. You can’t work with a garden that’s full of overgrown weeds, dead plants, or broken pots.
I started by removing all the weeds and unwanted plants by hand.
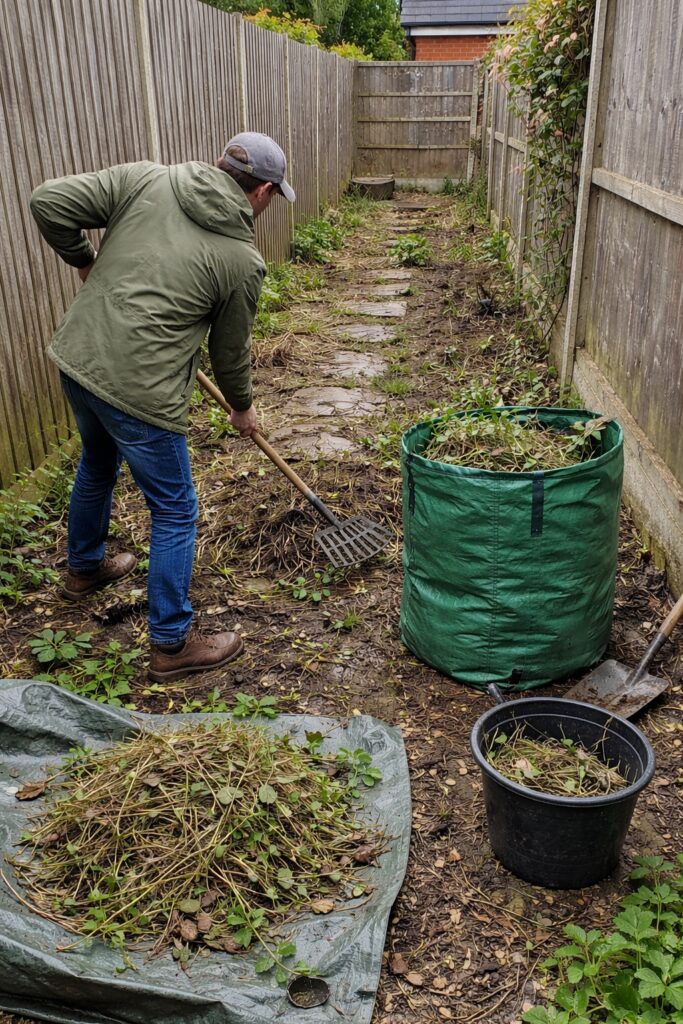
For larger plants, I used a garden fork to dig them up.
This process can be time-consuming, but trust me, it’s worth it. As I worked, I also took the opportunity to remove any old garden furniture or pots that no longer served a purpose.
One of the most satisfying parts of this step was seeing the space cleared out and ready for new life. The soil was a bit compacted, so I also loosened it up to allow for better water drainage in the future.
Step 3: Planning Your Garden Layout
After clearing the space, I moved on to planning the garden layout. This is a critical step as it will set the tone for the entire garden.
I wanted my garden to have a serene and welcoming vibe, so I decided on a winding pathway that would lead through different plant sections.
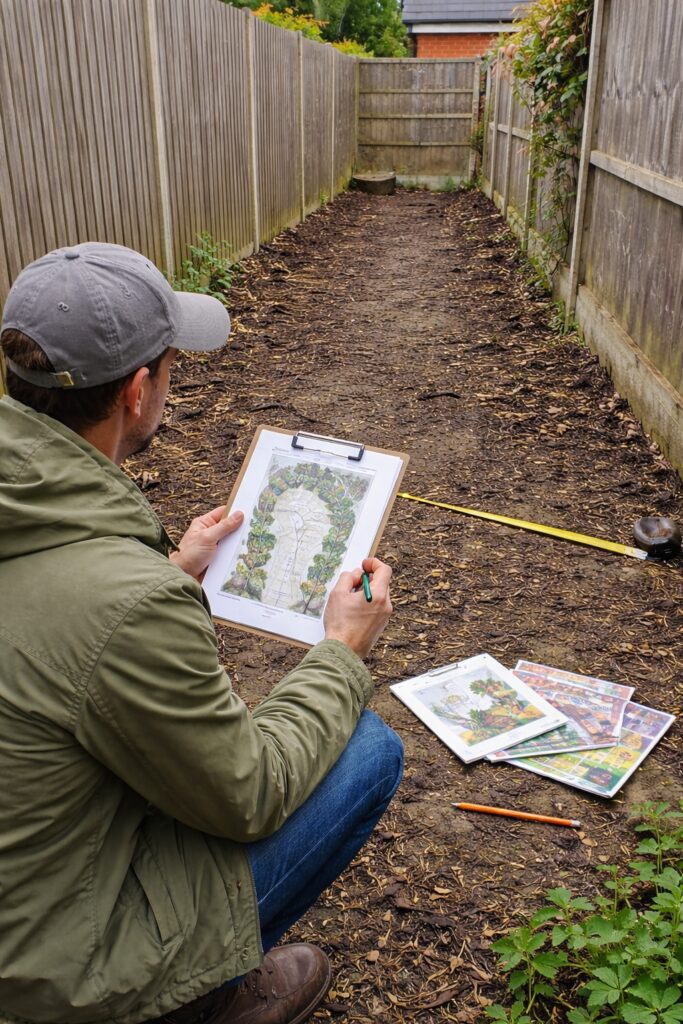
The goal was to make the space feel like a journey, where each turn would reveal new flowers, plants, and features.
I used simple materials like stepping stones for the pathway, ensuring that it complemented the rustic charm of the garden. I also decided to plant a mix of flowers, shrubs, and climbing plants to add both color and depth.
It’s important to consider the height of your plants, as well as their sunlight and water requirements, when designing your layout.
Step 4: Choosing the Right Plants for Your Garden
One of the most exciting aspects of any garden transformation is choosing the plants. For me, the goal was to have a variety of colors, textures, and heights.
I focused on plants that would thrive in my garden’s climate, paying attention to factors such as sunlight and soil type.

I planted roses along the edges of the garden because they not only add beauty but also fill the air with their delightful fragrance.
In addition, I included lavender for its calming color and soothing scent, as well as a variety of climbing plants like clematis and ivy to create a lush, green backdrop.
When choosing plants, always remember to consider their growth habits. Some plants require more space to spread out, while others, like ground covers, will help keep the weeds at bay.
Planning plant placement with their full size in mind will prevent overcrowding and ensure that each plant has the space it needs to thrive.
Step 5: Adding Garden Features and Structures
To add character to my garden, I decided to incorporate a few key features and structures. One of the first additions was a simple wooden bench, which not only provided a place to sit and enjoy the beauty of the garden but also added to the rustic feel I was going for.
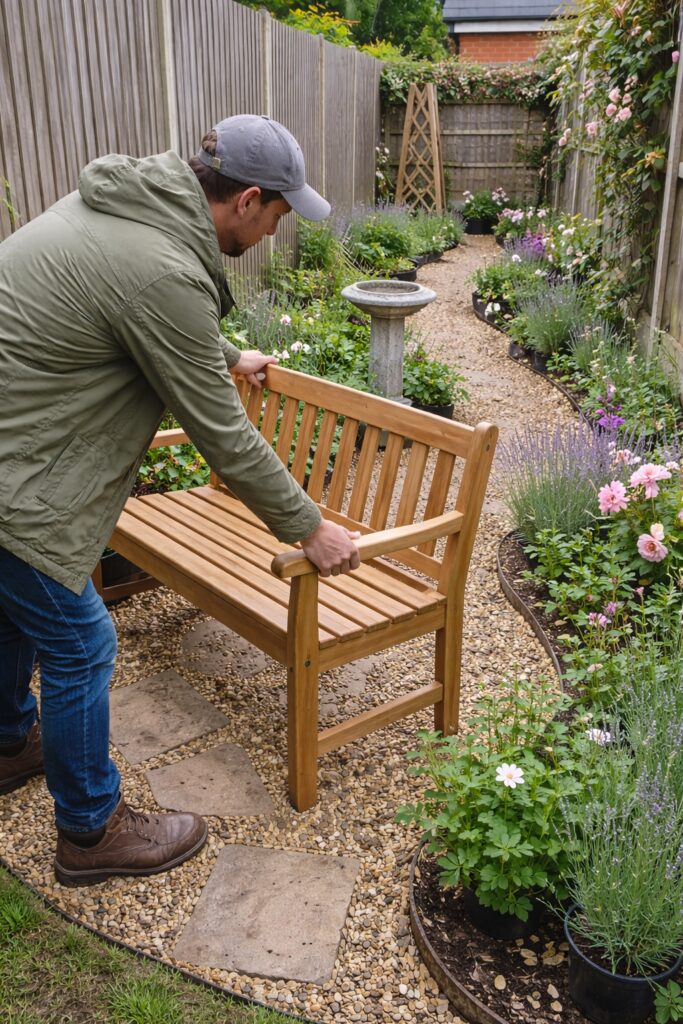
In addition, I installed a birdbath to attract wildlife to the garden. Birds are not only beautiful to watch but also play an important role in keeping pests under control.
You could also consider adding a small fountain or garden sculpture to enhance the overall aesthetic of your space.
Step 6: Mulching and Fertilizing the Soil
Now that the plants were in place, it was time to give the soil some extra care. Mulching is essential for retaining moisture, suppressing weeds, and keeping the soil temperature stable.
I chose organic mulch because it enriches the soil as it decomposes.
In addition to mulching, I applied a slow-release fertilizer to ensure that my plants had the nutrients they needed to grow strong and healthy. Be sure to choose the right fertilizer for your plants, as different varieties have different nutrient needs.
Step 7: Regular Maintenance and Watering
A garden transformation doesn’t end with planting; ongoing care and maintenance are key to keeping it looking beautiful. In the first few months after planting, I made sure to water my plants regularly, especially during dry spells.
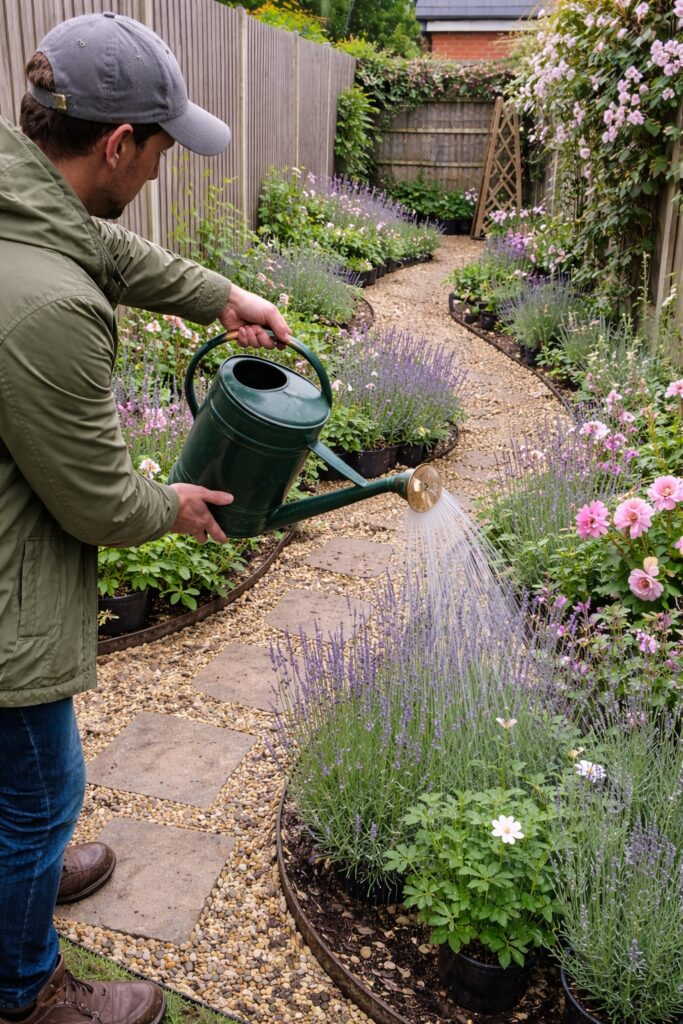
A good watering schedule can help your plants establish deep roots, ensuring long-term health.
I also stayed on top of weed control by regularly checking the garden for any unwanted plants. Deadheading spent flowers and pruning overgrown plants also helped maintain the garden’s appearance.
Step 8: Enjoying Your Transformed Garden
After weeks of hard work, the transformation was complete. The once-muddy and unkempt space had become a beautiful, lush garden with a winding path, colorful flowers, and vibrant greenery.
It was incredibly satisfying to see the fruits of my labor come to life.
The garden not only provided a visual retreat but also became a sanctuary where I could relax, reflect, and enjoy nature. Whether I was sitting on the bench, walking along the path, or simply gazing at the flowers, I was filled with a deep sense of accomplishment.
Your Garden Transformation Journey
Transforming a garden can be a challenging yet incredibly rewarding experience. With the right planning, attention to detail, and a bit of hard work, you can turn even the most neglected space into a beautiful outdoor retreat.
Just remember to take your time and enjoy the process.
As you embark on your own garden transformation journey, keep in mind that every step counts. From clearing the space to planting and maintaining your garden, each task brings you closer to creating the garden of your dreams.
Happy gardening!


