Gardening is a rewarding hobby that allows us to connect with nature and create beautiful outdoor spaces. However, it often comes with the expense of buying special tools and supplies.
In recent years, there has been a growing interest in finding eco-friendly and cost-effective ways to plant flowers, and one surprisingly simple solution is using toilet paper rolls.
This technique not only helps organize your flower bulbs but also repurposes household materials in a sustainable way.
Table of Contents
Why Use Toilet Paper Rolls for Planting?
Toilet paper rolls are a surprisingly versatile and eco-friendly gardening tool. They offer an affordable alternative to buying specialized planting pots or equipment, and they are easy to find.
In addition to being a budget-friendly option, toilet paper rolls are biodegradable, which means they will break down over time, enriching your soil with organic matter.

Using toilet paper rolls also helps in organizing the bulbs and ensuring they are spaced evenly. This method is perfect for planting flower bulbs like tulips, daffodils, and crocuses, which need consistent spacing and proper depth for optimal growth.
By using these household items, gardeners can create a visually appealing, well-organized garden without needing to invest in expensive planting accessories.
The Environmental Impact of Using Toilet Paper Rolls

Using toilet paper rolls for planting is a sustainable practice that promotes recycling and repurposing. According to the Environmental Protection Agency (EPA), nearly 6.3 million tons of paper and paperboard are discarded annually in the United States alone.
By reusing materials such as toilet paper rolls in gardening, we can help reduce waste and minimize our environmental footprint.
Additionally, when the rolls decompose in the soil, they contribute organic matter that improves the soil structure. This helps plants thrive by improving moisture retention, enhancing root growth, and increasing the number of beneficial microorganisms in the soil.
The fact that the toilet paper rolls naturally break down makes this method not only practical but also aligned with eco-conscious gardening practices.
How to Plant Flower Bulbs Using Toilet Paper Rolls?
Planting flower bulbs using toilet paper rolls is a simple, eco-friendly, and cost-effective method to organize and space your bulbs evenly.
This step-by-step guide walks you through filling the rolls with soil, placing the bulbs inside with the pointed end up, and then arranging the rolls in your garden.
The toilet paper rolls act as a natural support system for the bulbs, ensuring they are planted at the proper depth and spaced correctly.
As the rolls decompose, they enrich the soil with organic matter, promoting healthy plant growth. This technique is ideal for gardeners looking for an easy way to plant a variety of flowers while recycling household materials.
Step 1: Gather Your Materials

To get started, all you need are some toilet paper rolls, flower bulbs, soil, and a space to plant. You may also want to have scissors on hand to cut the rolls if needed, depending on the size of your garden or the bulbs you’re using.
Step 2: Prepare the Toilet Paper Rolls
To begin, lay out the toilet paper rolls on a flat surface, such as a table or workbench. If the rolls are too long for your bulbs, you can cut them in half to make them more manageable.
Once ready, fill each toilet paper roll with soil, leaving about an inch at the top for watering.
Step 3: Place the Bulbs
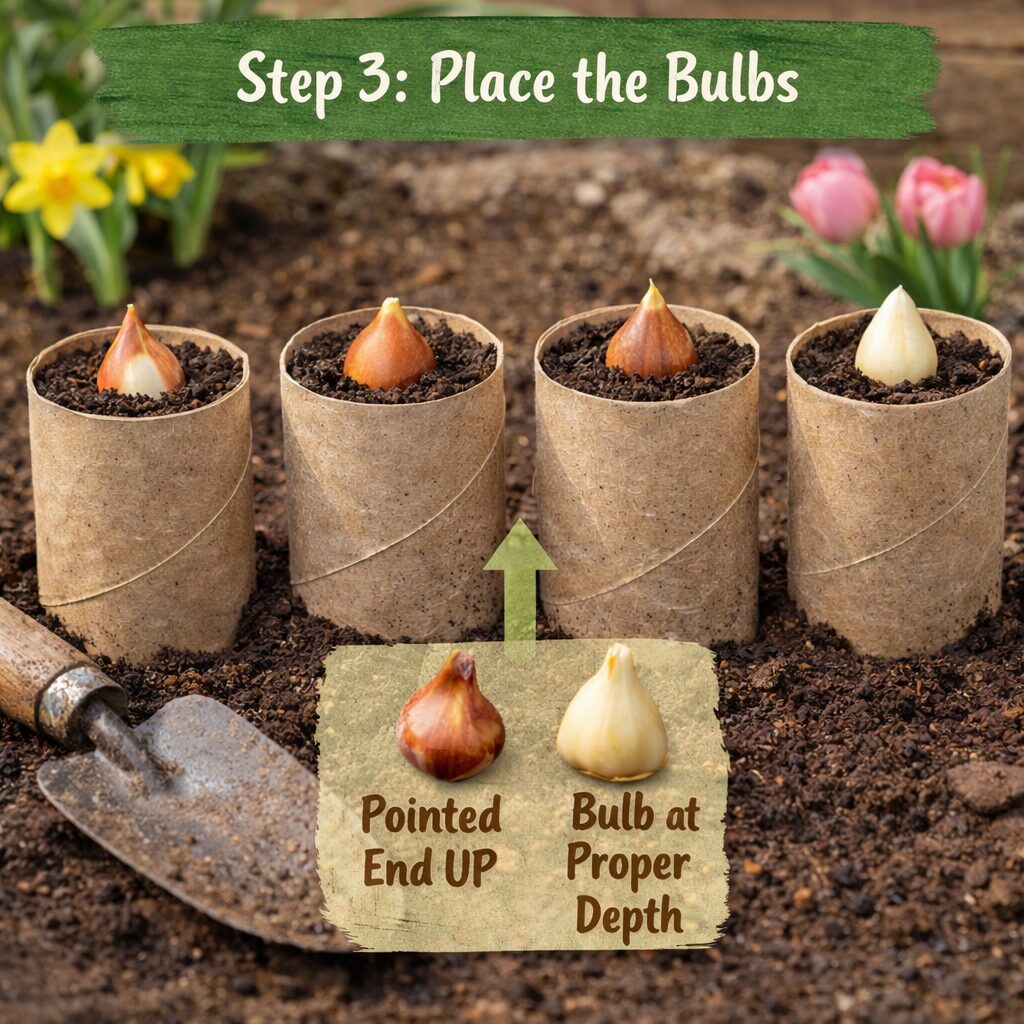
Next, take each flower bulb and place it inside the filled toilet paper roll. Be sure to position the bulb with the pointed end facing upwards, as this will encourage proper growth.
The depth at which you plant the bulb is important—typically, bulbs should be planted at a depth of about three times their height.
Step 4: Water the Bulbs
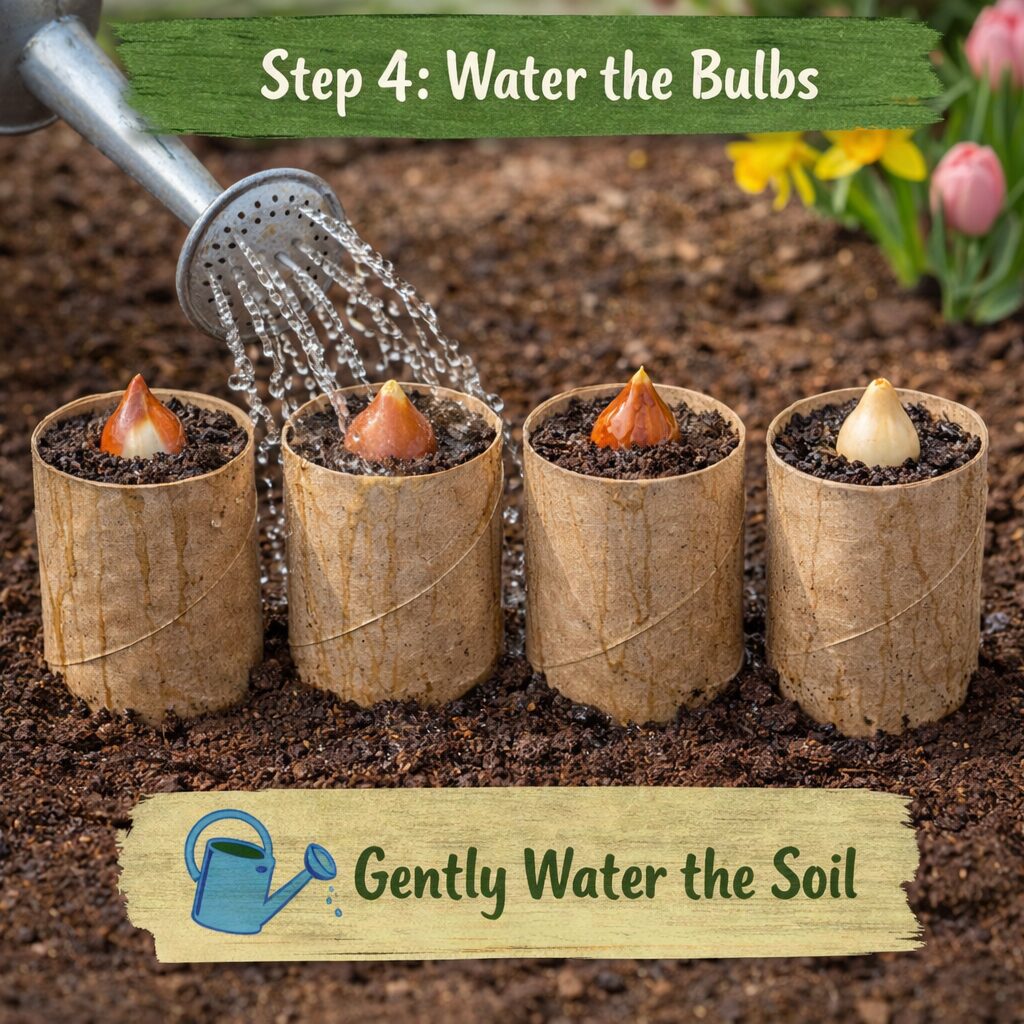
Once your bulbs are securely placed in the rolls, gently water the soil. Ensure that the water is evenly distributed, but be careful not to overwater.
Toilet paper rolls are great for maintaining moisture levels, but excessive water can lead to root rot.
Step 5: Transfer to the Garden
After planting, you can easily transfer the toilet paper rolls to your garden. Arrange them in rows or clusters, ensuring that there is enough space between each roll for the bulbs to grow.
Depending on the type of bulb, they may require different amounts of space, so it’s important to check the specific spacing needs for the varieties you’ve chosen.
Step 6: Maintain and Watch Them Grow

Once the bulbs are planted, all that’s left is to wait and watch them grow. Be sure to water them regularly and provide them with plenty of sunlight.
Over time, the toilet paper rolls will break down, adding organic matter to the soil while the flowers bloom, creating a stunning display in your garden.
Other Ways to Recycle Household Materials in Gardening
The practice of repurposing everyday items for gardening doesn’t end with toilet paper rolls. Here are a few other simple, eco-friendly ways to incorporate household items into your garden:
- Egg Cartons: Like toilet paper rolls, egg cartons are great for starting seeds. Simply fill each compartment with soil, plant a seed, and watch it grow.
- Plastic Bottles: Cut plastic bottles in half to create mini-greenhouses or use them as watering systems for your plants.
- Coffee Grounds: Used coffee grounds make excellent compost and provide a natural source of nitrogen for your plants.
By continuing to find creative ways to reuse household materials, gardeners can reduce waste, save money, and make their gardening practices more sustainable.


