When I first got my Monstera, I thought any potting soil would do. But after months of slow growth, yellowing leaves, and soggy soil, I realized the problem wasn’t watering or light; it was the soil itself.
Once I switched to a light, airy, and well-draining mix, the plant’s roots grew stronger, new leaves developed larger splits, and overall health improved dramatically.
The right soil can make the biggest difference in helping a Monstera thrive naturally and beautifully.
Table of Contents
- Why Monstera Deliciosa Needs a Special Soil Mix?
- The Soil Recipe I Personally Use
- Why I Use Orchid Bark?
- Why Potting Soil Still Matters?
- Why Sphagnum Moss Helps So Much?
- Why I Add Perlite?
- How I Mix the Soil Properly?
- Signs My Monstera Loves the Soil
- Common Soil Mistakes I Used to Make
- How Often I Repot My Monstera?
- The Best Pot for This Soil Mix
- Indoor Conditions That Help My Monstera Thrive
- Final Thoughts
Why Monstera Deliciosa Needs a Special Soil Mix?
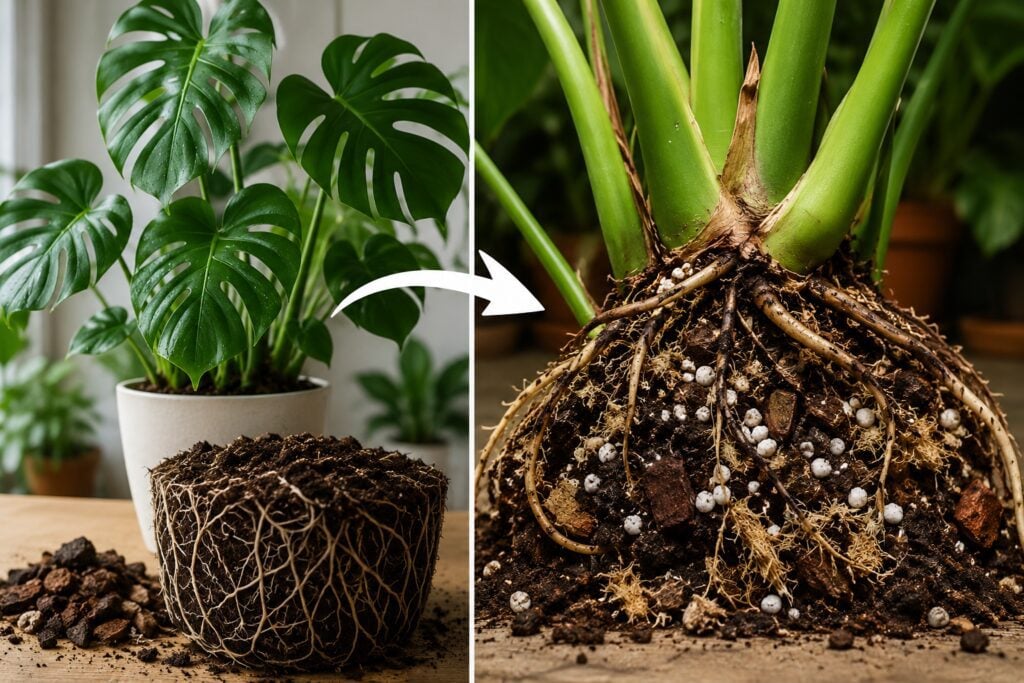
One thing many people do not realize is that Monstera Deliciosa is not naturally a regular soil plant in the wild.
Monsteras are tropical climbing plants that grow in rainforest environments. Their roots often spread through loose organic material, tree bark, moss, and airy forest debris instead of compact heavy ground soil.
Because of this, Monsteras prefer soil that is:
- Loose
- Airy
- Fast draining
- Moisture balanced
- Rich in organic matter
When planted in dense soil that stays wet too long, the roots struggle to breathe. This can eventually lead to:
- Root rot
- Yellow leaves
- Slow growth
- Drooping stems
- Weak root systems
I learned this lesson the hard way after overwatering a Monstera planted in regular dense potting mix. The roots stayed wet constantly, and the plant looked stressed no matter what I tried.
Once I switched to a chunkier, breathable mix, the improvement was surprisingly fast.
The Soil Recipe I Personally Use
After trying many combinations, I now use a simple soil blend that works extremely well for my Monstera Deliciosa.
The mix includes:
- 40% orchid bark
- 30% potting soil
- 20% sphagnum moss
- 10% perlite
This balance gives my Monstera exactly what it needs:
- Drainage
- Moisture retention
- Root airflow
- Stability
- Nutrients
The result is a healthier plant with stronger roots and much faster leaf development.
Why I Use Orchid Bark?
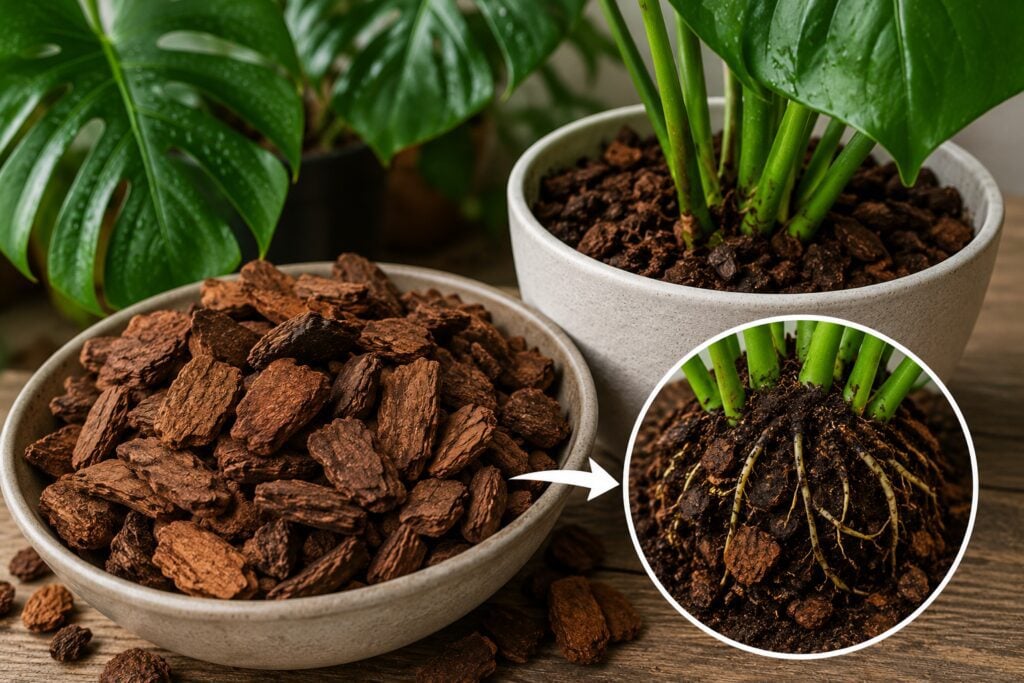
The first ingredient that completely changed my Monstera care was orchid bark. At first, adding bark into soil felt strange to me. But once I understood how tropical plants naturally grow, it made perfect sense.
Orchid bark creates air pockets throughout the soil mix. Those spaces allow oxygen to reach the roots more effectively.
I noticed several benefits immediately:
- Soil dried more evenly
- Roots stayed healthier
- Less compacted soil
- Better drainage
- Stronger root growth
The bark also mimics the natural forest floor conditions Monsteras love.
Whenever I repot a Monstera, I always make sure orchid bark becomes the largest portion of the mix. It keeps the soil light and breathable even months later.
Why Potting Soil Still Matters?
Even though Monsteras love airy conditions, they still need nutrients and moisture retention.
That is where potting soil becomes important.
I use regular indoor potting mix as the base that holds moisture and nutrients for the plant. Without some potting soil, the mix would dry too quickly and the plant could become stressed.
The key is balance.
Too much potting soil creates heavy dense conditions. Too little can make watering difficult because moisture drains away too fast.
For me, about 30% potting soil creates the perfect middle ground. I prefer high quality indoor potting soil that feels soft and well draining instead of thick muddy soil.
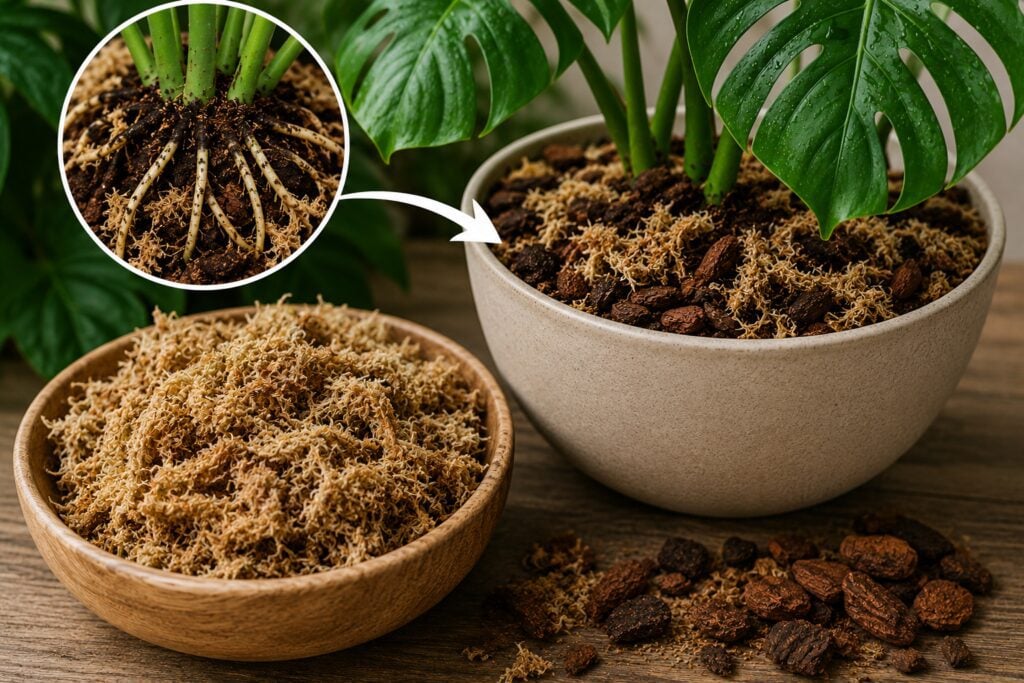
Why Sphagnum Moss Helps So Much?
One ingredient I underestimated at first was sphagnum moss. I originally thought moss was unnecessary, but it became one of my favorite additions after seeing how well it regulates moisture.
Sphagnum moss helps:
- Retain gentle moisture
- Prevent rapid drying
- Keep roots hydrated
- Maintain balanced humidity around roots
This is especially useful during hot weather or in homes with dry air.
The moss acts almost like a sponge. It holds enough moisture for the roots without making the mix soggy. I noticed my Monstera produced healthier new leaves after adding sphagnum moss consistently into the mix.
The roots also appeared much whiter and more active during repotting.
Why I Add Perlite?
Perlite may look simple, but it plays a huge role in root health. These lightweight white particles improve drainage and airflow throughout the pot.
Without enough drainage materials, water can become trapped around the roots.
That creates conditions where fungal problems and root rot develop easily. Perlite helps prevent that by:
- Increasing airflow
- Speeding up drainage
- Preventing compacted soil
- Reducing waterlogging
I especially recommend perlite for people who tend to overwater their plants. Even a small amount makes the soil much more forgiving.
How I Mix the Soil Properly?
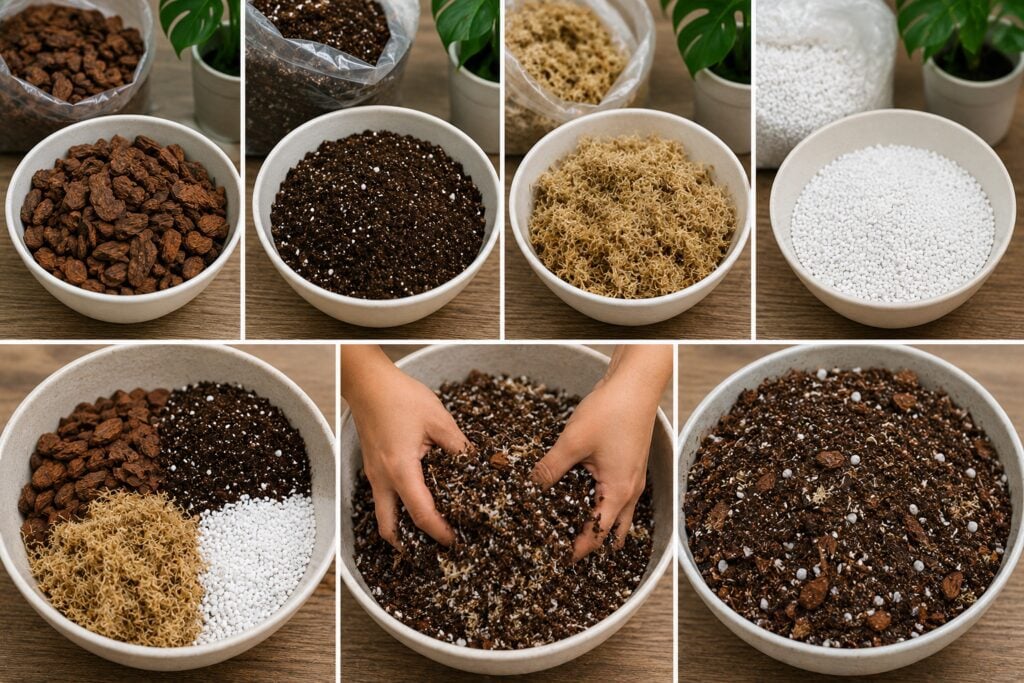
Whenever I prepare fresh Monstera soil, I combine everything in a large container before potting. I usually:
- Add orchid bark first
- Mix in potting soil
- Add sphagnum moss
- Finish with perlite
Then I blend everything evenly with my hands.
I want the final texture to feel:
- Chunky
- Loose
- Fluffy
- Moist but airy
The soil should never feel heavy or compacted. When I squeeze a handful lightly, it should hold shape briefly before falling apart again. That texture usually tells me the mix has enough airflow for healthy roots.
Signs My Monstera Loves the Soil
One of the most exciting things about finding the right soil mix is how quickly the plant responds. After repotting into this blend, I usually notice:
- Faster leaf growth
- Larger leaves
- Healthier green color
- Stronger stems
- Better root development
The biggest difference is often visible in new leaves. They unfurl more smoothly and grow much larger compared to before. I also notice the soil behaves better during watering.
Instead of staying soggy for days, it becomes evenly moist and gradually dries at the perfect rate.
Healthy soil creates healthier watering habits naturally.
Common Soil Mistakes I Used to Make
Back when I first started gardening, I made more soil mistakes than I care to admit. I would overwater without checking drainage, assume that any dirt in the yard was “good enough,” and forget to test the pH or nutrient levels.
Sometimes I added fertilizer blindly, only to watch plants struggle or leaves turn yellow. Looking back, I realize that healthy soil isn’t just dirt—it’s a living ecosystem that needs balance, attention, and care.
Every mistake taught me something new, and now I understand that nurturing the soil properly is the foundation for a thriving garden.
1. Using only regular potting soil
For the longest time, I relied solely on regular potting soil for all my plants, thinking it was enough to keep them happy and growing. At first, it seemed fine (seedlings sprouted and leaves looked green), but over time I noticed slower growth, drooping stems, and a lack of blooms.
I realized that while regular potting soil provides basic nutrients, it often lacks the tailored minerals, organic matter, and drainage properties that specific plants need.
Using only potting soil taught me that healthy growth isn’t just about planting; it’s about understanding each plant’s unique soil needs and supplementing wisely.
2. Using decorative pots without drainage
I used to love picking out beautiful, decorative pots that matched my home’s aesthetic, never paying much attention to whether they had drainage holes.
At first, my plants looked fine, thriving in their stylish new homes—but soon I noticed wilting leaves, yellowing stems, and roots that smelled faintly of rot. Without proper drainage, water would pool at the bottom, suffocating roots and inviting disease.
That experience taught me a crucial lesson: no matter how pretty a pot is, functionality matters just as much as style, and healthy plants always need a way to breathe and let excess water escape.
3. Compacting the soil too tightly
Early on, I thought packing the soil tightly around my plants would give them stability and help retain moisture—but I quickly learned the opposite was true.
Compacted soil made it hard for roots to spread, blocked air circulation, and caused water to puddle on the surface instead of reaching the deeper roots.
My plants struggled, showing stunted growth and drooping leaves despite regular care.
It was a humbling lesson that healthy soil needs to be loose and airy, allowing roots to breathe, water to flow, and life to truly flourish beneath the surface.
4. Ignoring root health
For a long time, I focused only on what I could see above the soil (lush leaves, bright flowers, and sturdy stems), completely ignoring what was happening below.
I didn’t check the roots when repotting or consider if they were crowded, damaged, or rotting. Unsurprisingly, some of my plants struggled, even when everything else seemed perfect.
It took me realizing that healthy roots are the foundation of a thriving plant to change my approach. Now, I make it a habit to gently inspect roots, give them room to grow, and nurture the hidden network that truly sustains life above the soil.
How Often I Repot My Monstera?

Monsteras grow surprisingly fast when healthy. I usually repot mine:
- Every 1 to 2 years
- When roots circle the pot
- When growth slows
- When soil becomes compacted
Fresh soil refreshes nutrients and restores airflow around the roots.
Whenever I repot, I gently loosen the old roots before placing the plant into the fresh mix. I also avoid oversized pots because too much extra soil can stay wet longer than necessary.
The Best Pot for This Soil Mix
The soil mix works best when paired with the right pot. I personally prefer:
- Terracotta pots
- Nursery pots with drainage
- Pots with airflow
- Containers that drain easily
Terracotta is especially helpful because it allows moisture to evaporate naturally through the sides.
This helps prevent overwatering issues. Plastic pots work too, but I water more carefully because moisture stays trapped longer.
Indoor Conditions That Help My Monstera Thrive
The soil mix alone is not everything. I also try to provide:
- Bright indirect light
- Warm temperatures
- Moderate humidity
- Consistent watering
When combined with proper soil, these conditions encourage explosive growth.
My Monstera grows fastest near bright windows where it receives filtered sunlight throughout the day. Direct harsh afternoon sun can sometimes burn the leaves, especially indoors.
Final Thoughts
Finding the right Monstera Deliciosa soil mix completely changed the way I care for tropical plants. What once felt confusing became much easier after I understood how important airflow and drainage truly are for root health.
The combination of orchid bark, potting soil, sphagnum moss, and perlite creates a balanced environment that closely mimics the loose tropical conditions Monsteras naturally love.
Since switching to this mix, my Monstera has become healthier, fuller, and far more rewarding to grow.
The leaves are larger, the roots are stronger, and watering feels much less stressful because the soil drains properly while still holding enough moisture.
If your Monstera seems stuck, unhappy, or slow growing, improving the soil may honestly be the biggest upgrade you can make. Sometimes the secret to healthier leaves begins entirely beneath the surface.


