I used to think growing my own food was complicated, but I learned one of the simplest ways is regrowing green onions from leftover grocery scraps. I just planted the roots in a small pot, watered lightly, and within days fresh shoots appeared.
It’s an easy, cost-effective way to reduce food waste and always have fresh ingredients on hand, even in small spaces.
Table of Contents
- Why Growing Green Onions From Scraps Is So Easy?
- What You Need Before Starting?
- How I Prepare the Green Onion Scraps?
- Planting the Onion Roots in the Pot
- The Best Light Conditions for Fast Growth
- How Often I Water My Green Onions?
- Watching the First Shoots Appear
- How I Harvest Green Onions Without Killing the Plant?
- Common Problems I Encountered
- Why This Method Saves Money?
- Indoor vs Outdoor Growing
- My Favorite Tip for Endless Regrowth
Why Growing Green Onions From Scraps Is So Easy?
One thing I immediately noticed about green onions is how resilient they are. Unlike many vegetables that need deep soil, complex fertilizers, or constant attention, green onions naturally want to regrow.
The white root ends already contain stored energy.
As long as the roots remain healthy and moist, the plant will continue producing fresh green shoots over and over again. What makes this method even more exciting is how little space it requires.
I have grown them successfully in:
- Small clay pots
- Plastic containers
- Recycled food tubs
- Window planters
- Indoor herb trays
Even a simple 6 inch pot can hold a surprising number of onion roots if planted closely together.
Another reason I love this project is because it feels almost instant. Many gardening projects require months before you can harvest anything, but green onions start showing visible growth within days.
That quick reward makes gardening feel fun instead of frustrating.
What You Need Before Starting?
Before diving into gardening, I learned that preparation makes all the difference between a thriving garden and constant frustration.
I used to grab random pots, soil, and seeds without a plan, only to end up with plants that struggled or never grew at all.
Now I know that what you truly need before starting includes the right soil for your plants, containers with proper drainage, quality seeds or seedlings, and the basic tools to care for them.
Taking the time to gather these essentials (and understanding each plant’s specific needs), sets the foundation for a healthier, more rewarding garden from day one.
1. Green onions from the grocery store
I used to toss out the roots of green onions I bought from the grocery store, thinking they were just scraps—but then I discovered their hidden potential.
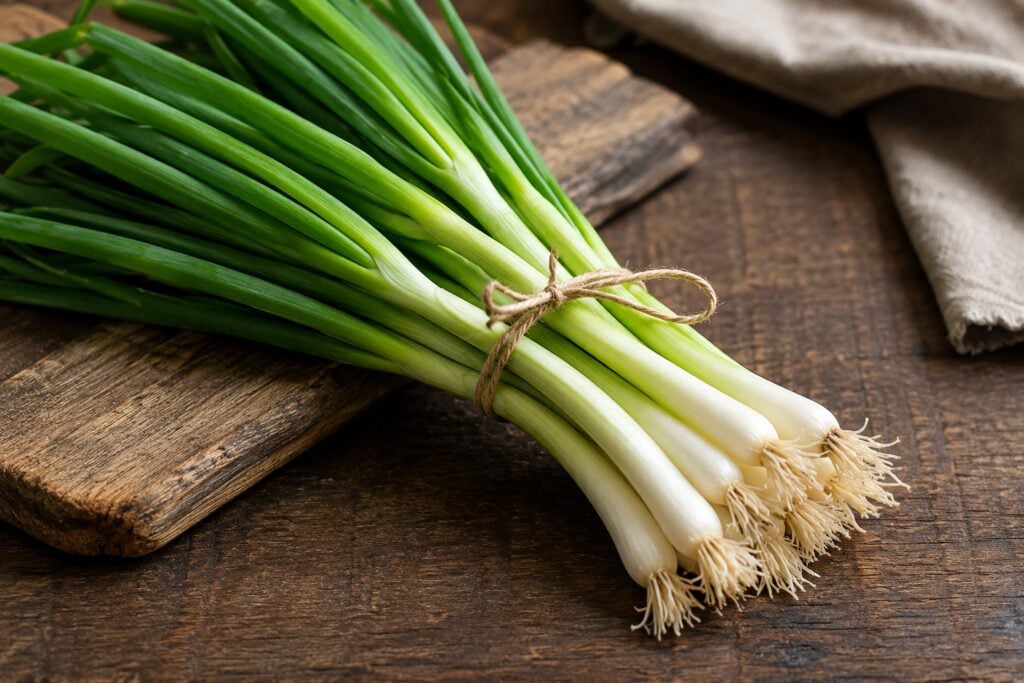
By placing the root ends in a small glass of water on my windowsill, I watched them sprout fresh, bright green shoots within days. It was amazing to see a simple kitchen leftover transform into a continuous source of flavorful greens.
That little experiment taught me that gardening doesn’t always start with seeds or soil; sometimes, the easiest and most rewarding plants begin right from what we already have at home.
2. A small pot or container
When I first started growing herbs and small vegetables, I thought any container would do, so I grabbed the tiniest pots I could find. At first, it seemed convenient and space-saving, but soon I noticed stunted growth, crowded roots, and soil that dried out in a matter of hours.
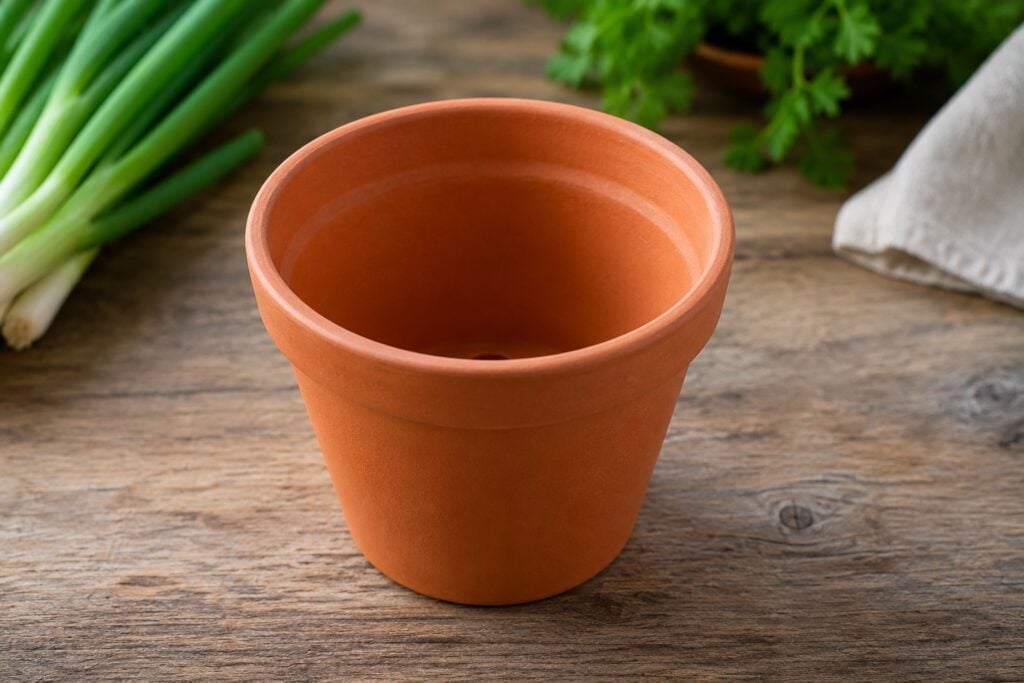
I realized that even small plants need enough room to stretch their roots and access nutrients properly.
Choosing the right-sized pot became a game-changer, teaching me that giving plants a little more space upfront can make all the difference in their health, growth, and long-term success.
3. Potting soil
When I first started gardening, I thought any potting soil would be fine for all my plants, so I grabbed the first bag I saw at the store.
At first, everything seemed okay (plants grew, leaves looked green), but over time, some started wilting or developing yellow spots.
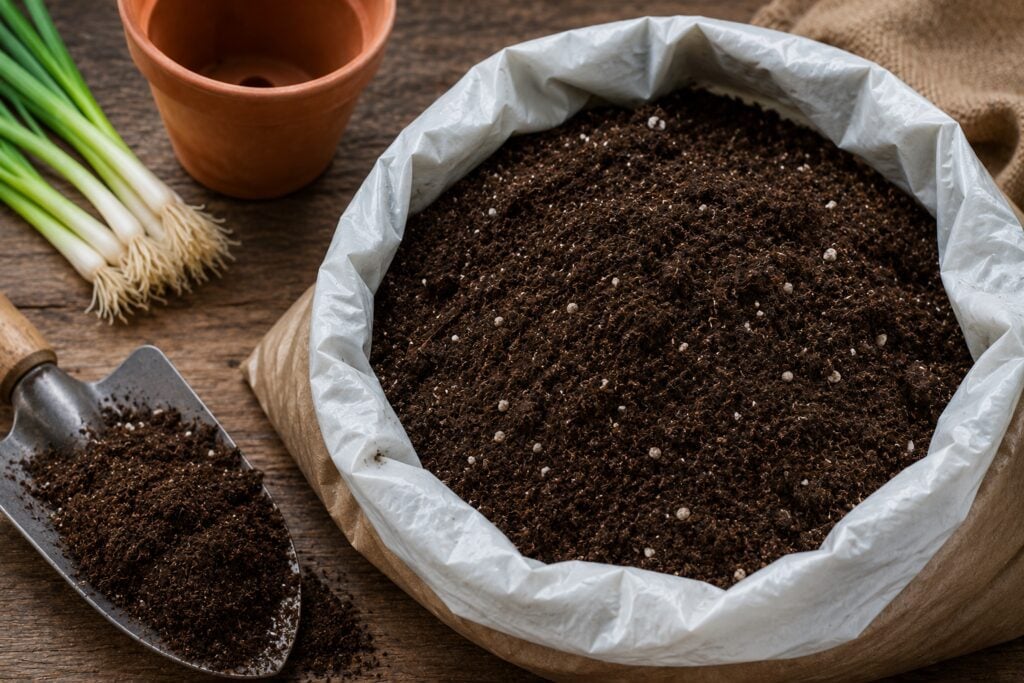
I realized that not all potting soils are created equal; some lack the right nutrients, drainage, or texture for specific plants.
That taught me an important lesson: choosing the right potting soil is more than a quick trip to the store; it’s about matching soil quality to the needs of each plant to help them truly thrive.
4. Water
In the beginning, I treated watering my plants like a simple, “one-size-fits-all” task, assuming a little every day was enough. At first, it seemed harmless, but soon I noticed drooping leaves, yellowing tips, and, in some cases, soggy roots.
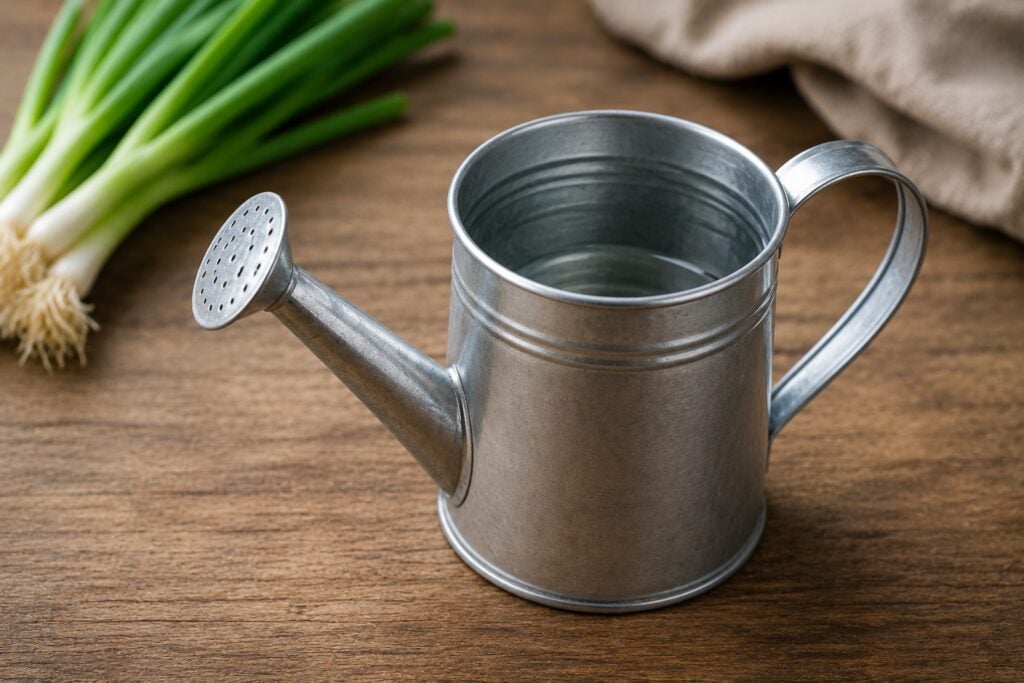
I realized that water isn’t just about quantity—it’s about timing, frequency, and understanding each plant’s needs.
Learning to observe the soil, feel for moisture, and adjust watering habits accordingly transformed my care routine, showing me that water is not just a necessity, but a skill that can make or break a plant’s health.
5. Sunlight
At first, I didn’t think much about where I placed my plants, assuming they would thrive anywhere in my home. But I quickly noticed that some leaves turned pale, stems stretched unnaturally, and flowers failed to bloom.
That’s when I realized sunlight isn’t just a backdrop; it’s a lifeline.
Each plant has its own light requirements, and positioning them correctly can mean the difference between slow growth and vibrant health.
Paying attention to sunlight taught me that understanding and respecting a plant’s natural environment is just as important as water or soil in helping it flourish.
How I Prepare the Green Onion Scraps?
The preparation step takes less than five minutes. Whenever I cook with green onions, I cut off the green tops for food but leave about 1 to 2 inches attached to the white root section.
This part is important because the remaining white section contains the growing point that will produce new shoots.
I make sure:
- The roots are still attached
- The base looks fresh
- The roots are not slimy or rotten
If the roots look healthy, they are ready to plant immediately.
Sometimes I even place the roots in a glass of water for a day before planting just to help them wake up faster.
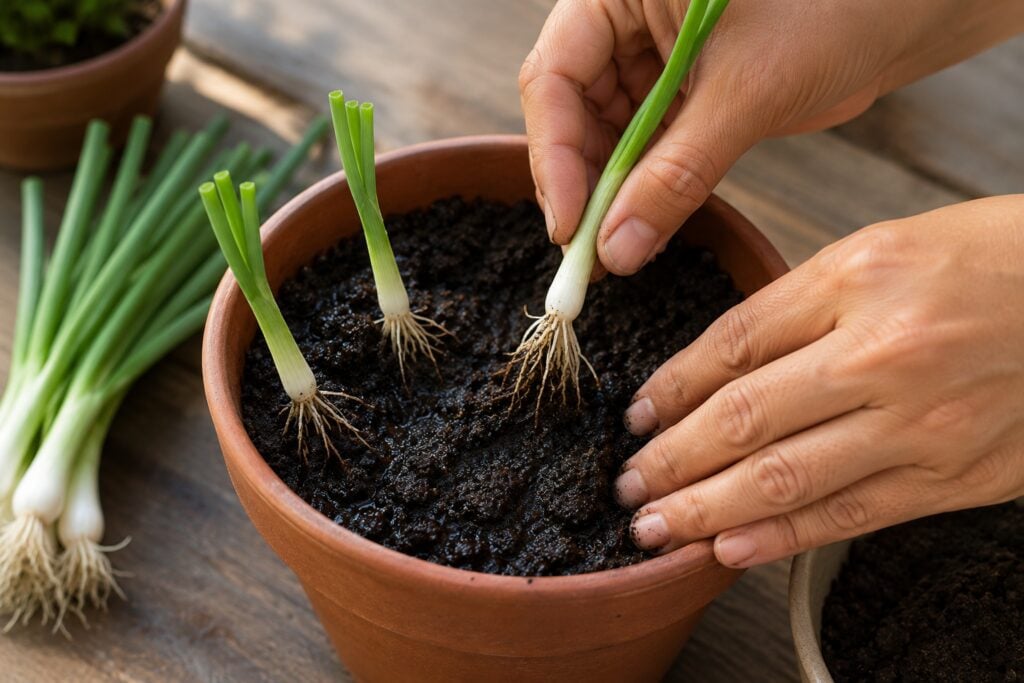
Planting the Onion Roots in the Pot
This is the step where the magic begins. I fill my small pot with moist potting soil, leaving about an inch of space at the top. Then I gently push each onion root into the soil.
I usually plant them:
- About 1 to 2 inches apart
- Around 1 inch deep
- With the green tips facing upward
One thing that surprised me was how many onion roots fit into one tiny container.
A single pot can produce a thick cluster of green onions very quickly. After planting, I lightly press the soil around the roots so they stay upright. Then I water the soil gently until it feels evenly moist.
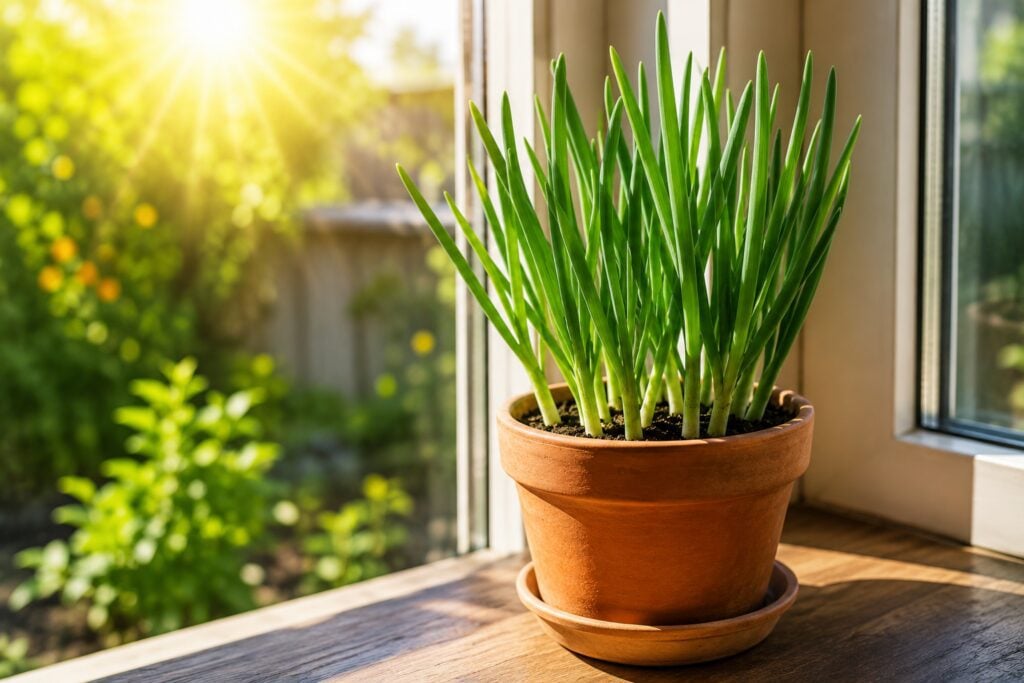
The Best Light Conditions for Fast Growth
Green onions love sunlight, but they are also flexible compared to many vegetables. I have successfully grown them:
- Outdoors on a patio
- Near a sunny kitchen window
- On a balcony
- Under indirect bright light
From my experience, about 4 to 6 hours of sunlight each day gives the best growth.
When they receive enough light, the leaves become:
- Taller
- Darker green
- Stronger
- More flavorful
If the onions do not get enough light, the leaves may become thin and floppy. During very hot afternoons, I sometimes move the pot into partial shade to keep the soil from drying too quickly.
How Often I Water My Green Onions?
One mistake I made early on was overwatering. Green onions enjoy moist soil, but constantly wet soil can cause root rot.
Now I follow a very simple routine:
- I touch the soil with my finger
- If the top feels dry, I water lightly
- If it still feels moist, I wait another day
Usually, watering every 2 to 3 days works well depending on weather conditions.
Indoor pots generally need less water than outdoor pots because they lose moisture more slowly. I also learned that containers with good drainage make a huge difference.
Healthy roots grow much faster when excess water can escape.
Watching the First Shoots Appear
This was honestly my favorite part. Around day 3 or 4, I usually notice tiny fresh green shoots emerging from the center of the onion tops. By the end of the first week, the growth becomes much more noticeable.
It feels incredibly satisfying because the progress happens so quickly. The timeline I usually experience looks like this:
1. Day 1
Day 1 felt like a small leap into the unknown. I planted my seeds carefully, patting the soil gently and giving them their first drink of water, then set them in a bright corner of the room.
As I stepped back, I felt a mix of excitement and impatience, knowing that the real magic would take time.
That first day was less about growth above the soil and more about hope—the quiet promise that beneath the surface, tiny roots were beginning their journey, and with patience and care, life was quietly preparing to emerge.
2. Day 3 to 5
By Day 3 to 5, the soil that once looked plain and still began to show the first signs of life. Tiny green tips poked through the surface, delicate and fragile, yet full of promise.
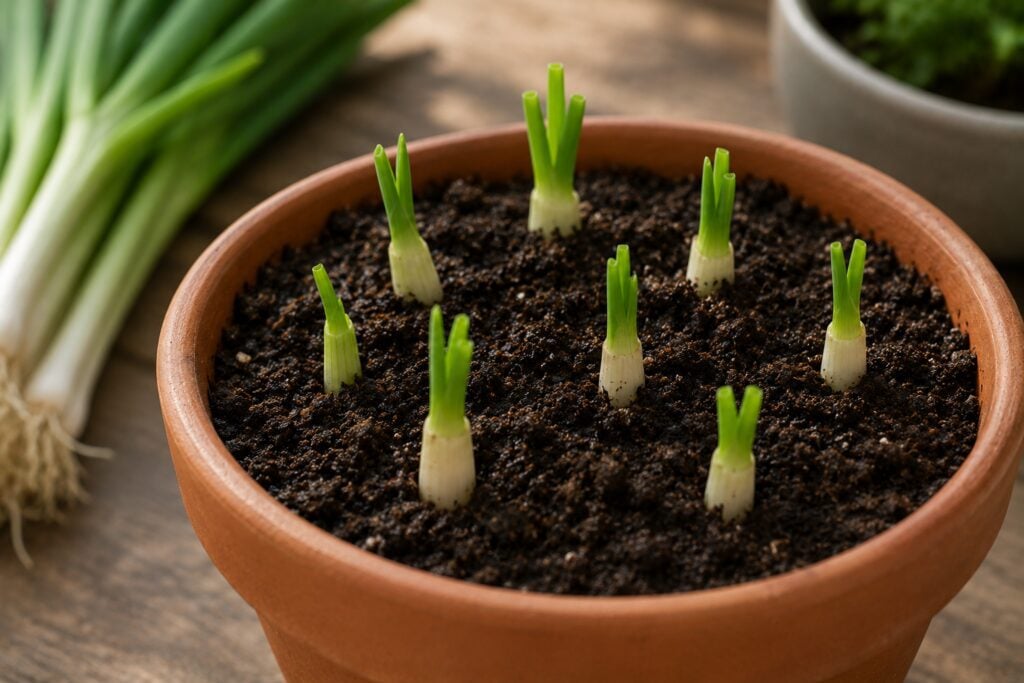
Each morning, I leaned closer, marveling at how something so small could feel so alive, and I felt a quiet sense of accomplishment for the care I had given.
Those early days reminded me that growth often starts in subtle ways, and patience is just as important as watering and light in helping new life push upward.
3. Day 7 to 10
By Day 7 to 10, the little shoots had grown taller and stronger, their green tips reaching confidently toward the light.
What began as a fragile whisper of life now looked like a small, thriving forest in miniature, and I couldn’t help but smile each time I checked on them.
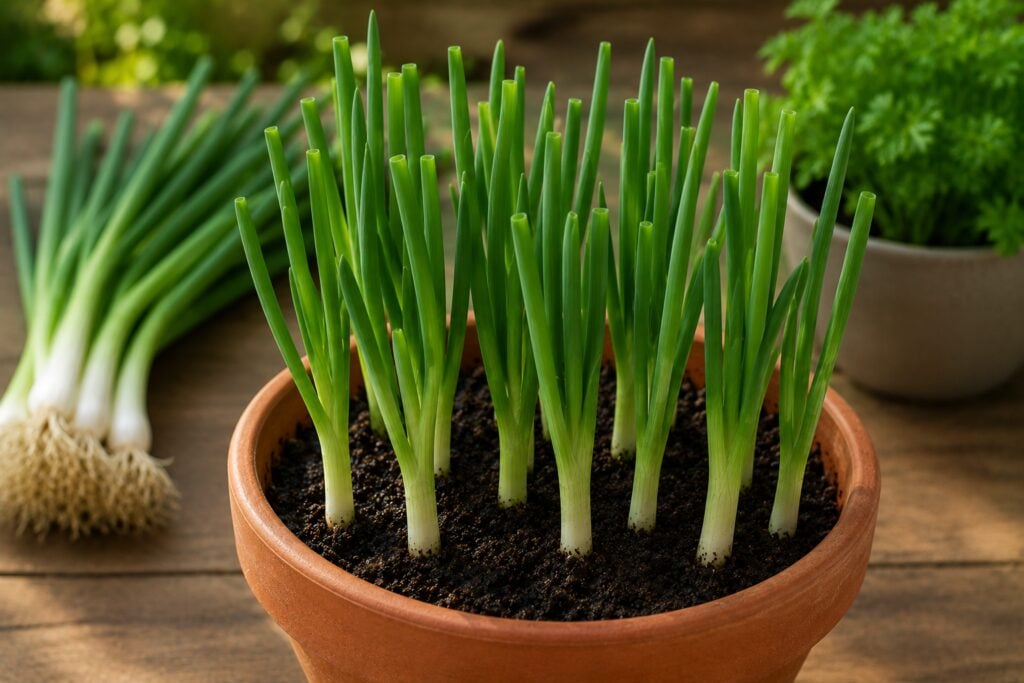
Their steady growth reminded me that patience truly pays off, and that with consistent care, the seeds of effort transform into something tangible and beautiful.
Those days taught me the quiet joy of watching life unfold, one small leaf at a time.
4. Day 10 to 14
By Day 10 to 14, the shoots had grown noticeably stronger and fuller, their leaves unfurling with confidence and vitality.
What once seemed delicate and tentative now looked like a young, thriving garden, each plant finding its own space and direction.
I felt a sense of wonder and pride, realizing that the tiny seeds I had planted were now alive in ways I could see and touch.
Those days reinforced the joy of patience and care, showing me that growth is a gradual, beautiful process that rewards attention and nurturing.
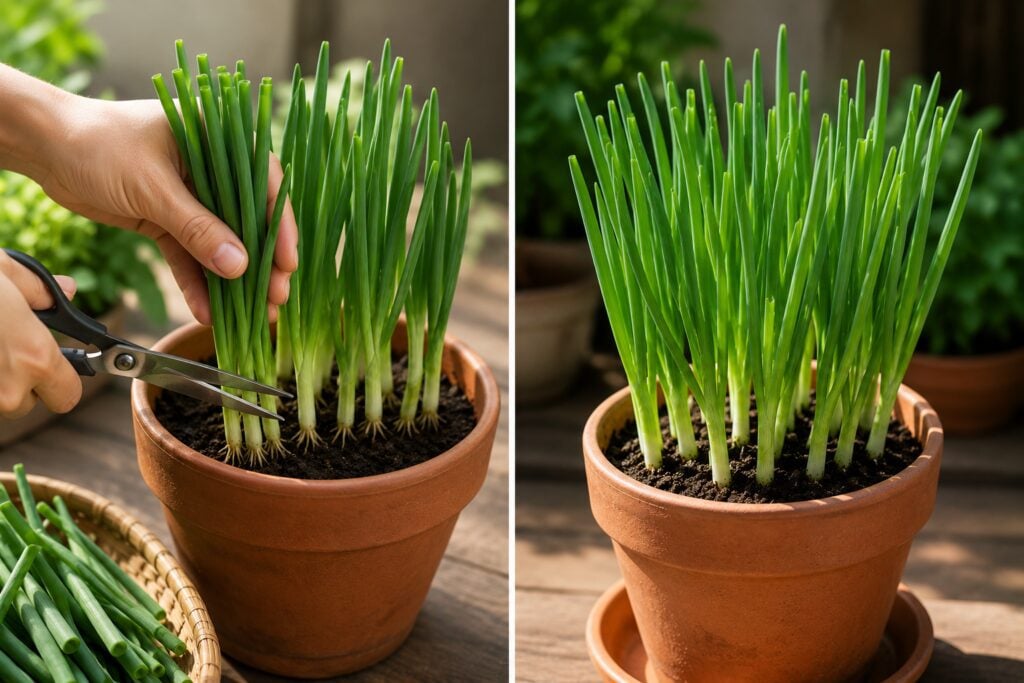
How I Harvest Green Onions Without Killing the Plant?
This was something I had to learn properly. At first, I accidentally cut too low and slowed down regrowth. Now I harvest carefully so the plant keeps producing new leaves.
I simply:
- Use scissors
- Cut the green leaves from the top
- Leave about 1 to 2 inches above the white base
By leaving the lower section intact, the plant quickly regrows again. This method allows continuous harvesting without needing to replant every time.
I love being able to walk outside, snip a handful of fresh onions, and immediately use them in:
- Fried rice
- Noodles
- Omelets
- Soups
- Salads
- Stir fry dishes
Freshly harvested green onions honestly taste much stronger and fresher than store bought ones sitting in the refrigerator for days.
Common Problems I Encountered
Even though green onions are easy to grow, I ran into a few small challenges at first. I had to figure out the right amount of water, the best container size, and the ideal spot for sunlight.
A little trial and error helped me understand what works best.
Once I made these adjustments, growing green onions in small pots became simple, reliable, and rewarding.
1. Yellow leaves
This usually happened when:
- The soil stayed too wet
- The pot lacked sunlight
Reducing watering and increasing sunlight fixed the issue quickly.
2. Slow growth
Sometimes the onions grew slowly because the roots were weak or old. Fresh grocery store onions usually regrow much faster.
3. Thin floppy leaves
This normally meant the plant needed more light. Moving the pot closer to sunlight solved the problem. Fortunately, green onions recover very easily compared to many other plants.
Why This Method Saves Money?
One thing I genuinely appreciate is how much waste this reduces. Before learning this method, I constantly threw away green onion roots after cooking. Now those scraps become continuous fresh harvests.
Over time, this saves:
- Grocery money
- Refrigerator space
- Extra shopping trips
It also feels rewarding knowing I am producing food from something most people normally throw away. For beginner gardeners, this project builds confidence because success happens so quickly.
Indoor vs Outdoor Growing
I’ve tried growing green onions in both indoor and outdoor setups, and I found that both work equally well. Indoor pots let me keep fresh ingredients close to the kitchen, while outdoor containers get plenty of sunlight and air circulation.
Each setup has its advantages, and with just a little care, green onions thrive in either environment, making it easy to enjoy fresh, homegrown produce all year round.
1. Indoor growing
Indoor growing works best:
- Near sunny windows
- In kitchens
- During rainy weather
- In apartments
The biggest advantage is convenience. I can harvest fresh onions while cooking.
2. Outdoor growing
Outdoor pots usually produce:
- Faster growth
- Thicker leaves
- Stronger flavor
Natural sunlight simply helps plants grow more aggressively. If possible, I personally prefer keeping the pot outdoors while temperatures remain comfortable.
My Favorite Tip for Endless Regrowth
The biggest lesson I learned is this:
“Do not pull the onions out completely after harvesting. As long as the roots stay healthy in the soil, they continue producing new green leaves repeatedly.”
Every few weeks, I sometimes add:
- A little fresh compost
- New potting soil
- Mild fertilizer
This keeps the nutrients strong and encourages continuous growth. Some of my onion pots lasted surprisingly long before needing replacement.


